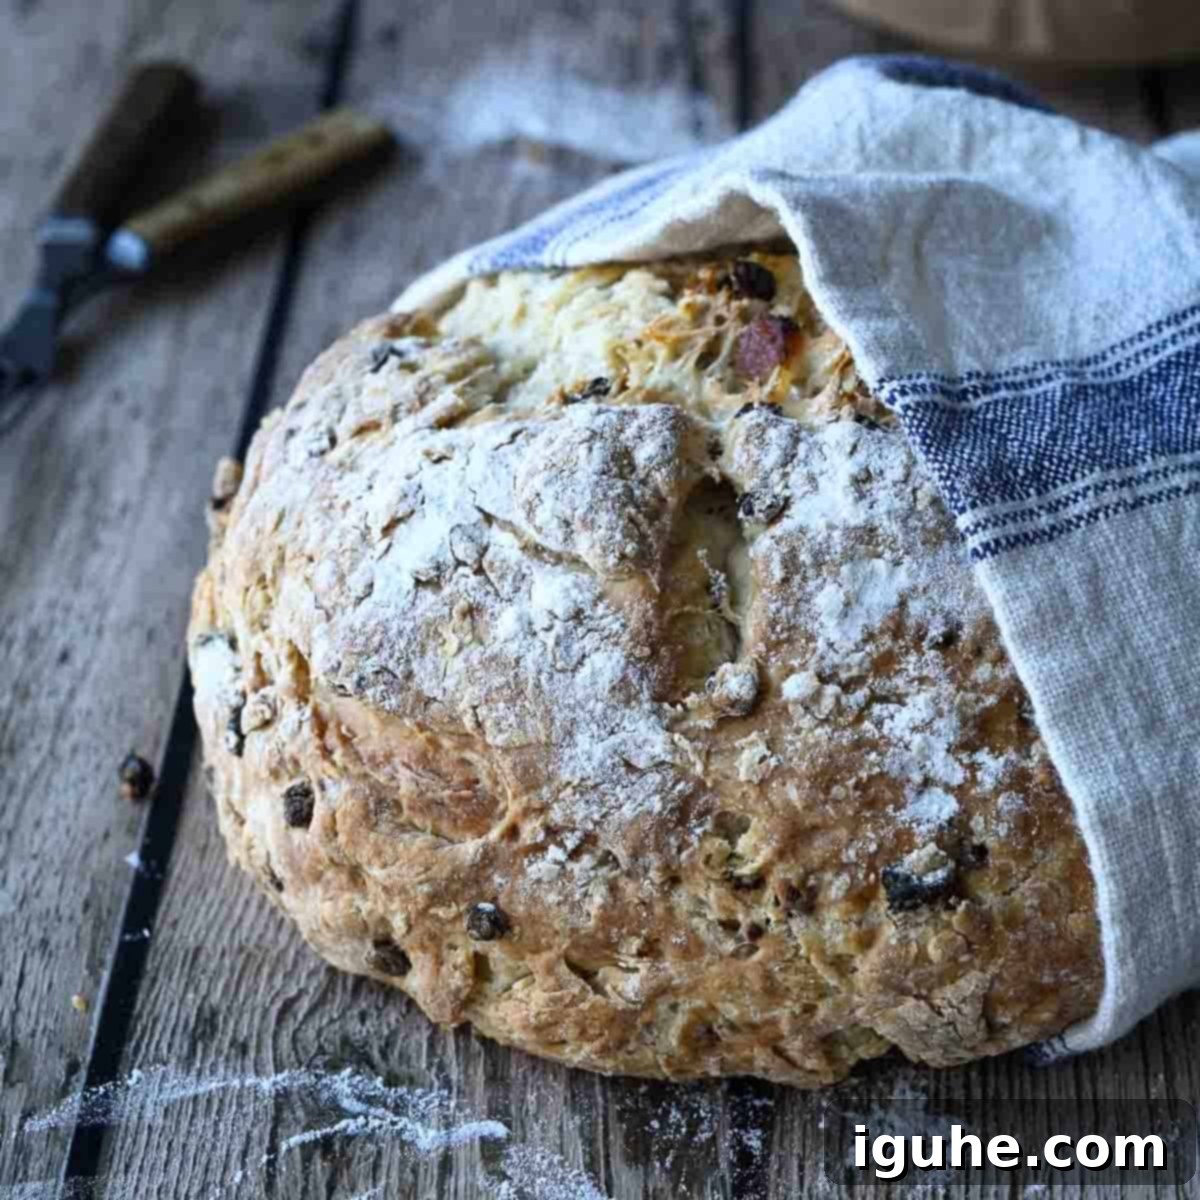
Irresistible American Irish Soda Bread with Sweet Currants and Tangy Apricots
Prepare to delight your taste buds with this unique American-style Irish Soda Bread, a delightful departure from its more traditional Irish counterpart. While classic Irish soda bread is often savory, this recipe embraces a touch of sweetness, making it an ideal treat for St. Patrick’s Day, a comforting breakfast, or a lovely afternoon snack. Our version incorporates rich brown sugar, which infuses the bread with subtle notes of molasses, beautifully complemented by the juicy texture and tart-sweetness of currants and apricots. Simply add a smear of butter, and you’ll experience a perfect harmony of flavors and textures that feels like a celebration in every bite!
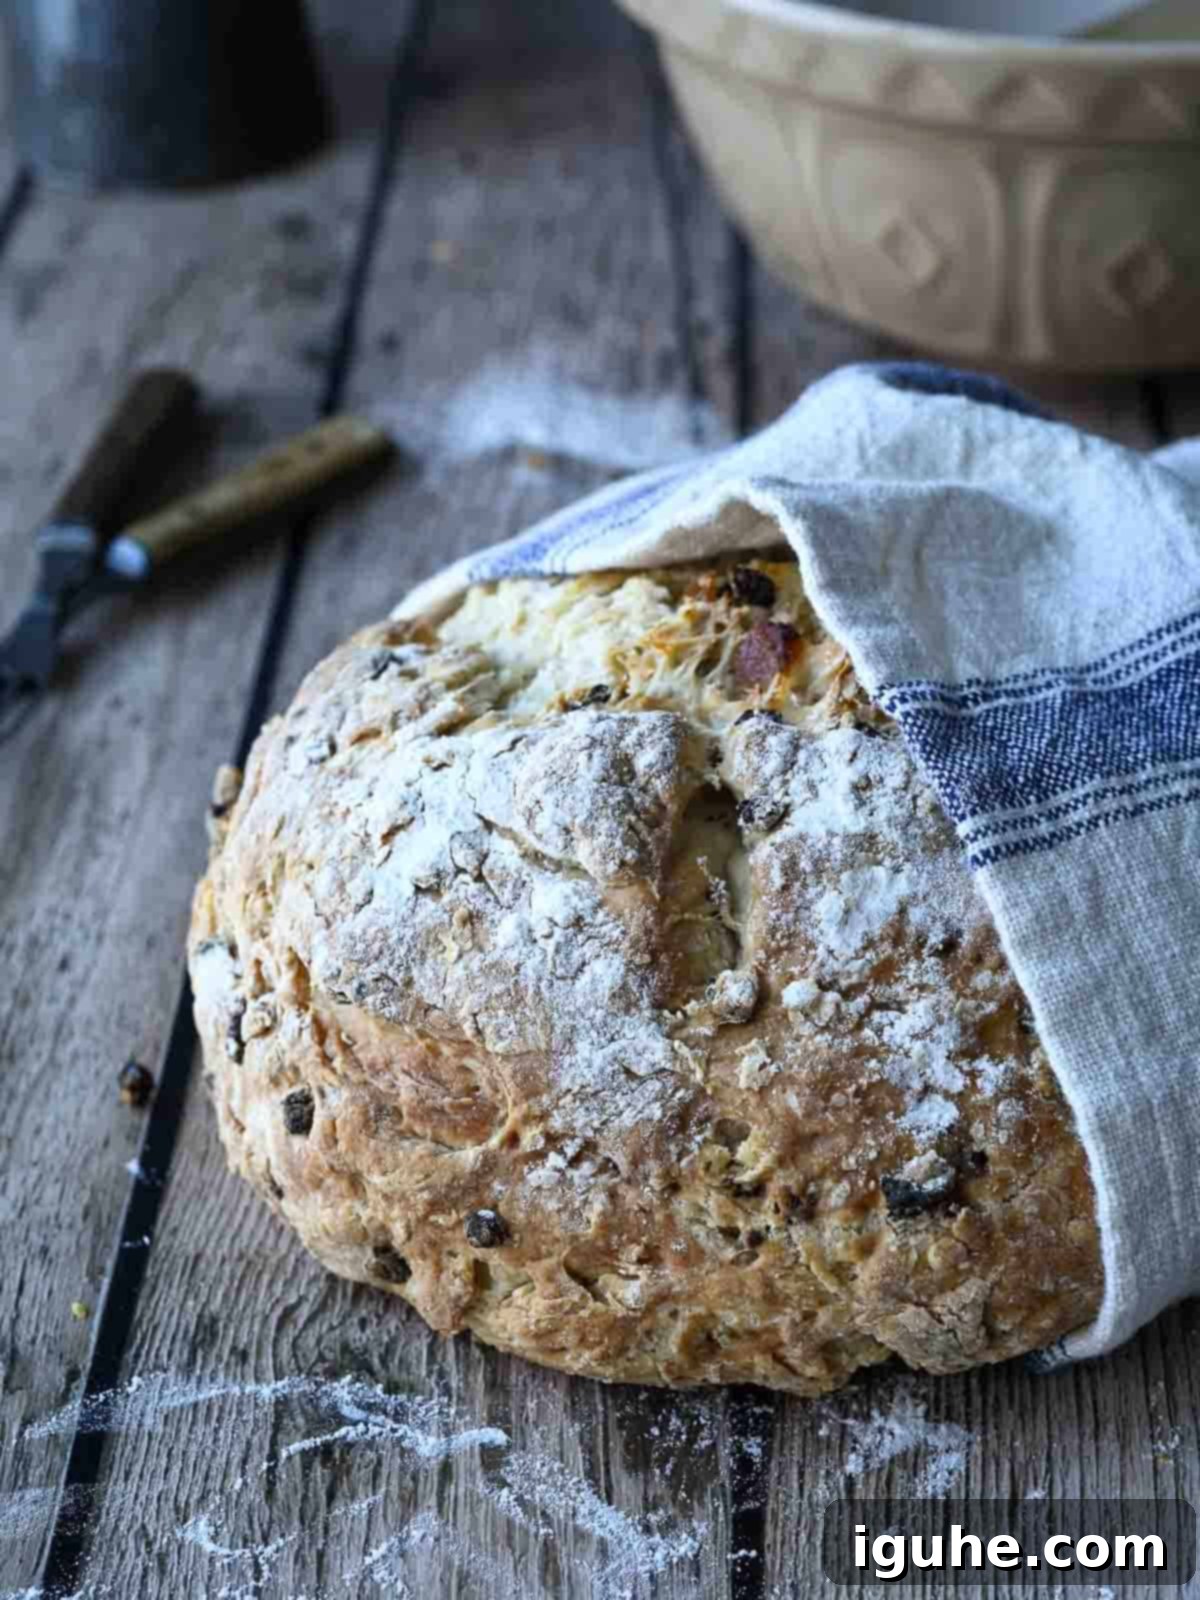
While this particular recipe may not adhere strictly to the oldest Irish traditions, it pays homage to them by incorporating time-honored wisdom passed down through generations. My inspiration for this delightful bake comes from a cherished accordion-playing Irishman, affectionately known as “Tony,” the father of a dear friend. Tony’s dedication to making soda bread with creamy buttermilk and achieving that coveted perfectly browned crust in a cast iron skillet resonated deeply with me. His insights laid the foundation for creating a bread that respects its heritage while embracing a contemporary American palate.
Tony, like many traditional bakers, often used raisins and occasionally caraway seeds in his soda bread. However, for this American twist, I opted for currants and apricots. Currants, which are small, dried black Corinth grapes, offer a sweeter and more intense flavor than typical raisins due to their smaller size. Their delightful sweetness pairs beautifully with the sweet tanginess of dried apricots, creating a vibrant fruit medley that elevates the bread’s flavor profile. This combination brings a unique balance of sweetness and a hint of tartness that perfectly complements the rich molasses notes from the brown sugar. Thank you, Tony, for the invaluable foundation; I’ve truly built something special from your guidance!
This recipe bridges two culinary worlds, taking the rustic charm of Irish baking and infusing it with a modern American sweetness. The result is a wonderfully moist, dense, yet tender loaf that’s perfect for any occasion, from a festive St. Patrick’s Day brunch to a simple, comforting evening treat. Let’s dive into how you can create this delicious bread in your own kitchen.
What is Irish Soda Bread? Understanding a Timeless Tradition
Irish soda bread is a beloved staple and a cornerstone of Irish culinary tradition. It’s a type of quick bread, meaning it doesn’t rely on yeast for leavening. Instead, its rise comes from a simple, ingenious chemical reaction. The core ingredients are typically just four: flour, baking soda, salt, and buttermilk. The magic happens when the alkaline baking soda reacts with the acid present in the buttermilk. This reaction produces carbon dioxide gas, which creates bubbles within the dough, causing the bread to rise and giving it its characteristic tender, somewhat dense crumb.
Originating in Ireland during the 19th century, soda bread became a household necessity, particularly when bicarbonate of soda became widely available. It was a practical and economical bread, utilizing readily available ingredients and requiring no elaborate proofing process, making it perfect for daily baking in humble homes. Traditionally, Irish soda bread comes in several regional variations, including the round, wheel-shaped loaves common in the south, often cut into quarters (known as “farls”), and flatter, pan-baked versions in the north. While often made with just the basic four ingredients for a plain, rustic loaf, many traditional recipes also include a small amount of sugar, raisins, or caraway seeds. Our American-style adaptation takes this tradition a step further, embracing a sweeter profile with a generous inclusion of fruit and brown sugar, making it a delectable blend of heritage and modern taste preferences.
Essential Ingredients for Your Sweet Irish-American Soda Bread
Crafting this flavorful Irish-American soda bread requires a selection of quality ingredients, each playing a crucial role in achieving its unique taste and texture. Here’s a detailed look at what you’ll need to gather:
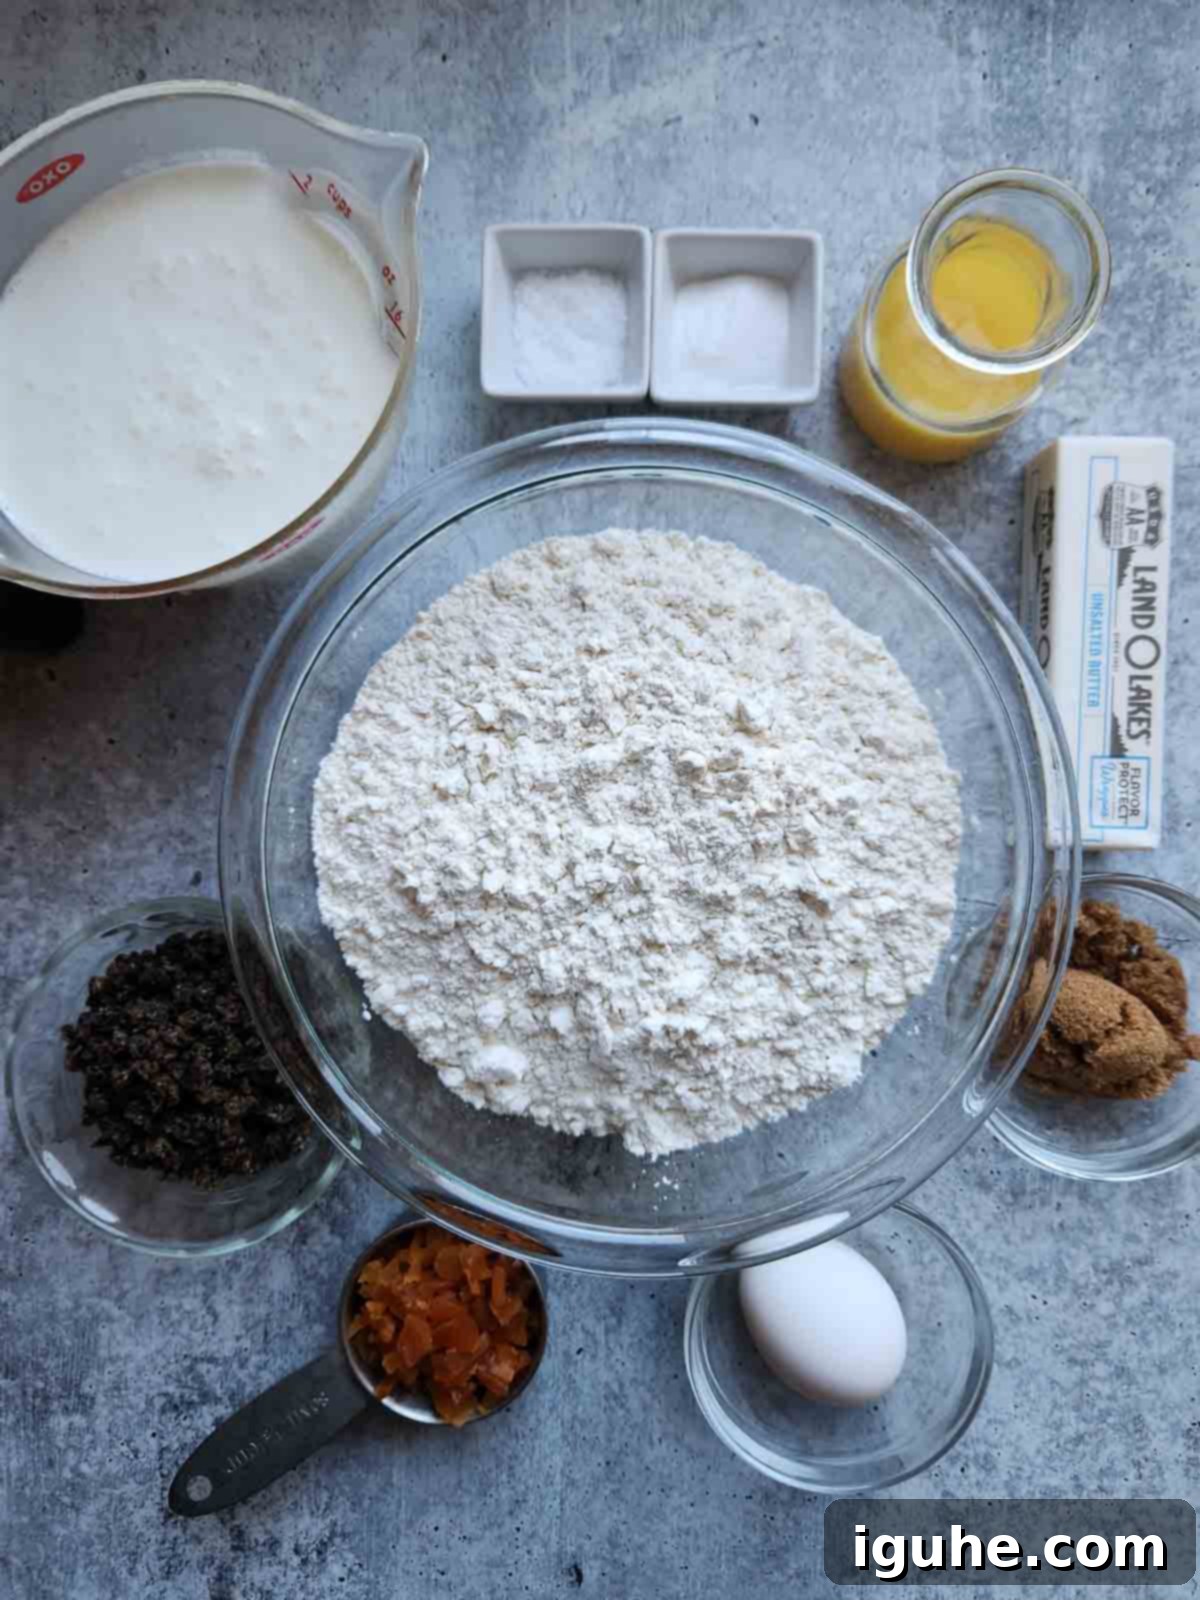
- Flour– Standard all-purpose flour works perfectly for this recipe, providing the ideal structure for a tender crumb.
- Baking soda– The star of quick breads! This is the leavening agent that reacts with the buttermilk to make your bread rise beautifully. Ensure it’s fresh for optimal results.
- Salt– Use kosher or fine sea salt to enhance the overall flavors and balance the sweetness. Salt is crucial for bringing out the best in any baked good.
- Brown sugar– This ingredient is key to our American-style sweetness, adding moisture and a wonderful depth of flavor with its characteristic molasses notes. It makes this soda bread truly stand out from its savory cousins.
- Egg– A large egg contributes richness, helps bind the ingredients, and adds to the bread’s moistness and tender texture.
- Buttermilk– The acidic component vital for reacting with the baking soda. Cold buttermilk is preferred as it helps keep the butter firm, contributing to a flakier texture.
- Butter– Unsalted and very cold. Cutting cold butter into small pieces and incorporating it into the flour creates pockets of fat that result in a more tender and slightly flaky texture in the finished bread.
- Orange juice– Used for soaking the dried fruit, the orange juice helps to plump up the currants and apricots, making them juicy and bursting with flavor. It also adds a subtle citrus note that complements the fruits.
- Currants or raisins– Zante currants are small, dried black Corinth grapes, known for their concentrated sweet and tangy flavor. They are smaller than most raisins, offering a more intense burst of fruitiness in each bite. If zante currants are hard to find, traditional raisins can be easily substituted, though the flavor profile will be slightly different.
- Dried apricots– Finely chopped, dried apricots contribute a delightful chewiness and a lovely sweet-tart flavor that brightens the entire loaf. Their vibrant color also adds visual appeal.
- Butter or jam for serving– Essential for enjoying this bread warm, enhancing its comforting flavors. Irish butter is highly recommended for an authentic touch of indulgence.
For precise measurements, please refer to the recipe card below. Gathering all your ingredients and having them ready (mise en place) before you begin will make the baking process smooth and enjoyable.
Essential Equipment for Perfect Soda Bread
Having the right tools can make all the difference in your baking experience. For this Irish soda bread, you won’t need anything overly specialized, but a few key pieces of equipment will ensure the best results:
- Cast Iron Skillet (10-inch) or Round Baking Pan: My personal preference is a 10-inch cast iron skillet. The heavy, even heat distribution of cast iron helps the bottom and sides of the bread cook uniformly, producing a beautifully browned and crisp crust that’s hard to replicate with other pans. If you don’t have a cast iron skillet, any round or even a flat baking pan of a similar size will work; just ensure it’s suitable for oven baking. A sturdy baking sheet can also be used, but the cast iron truly helps with that perfect crust.
- Measuring Cups and Spoons: Standard kitchen essentials for accurate ingredient measurements. Precision is important in baking!
- Mixing Bowls: You’ll need at least two medium-sized mixing bowls—one for dry ingredients and another for wet ingredients—to ensure everything is properly combined before mixing.
- Pastry Cutter or Two Forks: To efficiently cut the cold butter into the flour mixture, a pastry cutter is ideal. Its sharp blades quickly blend the butter without warming it too much with your hands. If you don’t have one, two dinner forks held crisscross will also do the job, albeit with a bit more effort. The goal is to create pea-sized pieces of butter in the flour.
- Sharp Knife: For scoring the top of the dough with the traditional “x” and for easily slicing the finished bread.
- Wire Rack: For cooling the bread after it comes out of the oven. This allows air to circulate around the entire loaf, preventing the bottom from becoming soggy and helping to maintain that crisp crust.
With these basic baking tools, you’ll be well-equipped to create a fantastic loaf of Irish soda bread that will impress family and friends.
Step-by-Step Directions to Bake Your Perfect Irish Soda Bread
Making delicious Irish soda bread is much simpler than you might imagine. Follow this detailed step-by-step guide, paying close attention to the expert baking tips, and you’ll achieve a perfectly baked loaf every time.
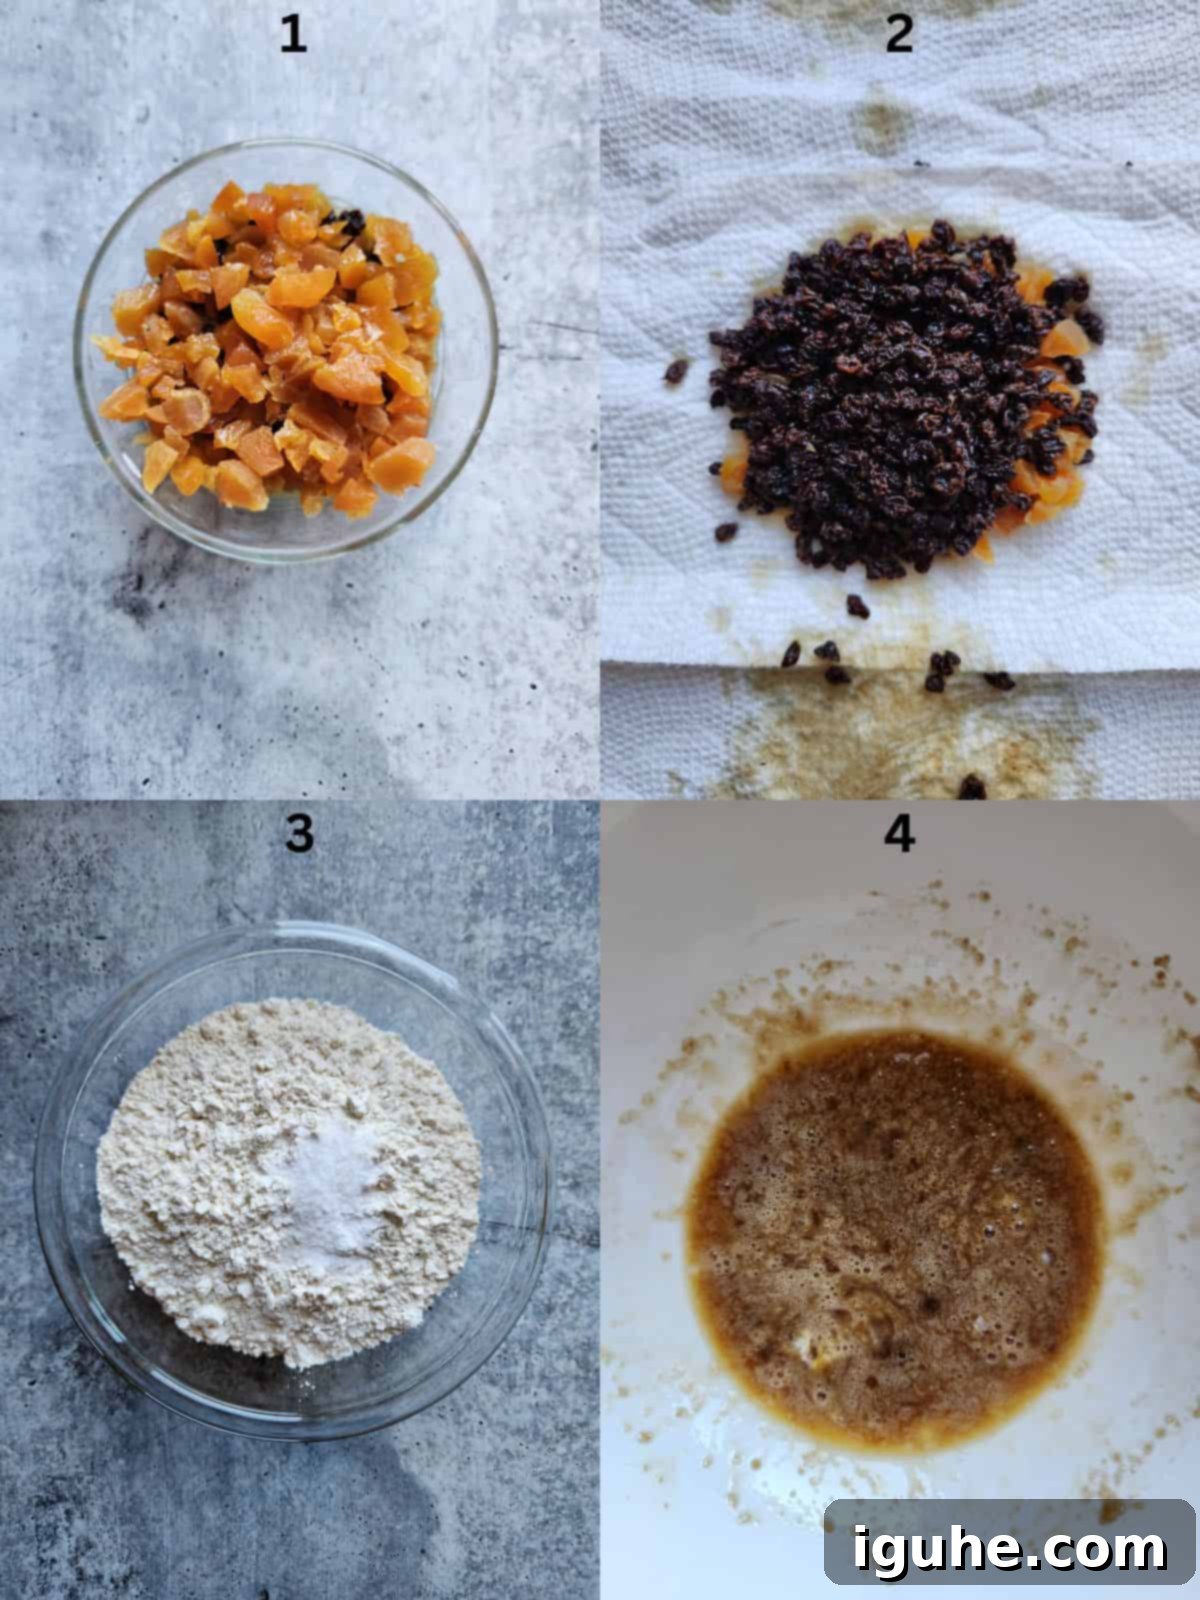
1 and 2 – Plumping the Fruit: Begin by soaking the dried currants and chopped apricots in orange juice for 10 minutes. This step is essential for rehydrating the fruit, making it plump and juicy. Once soaked, drain the fruit thoroughly and gently squeeze out any excess juice. Set the plumped fruit aside.
3 – Combining Dry Ingredients: In a medium-sized mixing bowl, whisk together the all-purpose flour, baking soda, and salt until well combined. This ensures the leavening agent is evenly distributed.
4 – Preparing Wet Ingredients: In a separate bowl, whisk together the brown sugar and the large egg until the sugar is mostly dissolved and the mixture is smooth.
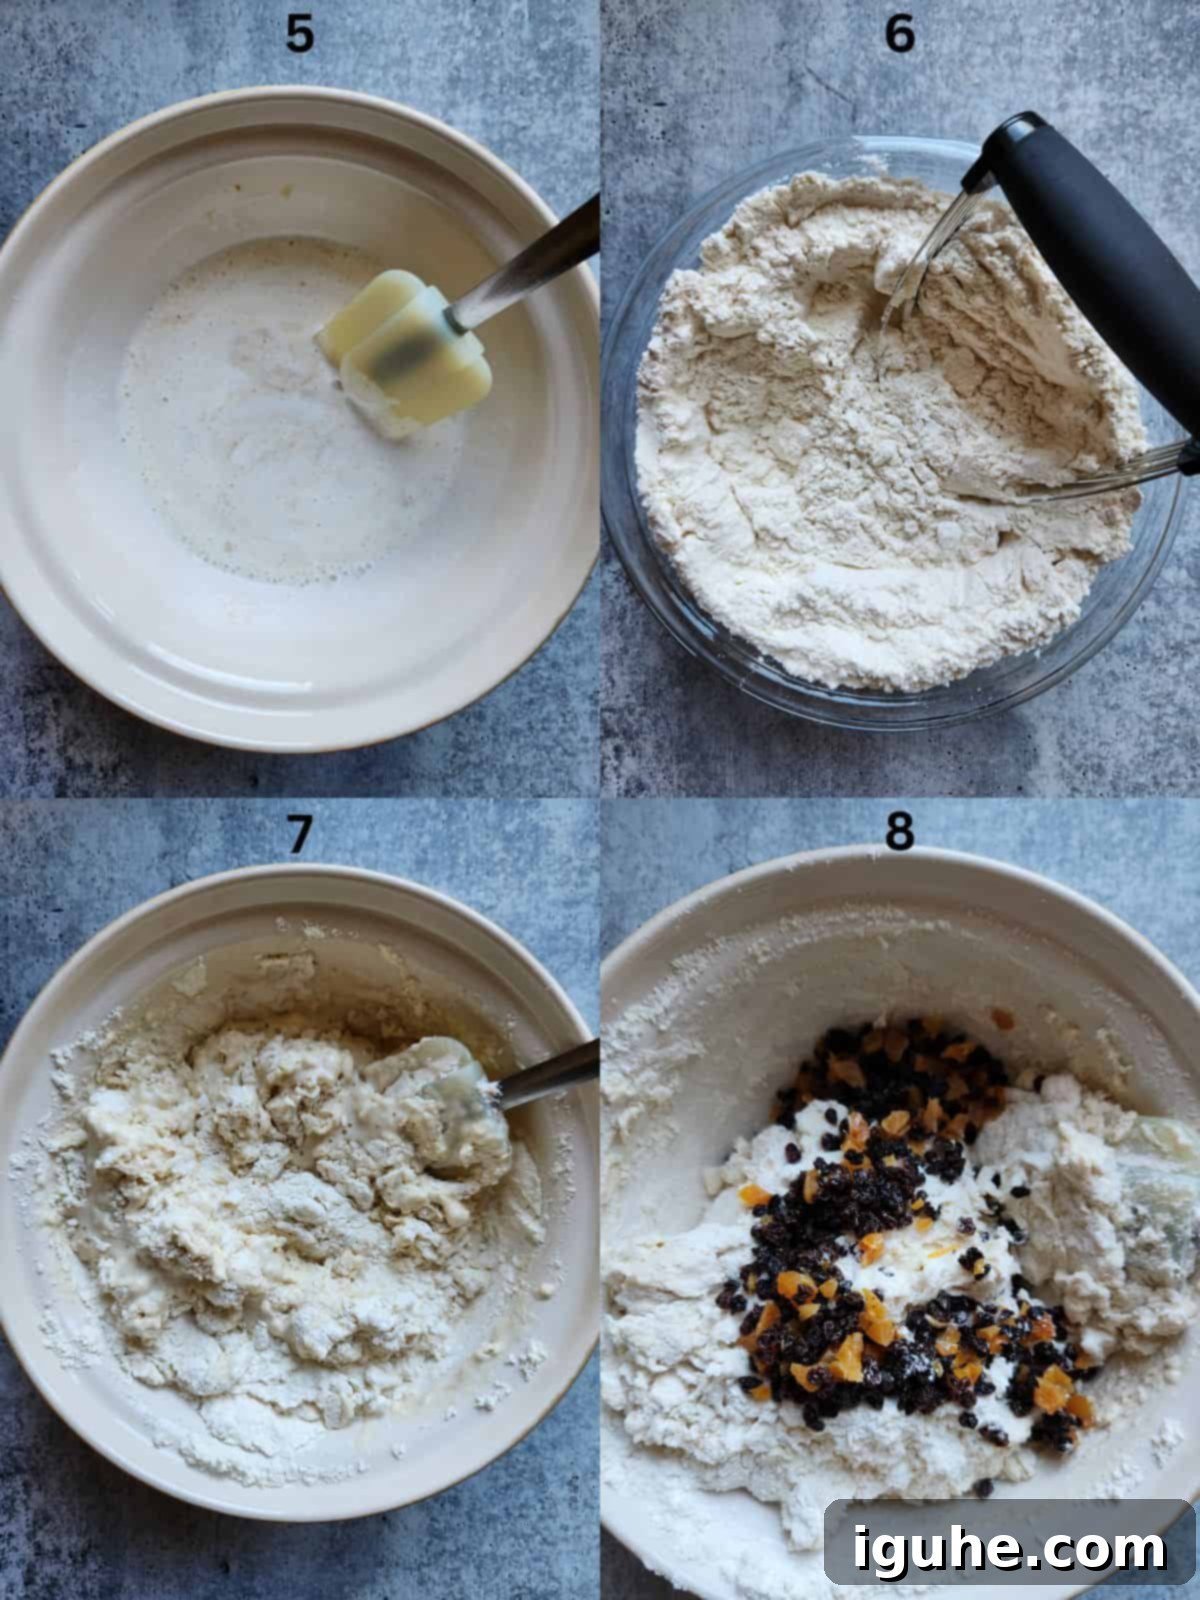
5 – Adding Buttermilk: Pour the cold buttermilk into the egg and sugar mixture. Whisk everything together until thoroughly combined. This creates your wet ingredient base.
6 – Incorporating Cold Butter: Add the cubed, very cold unsalted butter to your dry flour mixture. Using a pastry cutter (or two forks), work the butter into the flour until it resembles coarse crumbs, with pieces no larger than small peas. This step is crucial for a tender crumb.
7 – Combining Wet and Dry: Pour the buttermilk and egg mixture into the flour and butter mixture. Stir gently with a spoon or your hands until the dry ingredients are just moistened. Be careful not to overmix, as this can lead to a tough bread.
8 – Folding in Fruit: Finally, add the plumped currants and apricots to the batter. Mix gently until the fruit is evenly distributed throughout the dough. Again, avoid overmixing.
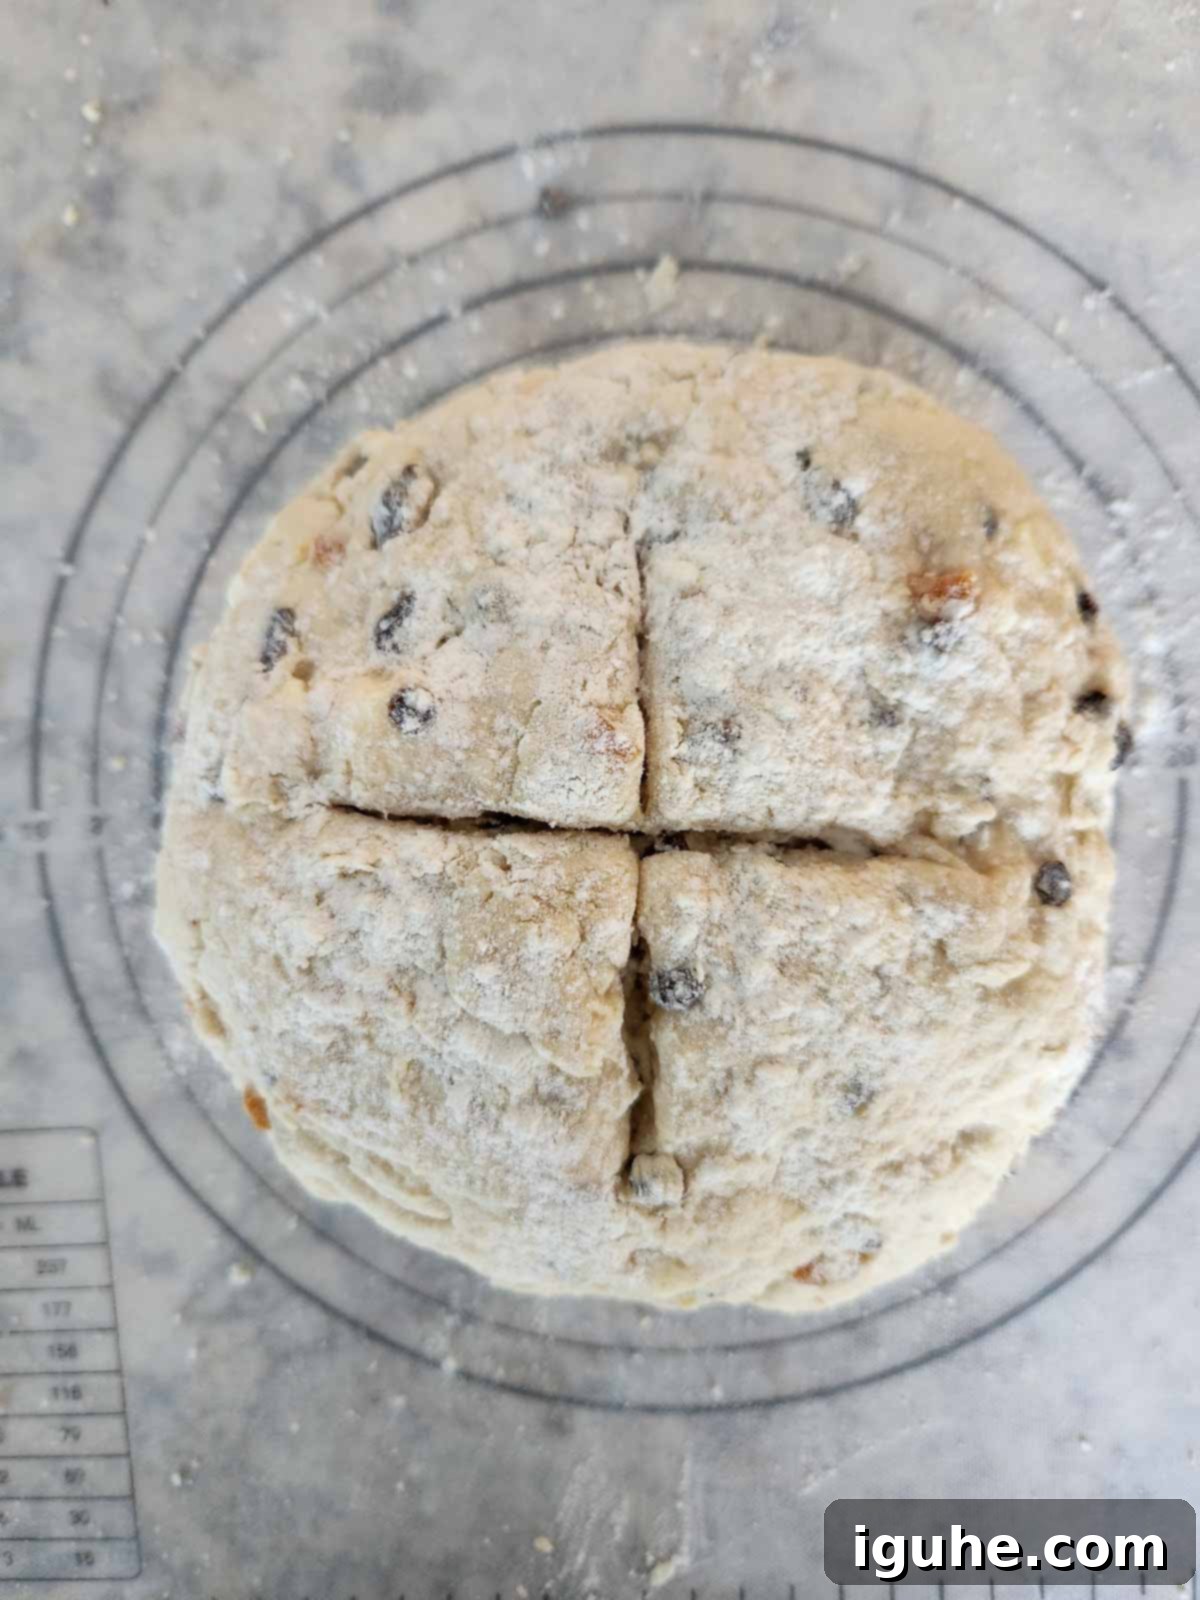
Shaping the Dough: Lightly flour a clean work surface. Carefully scrape the sticky dough onto the floured surface. Knead the dough just a few times, enough to bring it together into a cohesive mass. Over-kneading will develop gluten and make the bread tough. Gently shape the dough into a round loaf, approximately 7 inches in diameter. If the dough feels too wet or sticky to handle, add a very small amount of extra flour to your hands, but resist the urge to add too much to the dough itself.
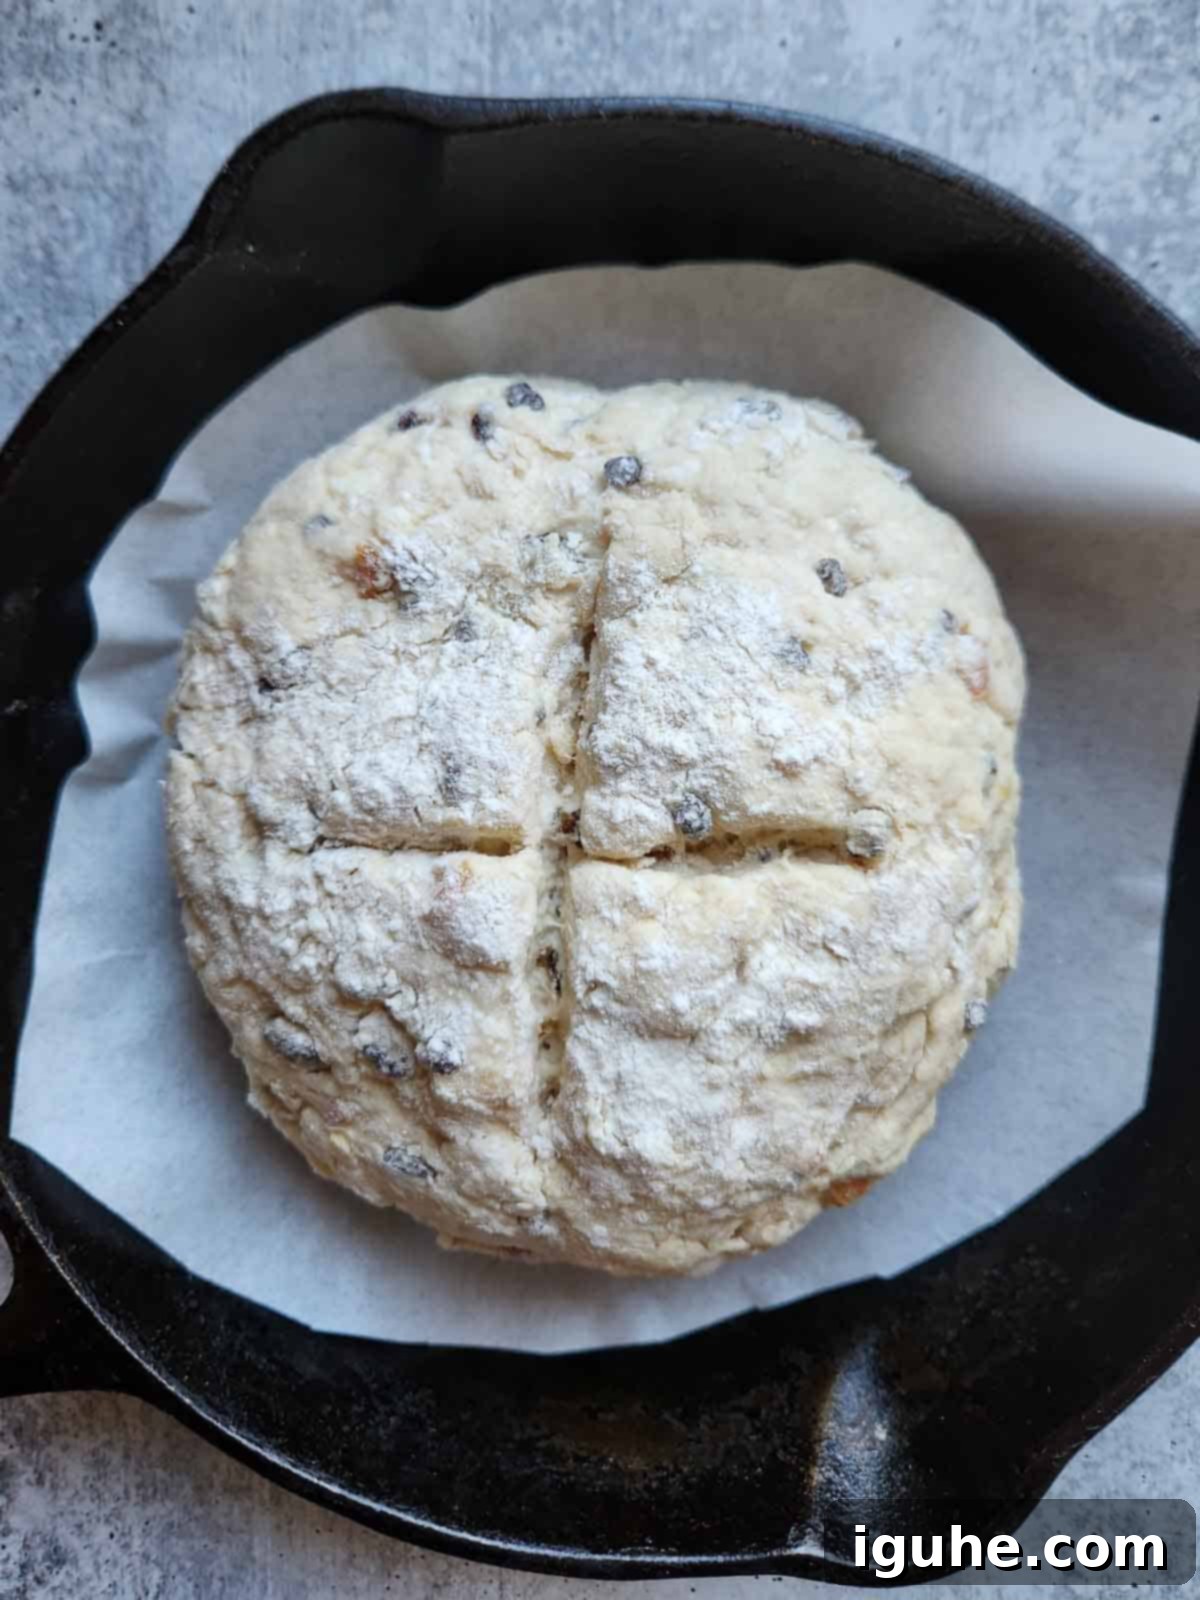
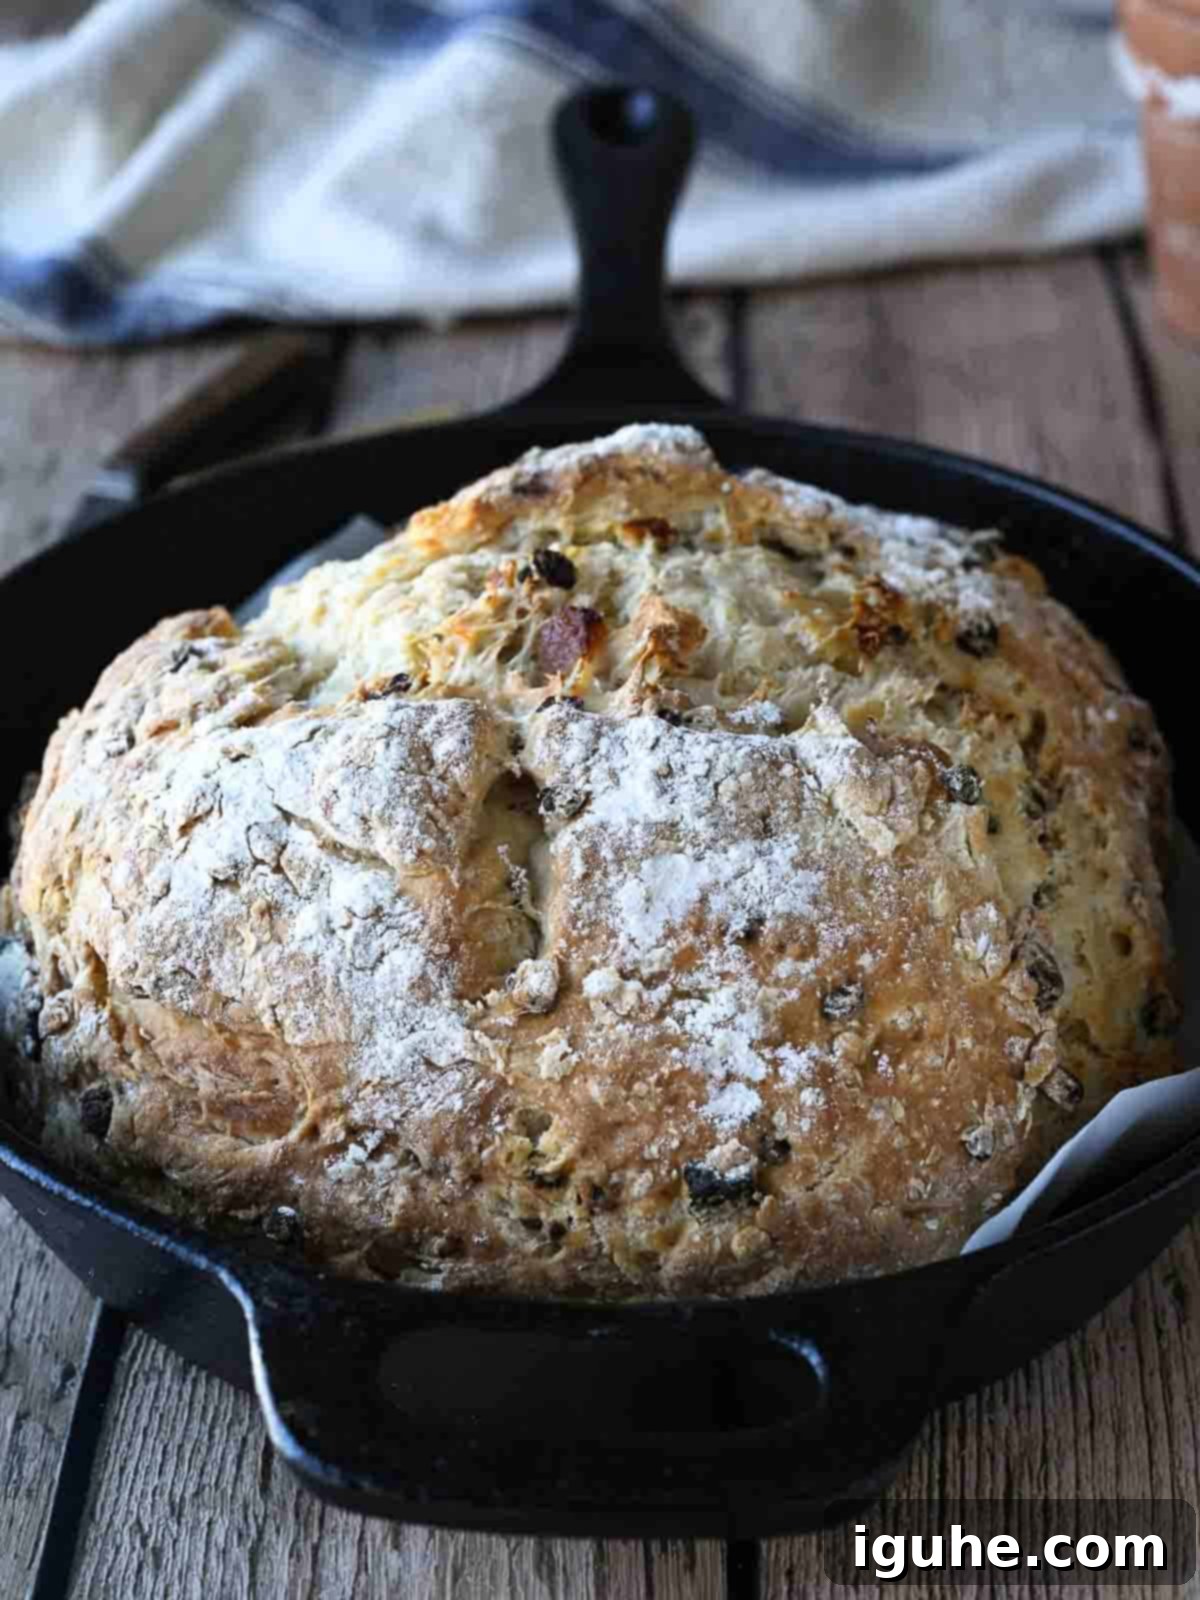
Scoring and Baking: Using a sharp knife, score a deep “x” pattern on the top of the dough, about ½ inch deep. This traditional mark serves a practical purpose, helping the bread expand evenly during baking. Carefully transfer the shaped dough to your parchment-lined baking pan or cast iron skillet. Bake in a preheated oven at 375℉ (190°C) for 50-65 minutes. The bread is ready when the top is beautifully golden brown, and a wooden skewer inserted into the center comes out clean. When you tap the bottom of the loaf, it should sound hollow, indicating it’s cooked through.
Once baked, remove the soda bread from the oven and transfer it to a wire rack. Allow it to cool for at least 15 minutes before slicing. Serving it warm with a generous spread of butter is highly recommended for the ultimate comfort food experience.
📝Expert Baking Tips for the Best Irish Soda Bread
Achieving a perfect loaf of Irish soda bread is straightforward with a few key considerations in mind. These expert tips will help ensure your bread turns out wonderfully tender, with a beautiful crust every time:
- Keep Ingredients Cold: It’s crucial that both your butter and buttermilk are very cold. Cold butter helps create small pockets of steam during baking, contributing to a more tender and slightly flaky texture. Cold buttermilk, on the other hand, reacts more slowly with the baking soda, allowing for a more controlled rise. For an extra chill, you can even pop the butter (cubed) and buttermilk into the freezer for 10 minutes before you start.
- Ensure Fresh Baking Soda: Baking soda is the primary leavening agent in this bread, responsible for its rise. If your baking soda isn’t fresh, your bread won’t rise properly and may be dense. To test its freshness, simply add ¼ teaspoon of baking soda to a cup and pour in 2 teaspoons of vinegar. If the mixture vigorously bubbles, it’s good to go. If not, it’s time for a new box!
- Avoid Overworking the Dough: Irish soda bread is a quick bread, and over-kneading or over-mixing will develop the gluten in the flour too much. This can lead to a tough, chewy loaf rather than a tender one. Mix the dough just until the ingredients are combined. The warmth from your hands can also prematurely melt the cold butter, so work quickly and gently.
- Parchment Paper for Easy Cleanup: For a hassle-free cleanup, always line your cast iron skillet or baking pan with parchment paper. This not only prevents sticking but also makes transferring the warm loaf much easier.
- Check for Doneness: Knowing when your soda bread is perfectly baked is key. It should have a deep golden-brown crust and, when gently tapped on the bottom, it should produce a hollow sound. A wooden skewer or toothpick inserted into the center should come out clean. These indicators confirm that the bread is cooked through and has developed its optimal texture.
Delightful Ways to Serve Your Irish Soda Bread
This sweet and fruity Irish soda bread is incredibly versatile and can be enjoyed in numerous ways beyond just St. Patrick’s Day. Here are some fantastic serving suggestions to make the most of your homemade loaf:
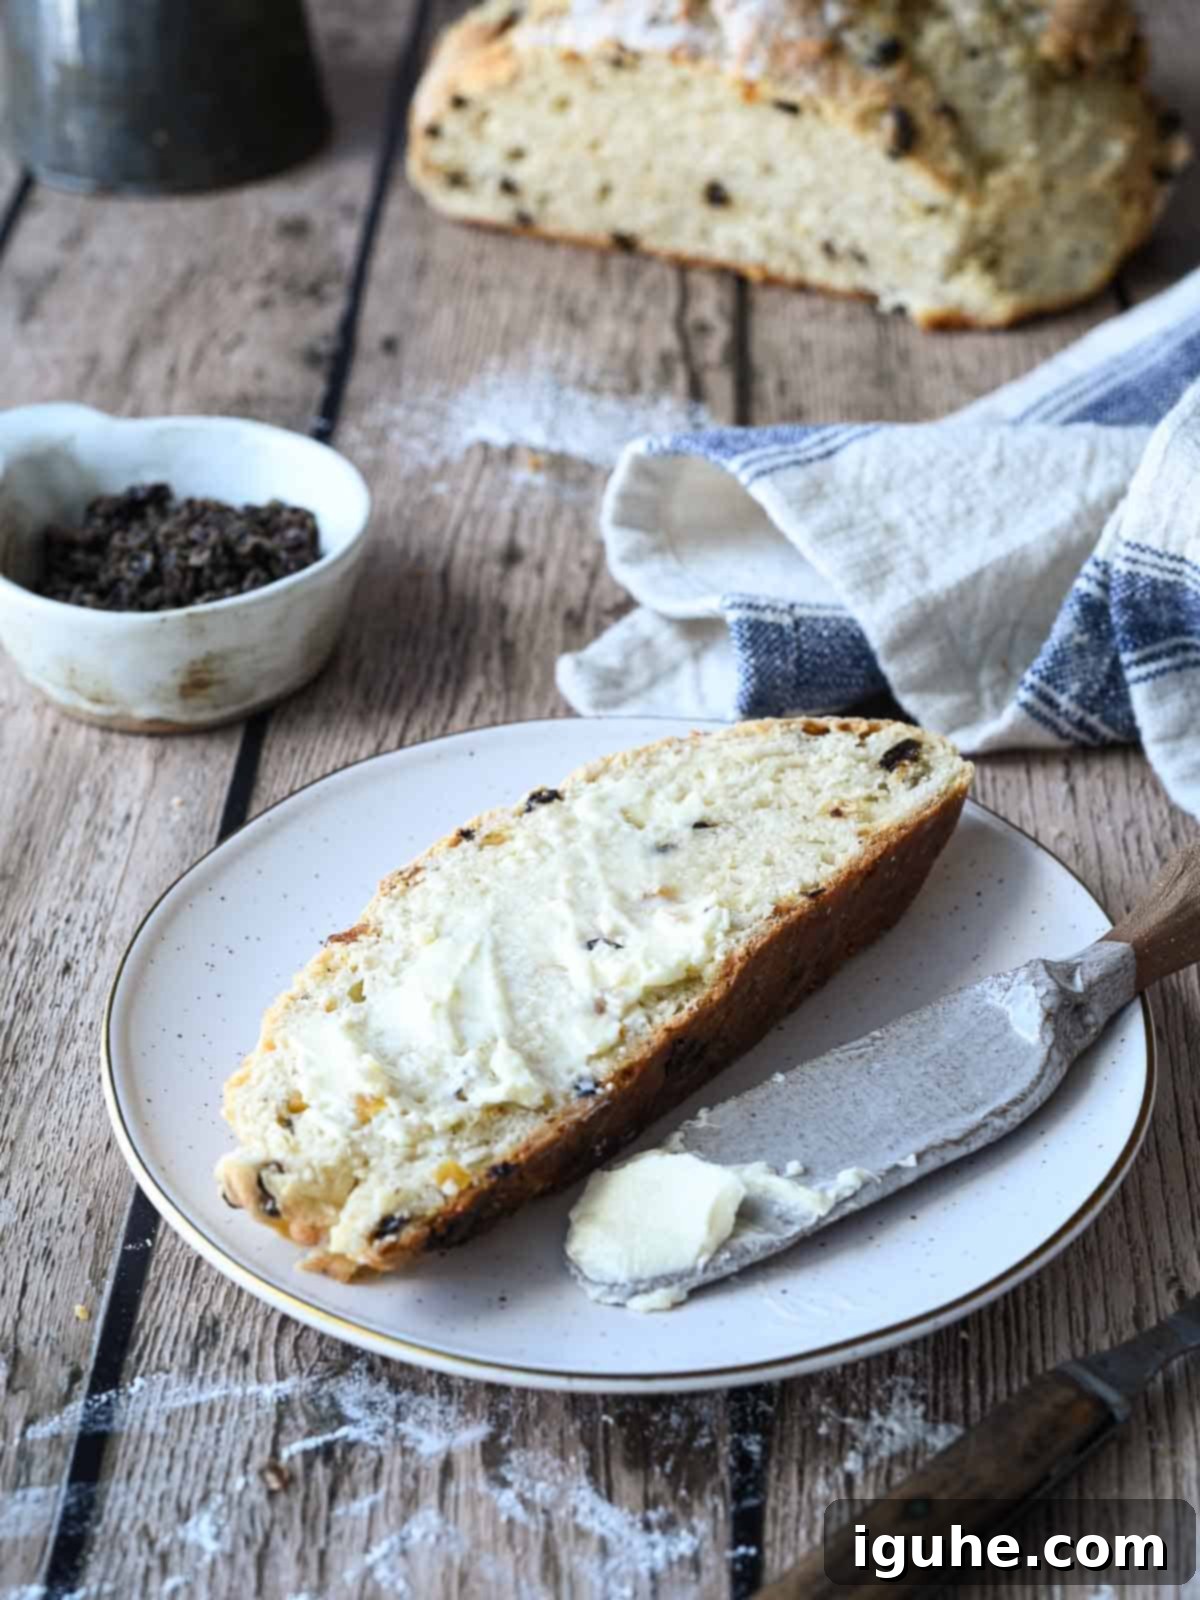
- With Butter: The classic and arguably best way to enjoy Irish soda bread. Serve slices warm with generous amounts of salted butter. For an authentic Irish indulgence, seek out and use a good quality Irish butter. The slight saltiness of the butter perfectly complements the bread’s sweetness.
- Plain or with Fresh Fruit: For a lighter option, enjoy a slice plain or alongside a bowl of your favorite fresh sliced fruit. The bread’s unique flavor profile makes it a satisfying stand-alone treat.
- Cheese Board Companion: Elevate your cheese board by including slices of Irish soda bread. Its slightly sweet and tangy profile pairs wonderfully with a variety of cheeses, from creamy Brie to sharp cheddar or a mild goat cheese.
- Soup Dunker: This hearty bread makes an excellent accompaniment to your favorite soups and stews. Its dense texture is perfect for soaking up rich broths, adding a comforting dimension to your meal.
- Creative Sandwiches: Don’t limit soda bread to breakfast. Use slices to create unique sandwiches. It’s surprisingly delicious with both sweet and savory fillings. Try a simple ham and cheese with a touch of mustard, or even a creamy avocado spread.
- Toasted or Grilled: For an extra layer of flavor and texture, toast or lightly grill slices of Irish soda bread. The heat crisps the exterior and warms the interior, enhancing its aroma. Serve toasted slices with anything from avocado and a sprinkle of chili flakes to poached eggs for a gourmet breakfast.
- The Ultimate Irish Breakfast: Integrate this sweet soda bread into a traditional Irish breakfast spread. Pair it with fried eggs, crispy bacon, sausages, and black pudding for a truly hearty and authentic meal experience.
- Holiday Celebrations: While perfect for St. Patrick’s Day, this bread can also be a delightful addition to other holiday meals. Serve it alongside roasted meats, stews, or as part of a festive brunch buffet. It’s a crowd-plepleaser that brings a touch of Irish warmth to any gathering.
Storing and Preparing Your Irish Soda Bread in Advance
Proper storage is essential to keep your homemade Irish soda bread fresh and delicious for as long as possible. This bread is best enjoyed within a few days of baking, but it can also be prepared ahead of time or frozen for later enjoyment.
Room Temperature Storage: Once your soda bread has cooled completely to room temperature, wrap it tightly in plastic wrap or aluminum foil. You can also place it in an airtight container or a large resealable bag. Stored this way, it will remain fresh and moist for 3-4 days at room temperature. For optimal flavor and texture, I highly recommend reheating slices briefly in a toaster or oven the next day; it brings back that wonderful fresh-baked aroma and crispy exterior.
Freezing for Longer Storage: Irish soda bread freezes remarkably well, making it perfect for meal prepping or having a delicious treat on hand. Once fully cooled, wrap the entire loaf or individual slices tightly in plastic wrap, then an additional layer of aluminum foil. Place the well-wrapped bread in a freezer-safe bag or container. It can be frozen for up to 3 months. When you’re ready to enjoy it, thaw the bread at room temperature, then warm slices in the oven or toaster for best results. Freezing is a great way to ensure you always have this delightful bread ready to go!
Frequently Asked Questions About Irish Soda Bread
Absolutely! A perfectly baked Irish soda bread will feature a firm, wonderfully crunchy crust that provides a delightful contrast to its soft and pliable interior. This crispy exterior is a hallmark of good soda bread, especially when baked in a cast iron skillet. To best enjoy this texture, use a serrated knife when slicing your soda bread; it helps to cut through the crust cleanly without crushing the tender inside.
Traditional Irish soda bread is typically more rustic and often savory, made with just flour, baking soda, salt, and buttermilk. It’s meant to accompany savory meals. Our American-style version incorporates brown sugar, currants, and apricots, making it significantly sweeter and fruitier. This adaptation caters to a preference for sweet baked goods, making it ideal for breakfast, brunch, or dessert.
Buttermilk is crucial for this recipe as its acidity reacts with the baking soda to leaven the bread. You can make a homemade buttermilk substitute by adding 1 tablespoon of white vinegar or lemon juice to a measuring cup, then filling it with regular milk (dairy or non-dairy) to the 1¾ cup line. Let it sit for 5-10 minutes until it slightly curdles. While this works in a pinch, real buttermilk generally provides a richer flavor and superior texture.
Your Irish soda bread is ready when it has a deep golden-brown crust, a wooden skewer or toothpick inserted into the center comes out clean, and when you tap the bottom of the loaf, it produces a hollow sound. These signs indicate that the interior is cooked through and the bread has developed its characteristic crumb and crust.
Absolutely! This recipe is quite flexible. While currants and apricots offer a fantastic sweet-tart balance, you can experiment with other dried fruits like cranberries, chopped dates, or even mixed peel for a more traditional fruit bread flavor. A handful of chopped walnuts or pecans can also add a delightful crunch. Just be sure to keep the total quantity of added fruits/nuts similar to prevent the dough from becoming too heavy.
More International Flavors to Explore
If you’ve enjoyed the delightful blend of flavors in this Irish-American soda bread, you might be interested in trying other recipes inspired by diverse international cuisines. Broaden your culinary horizons with these delicious dishes:
- Mexican Eggs Benedict with Chipotle Hollandaise
- Easy Huevos Rancheros Tostadas
- Thai Peanut Butter and Jelly Sandwich
- Easy Italian Pignoli Cookies
Did you make this delicious Irish soda bread with currants and apricots? We’d love to hear all about it! Please leave a ⭐⭐⭐⭐⭐ rating with a comment right below the recipe card to share your experience. If you snap a photo of your beautiful creation, don’t forget to tag me on Instagram @brunchandbatter. Your feedback and photos inspire us!
📖Recipe
Irish Soda Bread with Currants and Apricots
Equipment
- 1 9 or 10-inch cast iron skillet or similar pan
Ingredients
- ½ cup dried currants or raisins
- ⅓ cup dried apricots, finely chopped
- ¼ cup orange juice
- 3 tablespoon dark brown sugar
- 1 large egg
- 1¾ cup buttermilk, cold
- 4 cups all-purpose flour
- 1 teaspoon baking soda
- 1 teaspoon Kosher or fine sea salt
- 4 tablespoon cold unsalted butter, cut into cubes
Instructions
- Preheat your oven to 375℉ (190°C). Prepare a cast iron skillet or your preferred round baking pan by lining it with parchment paper for easy removal and cleanup.
- Soak the fruit: In a small bowl, combine the orange juice with the dried currants and chopped apricots. Allow the fruit to soak for about 10 minutes to rehydrate and plump up. While the fruit is soaking, proceed with preparing the dough. Keep a few paper towels handy to thoroughly drain and squeeze excess juice from the fruit when it’s ready.½ cup dried currants or raisins, ⅓ cup dried apricots, finely chopped, ¼ cup orange juice
- In a separate medium-sized bowl, whisk together the dark brown sugar and the large egg until well combined and slightly frothy. Then, add the cold buttermilk to this mixture and whisk thoroughly until all wet ingredients are fully incorporated. Set this wet mixture aside.1 large egg, 3 tablespoon dark brown sugar, 1¾ cup buttermilk, cold
- In another medium bowl, whisk together the all-purpose flour, baking soda, and kosher or fine sea salt. Once these dry ingredients are mixed, add the cold unsalted butter, cut into small cubes. Using a pastry cutter (or two forks), cut the butter into the flour mixture until the butter pieces resemble the size of small peas. This step ensures a tender crumb.4 cups all-purpose flour, 1 teaspoon baking soda, 1 teaspoon Kosher or fine sea salt, 4 tablespoon cold unsalted butter, cut into cubes
- Pour the buttermilk-egg mixture into the flour and butter mixture. Stir with a spoon or your hands just until the flour is moistened and the ingredients are combined. Avoid overmixing. Now, thoroughly squeeze out any remaining juice from the soaked fruit using paper towels, then add the plumped fruit to the dough. Mix gently until the fruit is evenly distributed throughout the batter.
- Lightly flour a clean work surface. Carefully dump the sticky dough onto the floured surface. Knead the dough only a few times (3-4 turns) just until it comes together into a cohesive round shape, approximately 7 inches in diameter. The dough will be quite wet and sticky, so resist the urge to add too much extra flour. If necessary, lightly flour your hands. Using a sharp knife, score a traditional “x” into the top of the dough, about ½ inch deep. This helps the bread rise evenly.
- Carefully transfer the shaped dough to your prepared skillet or pan. Bake for 50-65 minutes, or until the top is beautifully golden brown, and a wooden skewer inserted into the center comes out clean. The bottom of the bread should also be nicely browned and sound hollow when tapped, indicating it’s fully cooked. Remove the bread from the oven and transfer it to a wire rack to cool for about 15 minutes before slicing. Serve warm with butter or your favorite jam for a delightful experience.
Notes
-
- Cold Ingredients are Key: Always ensure your butter and buttermilk are very cold. This helps create a tender crumb and a better rise. You can even place them in the freezer for 10 minutes beforehand.
- Test Your Baking Soda: Fresh baking soda is crucial for leavening. Test it by mixing ¼ teaspoon with 2 teaspoons of vinegar; if it bubbles vigorously, it’s good to use.
- Don’t Overmix the Dough: Overworking the dough will develop gluten, leading to a tough bread. Mix just until combined and handle gently to keep the butter cold and the texture tender.
- Parchment for Easy Cleanup: Line your baking pan or skillet with parchment paper to prevent sticking and make cleanup a breeze.
- Know When It’s Done: Your soda bread is perfectly baked when it’s golden brown, sounds hollow when tapped on the bottom, and a tester comes out clean.
Nutrition*
*Nutrition information is provided as a courtesy and is an estimate only. Nutrition information can vary depending on many factors, such as products used, measurements and substitutions, therefore it is recommended that you obtain nutritional calculations based on your own finished recipe.
