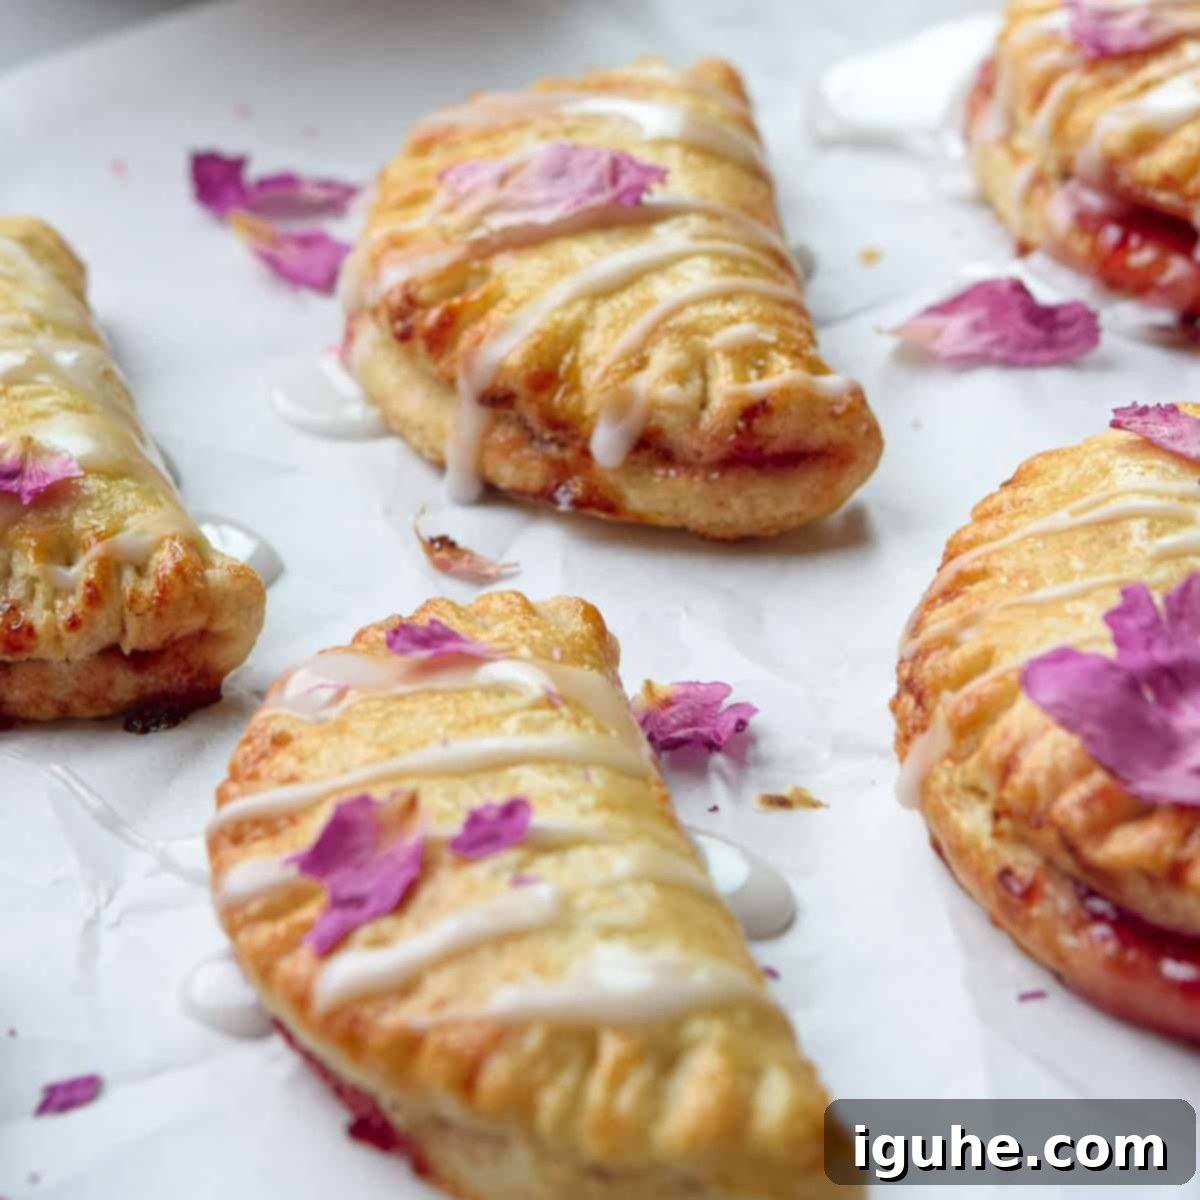
Easy Homemade Strawberry Mini Pies with Delicate Rose Glaze: Your Perfect Individual Dessert!
Imagine biting into a perfectly golden, flaky pastry, filled with a burst of sweet strawberry jam, all topped with a delicate, fragrant rose-flavored glaze. These adorable Strawberry Mini Pies with Rose Glaze aren’t just a dessert; they’re an experience. Designed for individual enjoyment, they offer all the comfort of a classic pie without the need for sharing. Perfect for any occasion – from elegant garden parties and casual picnics to celebratory brunches and even a sweet treat just for you!
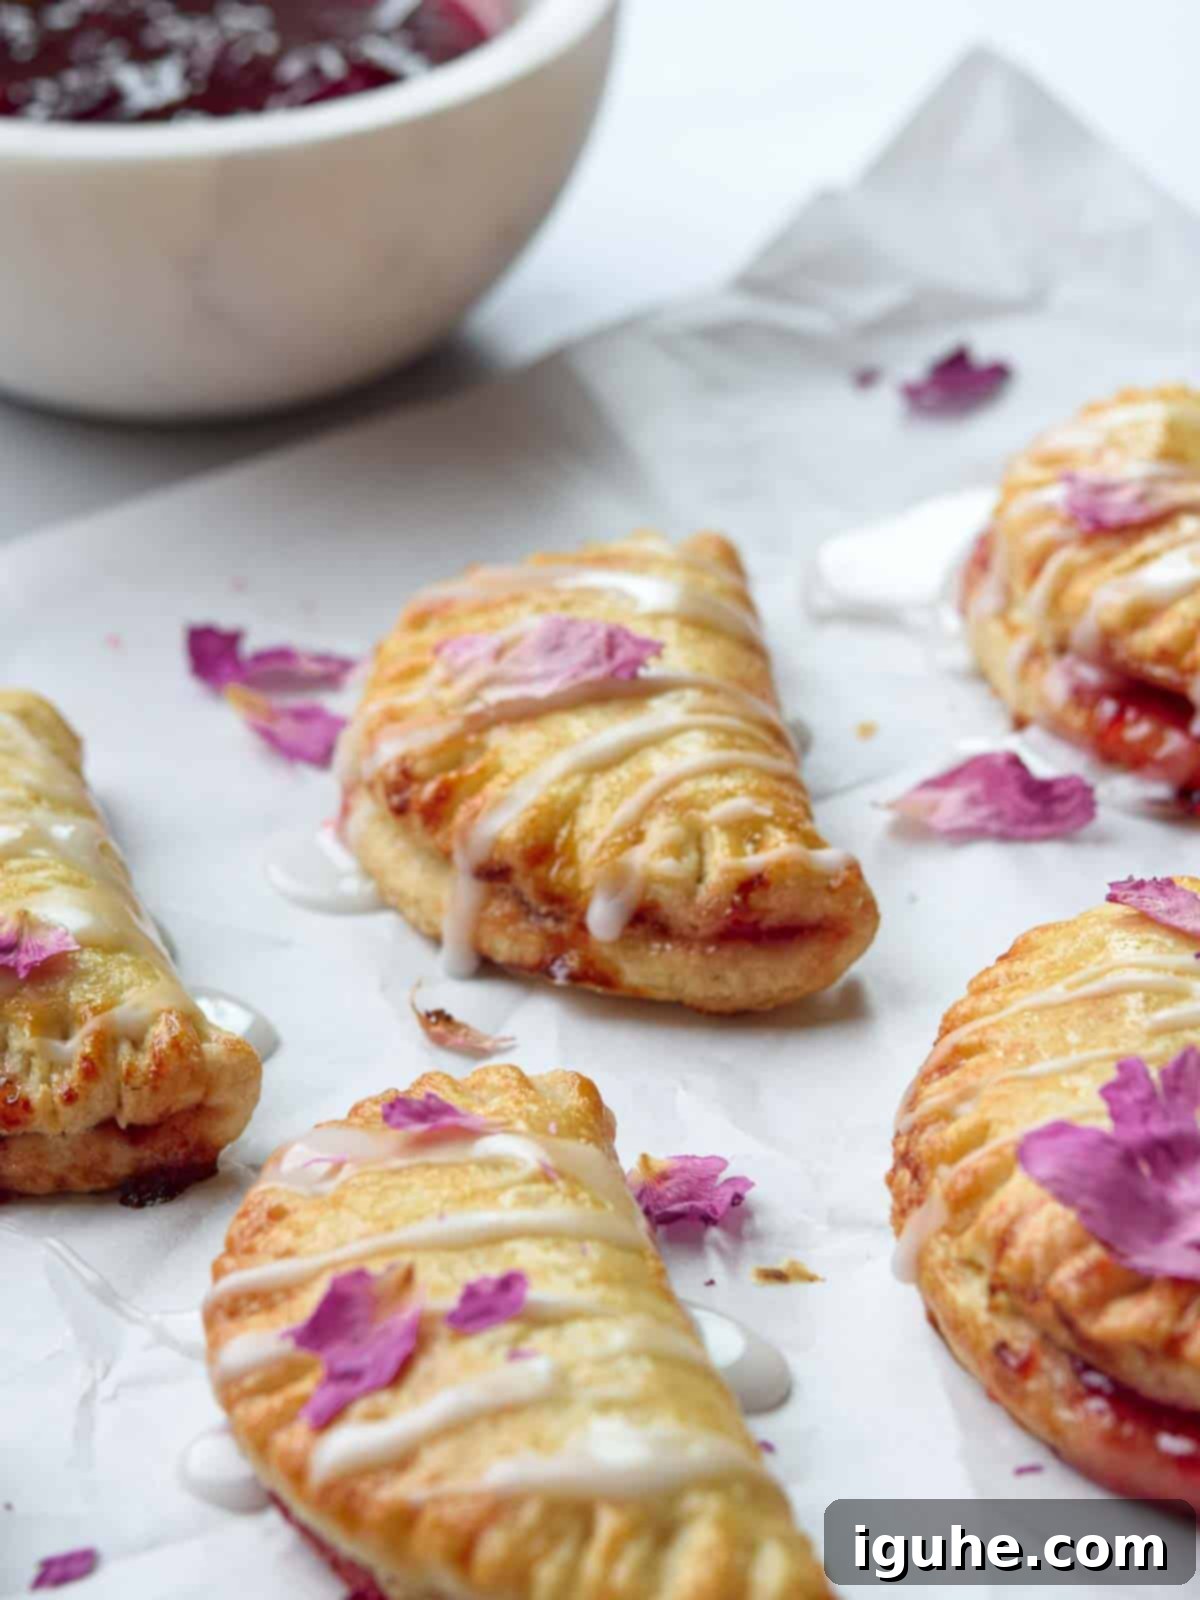
As spring gently ushers in warmer days, there’s a natural inclination towards light, refreshing, and beautifully scented treats. My recent fascination with floral flavors has been a delightful journey, much like exploring new horizons in baking. From the soothing notes of a lavender tea latte to these elegant mini pies, floral essences have a magical way of elevating a dish, adding a sophisticated touch that truly transforms the ordinary into the extraordinary. The best part? You get all the aromatic benefits without any pesky pollen to make you sneeze!
Rose, as a flavor, is truly a unique and acquired taste. The key to mastering it lies in subtlety. Too much, and your delightful dessert can quickly veer into tasting like perfume – an outcome we certainly want to avoid! This recipe meticulously balances the vibrant sweetness of strawberry with just a hint of rose, ensuring a harmonious and perfectly balanced flavor profile that will tantalize your taste buds without overpowering them. Each bite-sized pie is crafted to deliver the ideal ratio, making them an irresistible treat for both rose enthusiasts and newcomers alike.
So, the next time you’re searching for a captivating dessert, a charming party favor, or simply a sweet escape, consider these delightful mini pies. They’re not just a dessert; they’re a tiny slice of joy, promising a delicious experience that your taste buds will undoubtedly cherish and thank you for.
Why You Will Absolutely Love These Strawberry Mini Pies
These mini strawberry pies aren’t just pretty faces; they bring a host of benefits that make them an absolute joy to bake and devour. Here’s why they’re sure to become a new favorite:
- Perfectly Portable: Forget struggling with slicing a large pie! These individual pies are grab-and-go friendly, making them ideal for any event. Pack them in lunchboxes, bring them to a potluck, or enjoy them on a picnic blanket without any fuss.
- Kid-Friendly Delight: Their small size and sweet strawberry filling make these pies an instant hit with children. They’re easy for little hands to hold and enjoy, turning snack time into a special occasion.
- Surprisingly Easy to Make: Don’t let their elegant appearance fool you. While homemade pie crust might seem daunting, our step-by-step guide makes it approachable even for beginner bakers. The process is straightforward, leading to incredibly rewarding results.
- Mess-Free Snacking: Unlike a traditional slice of pie that often requires a plate and fork, these mini pies are designed for neat, individual consumption. The crimped edges keep the filling securely inside, ensuring a clean and enjoyable treat.
- Individual Sized Indulgence: Everyone gets their own pie! This personal touch adds a special feel, making guests feel uniquely cared for. Plus, it’s easier for portion control (if you can stop at just one!).
- Ideal for Special Occasions: Their charming presentation and delightful flavors make them perfect for festive events. Whether you’re celebrating Valentine’s Day, pampering Mom on Mother’s Day, or hosting a beautiful brunch, these pies add a touch of handmade elegance that everyone will adore. They’re also fantastic for baby showers, bridal teas, or simply making an ordinary Tuesday feel extraordinary.
Gathering Your Ingredients for Strawberry Mini Pies with Rose Glaze
Crafting these delightful mini pies begins with a selection of simple, high-quality ingredients. You’re just a few pantry staples and a couple of special additions away from making these absolutely delicious and memorable treats! Choosing the right components ensures the best flavor and texture in your homemade pies.
- All-Purpose Flour: The foundation of our flaky pie crust. Make sure to measure it correctly, either by weight for precision or by spooning it into a measuring cup and leveling off.
- Butter (Unsalted): Cold, unsalted butter is crucial for achieving that irresistible flaky crust. Unsalted butter allows you to control the total salt content in your recipe. Cut it into small cubes and keep it chilled until just before use.
- Salt (Kosher or Fine Sea Salt): A pinch of salt enhances all the flavors in the crust and filling, balancing the sweetness.
- Sugar: You’ll need two types of sugar. White granulated sugar for the pie crust and to add a touch of sweetness, and confectioner’s (powdered) sugar for the smooth, delicate rose glaze.
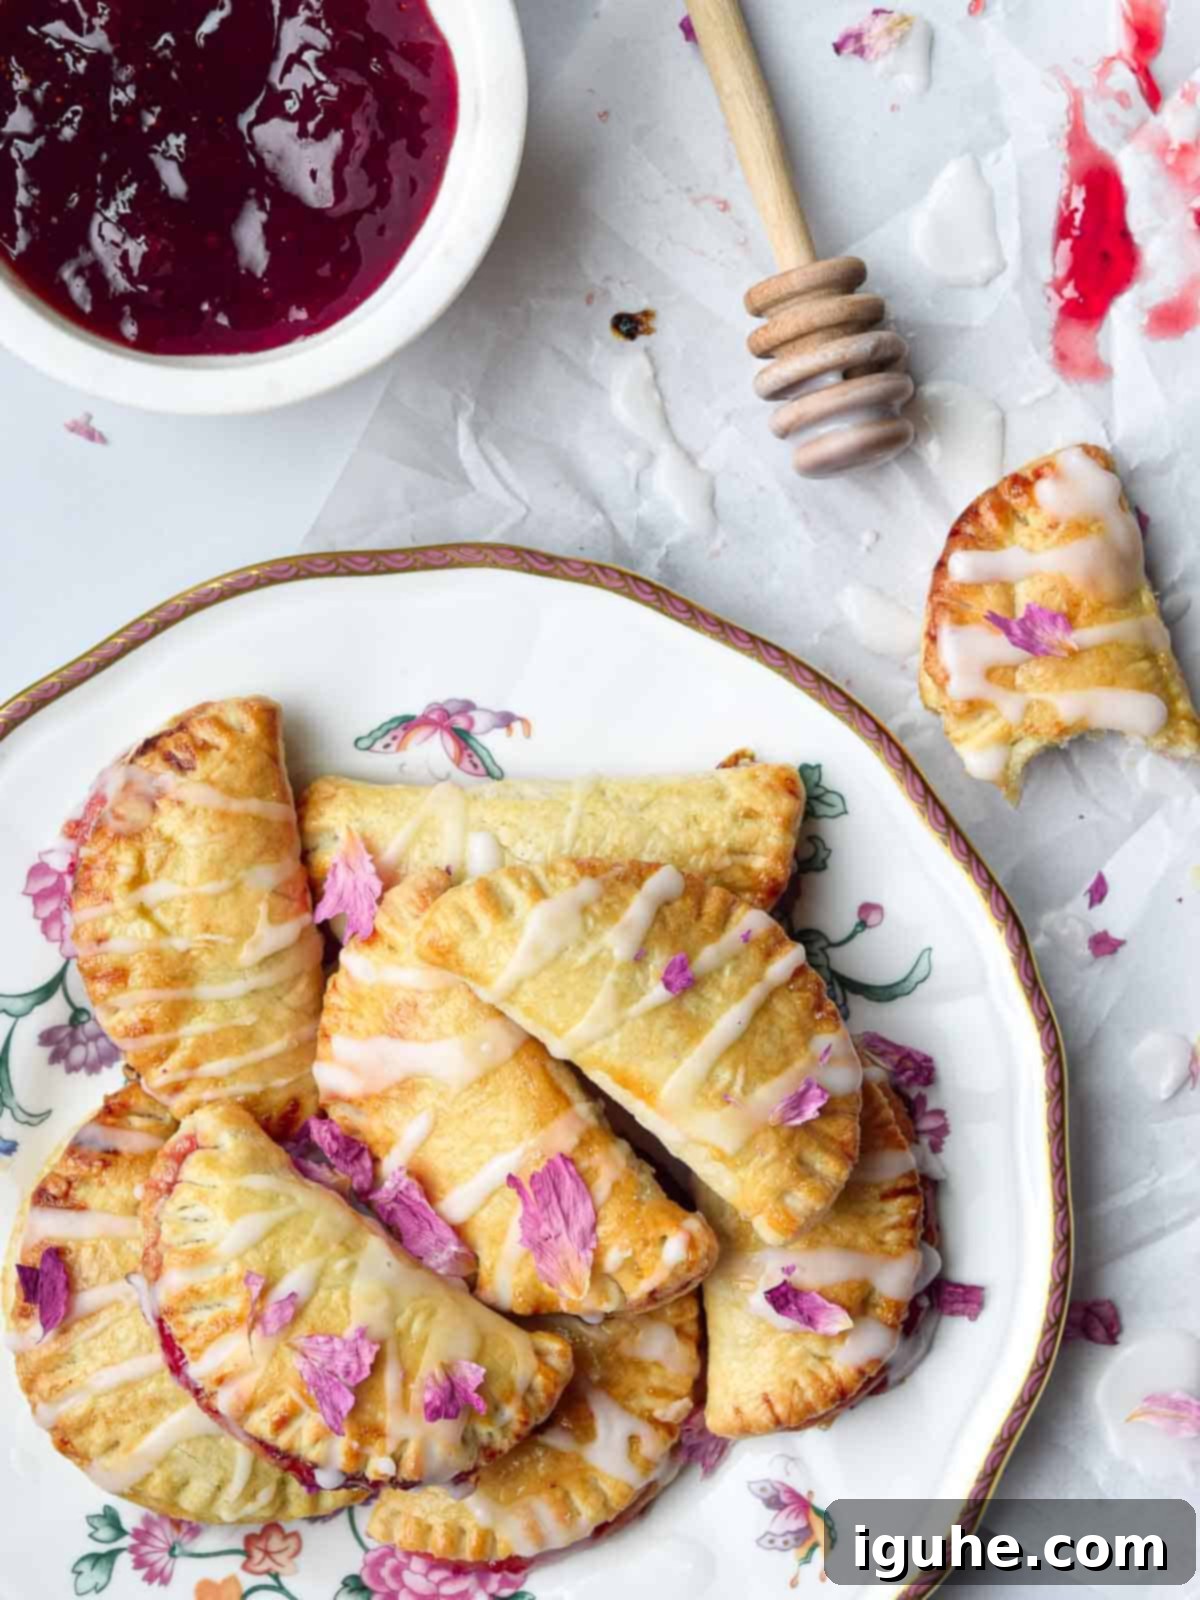
- Strawberry Jam: The heart of these pies! You can use your favorite store-bought jam for convenience, or elevate the flavor even further with a homemade strawberry jam. Ensure it’s not too runny, or it might leak during baking.
- Egg: Mixed with a little water, this creates an essential egg wash. It gives the mini pies their beautiful golden-brown color and a lovely sheen, making them even more appealing.
- Rose Water or Extract: This is the secret ingredient that imparts the delicate floral aroma and flavor to your glaze. I highly recommend a high-quality culinary rose water like Nielsen-Massey Rose Water, as its potency and quality directly impact the final taste. Remember, a little goes a long way to avoid a “perfume” taste.
- Rose Petals (Optional for Decorating): For an extra touch of elegance and visual appeal, food-grade rose petals are a beautiful garnish. You can often purchase them online. Always ensure they are specifically labeled as “culinary” or “food-grade” to ensure they are safe for consumption and free from pesticides.
See the full recipe card below for exact quantities and detailed measurements.
Essential Equipment for Perfect Mini Pies
Having the right tools can make all the difference in your baking experience, especially when it comes to achieving that perfect flaky crust. While some items are essential, others simply make the process much smoother and more enjoyable.
You don’t absolutely need a food processor for this recipe, but if you have one, I wholeheartedly recommend using it. A food processor makes quick work of blending the butter into the flour, ensuring an even distribution and helping to keep the butter cold, which is crucial for a flaky crust. It saves time and effort, bringing the pie crust together effortlessly in a matter of pulses.
In addition to a food processor (or your trusty hands and a pastry cutter), you will need a 3.5 to 4-inch cookie or biscuit cutter to create uniform circles from your dough. This size is ideal for individual mini pies, ensuring they are perfectly bite-sized and consistent in shape. If you don’t own a specialized cutter, don’t worry! A drinking glass of the same diameter can work as a fantastic substitute. Just make sure its rim is sharp enough to cut cleanly through the dough.
Other useful tools include a large baking sheet (lined with parchment paper for easy cleanup and to prevent sticking), a rolling pin to achieve an even thickness for your dough, and a fork for crimping the edges of your pies. A small bowl and whisk will also be handy for preparing the egg wash and rose glaze.
Step-by-Step Instructions: Crafting Your Delicious Mini Pies
Let’s dive into the baking process. The journey to these delightful mini pies is a rewarding one, starting with a truly irresistible homemade pie crust. Follow these detailed steps for perfect results every time!
Crafting the Flaky Pie Crust
First things first, let’s talk about the crust. It’s the cornerstone of these pies – flaky, buttery, and literally melts in your mouth. The secret? Cold ingredients and minimal handling. Begin by combining the all-purpose flour, granulated sugar, and salt in your food processor. Pulse a few times to ensure everything is well mixed. Next, add the cold, cubed unsalted butter. Pulse in short bursts, about 5-6 times, until the mixture resembles coarse crumbs. These crumbs are tiny pieces of butter coated in flour, which will create steam in the oven, leading to those desirable flaky layers.
Now, gradually add the ice-cold water, starting with 3 tablespoons. Pulse a few more times after each addition. You’ll likely need 3 to 5 tablespoons total. The goal is to achieve a mixture that looks like fine crumbs and just begins to come together when pinched between your fingers, without being overly wet or sticky. Be careful not to overmix! Once the dough holds together, turn it out onto a lightly floured surface. Gently knead it just a few times, enough to form a cohesive, smooth dough. Flatten the dough into a disk, wrap it in plastic wrap, and refrigerate for at least 30 minutes. This chilling step is vital as it allows the gluten to relax, making the dough easier to roll, and keeps the butter cold, enhancing flakiness.
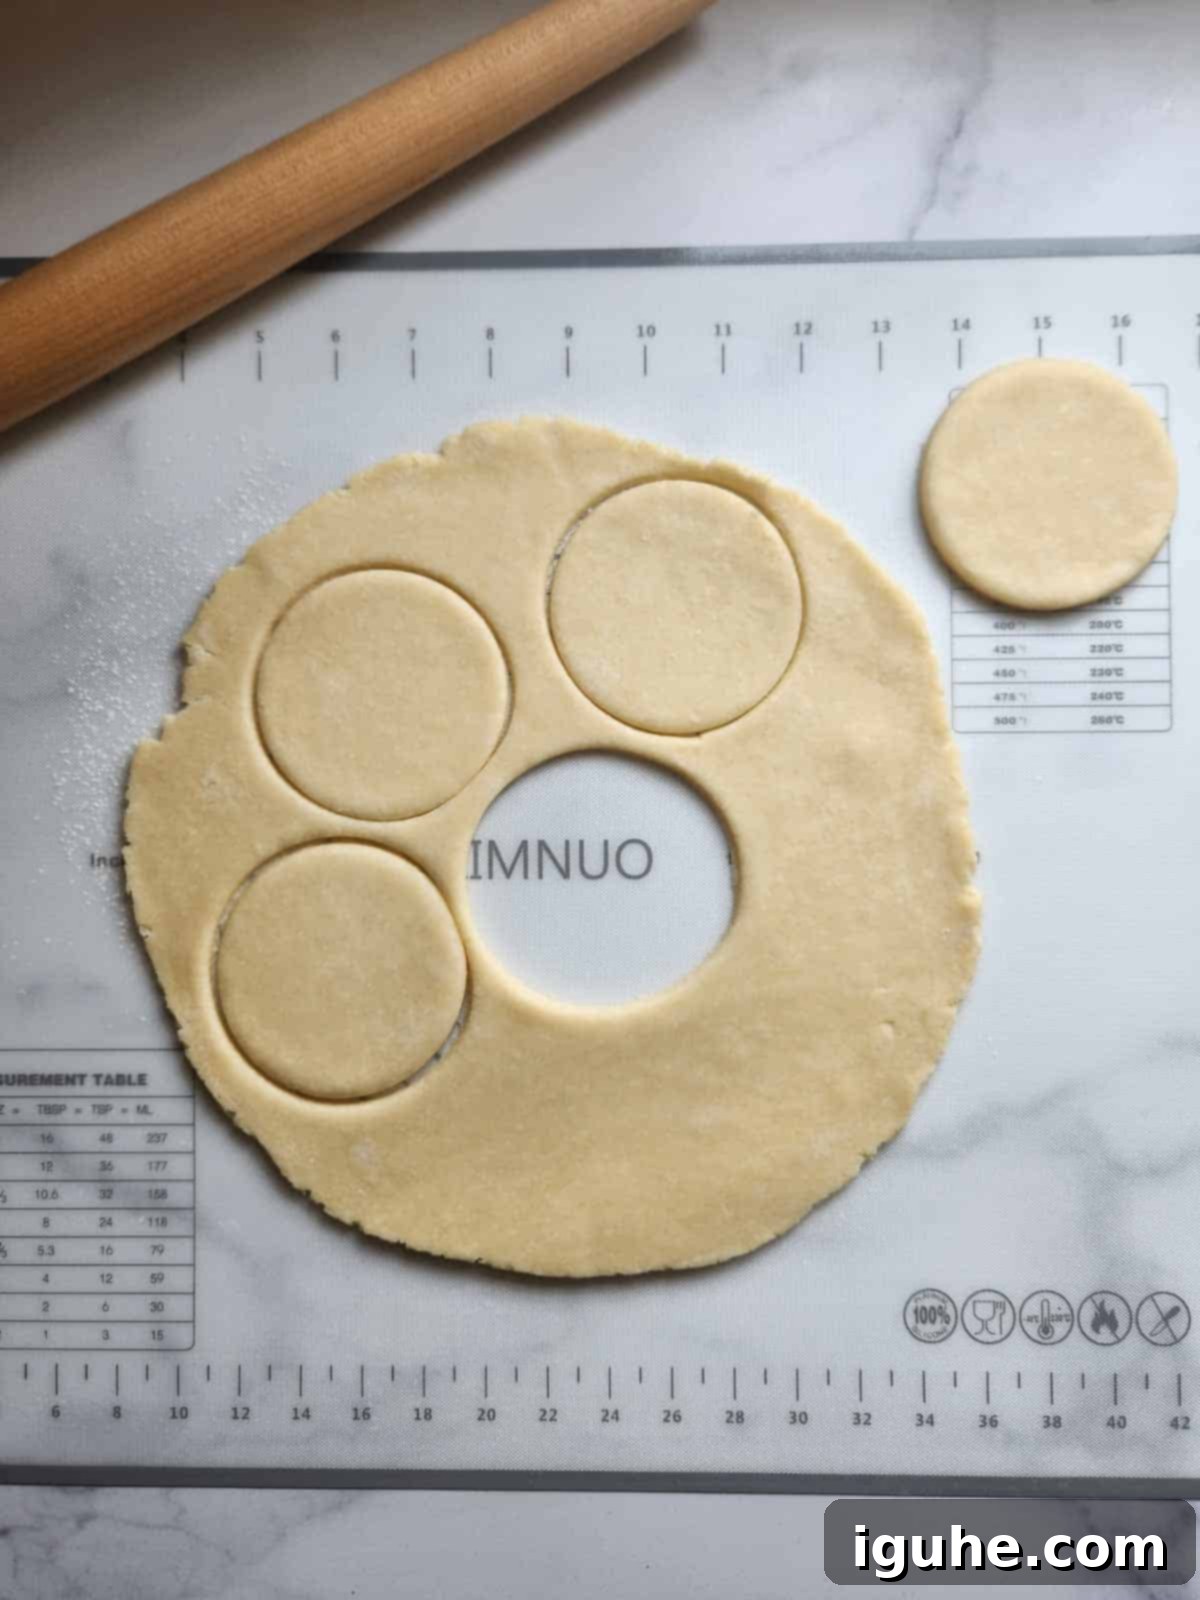
Once chilled, lightly flour your work surface and your rolling pin. Roll the pie dough into a large, even circle, approximately 10-12 inches in diameter and about ⅛th of an inch thick. Consistency in thickness is important for even baking. Using your 3.5 to 4-inch cookie cutter (or drinking glass), cut out circles from the dough. To prevent sticking, dip your cutter in flour after each cut. Carefully gather the dough scraps, gently re-roll them, and cut again until you’ve used all the dough. You should yield about 12 circles in total.
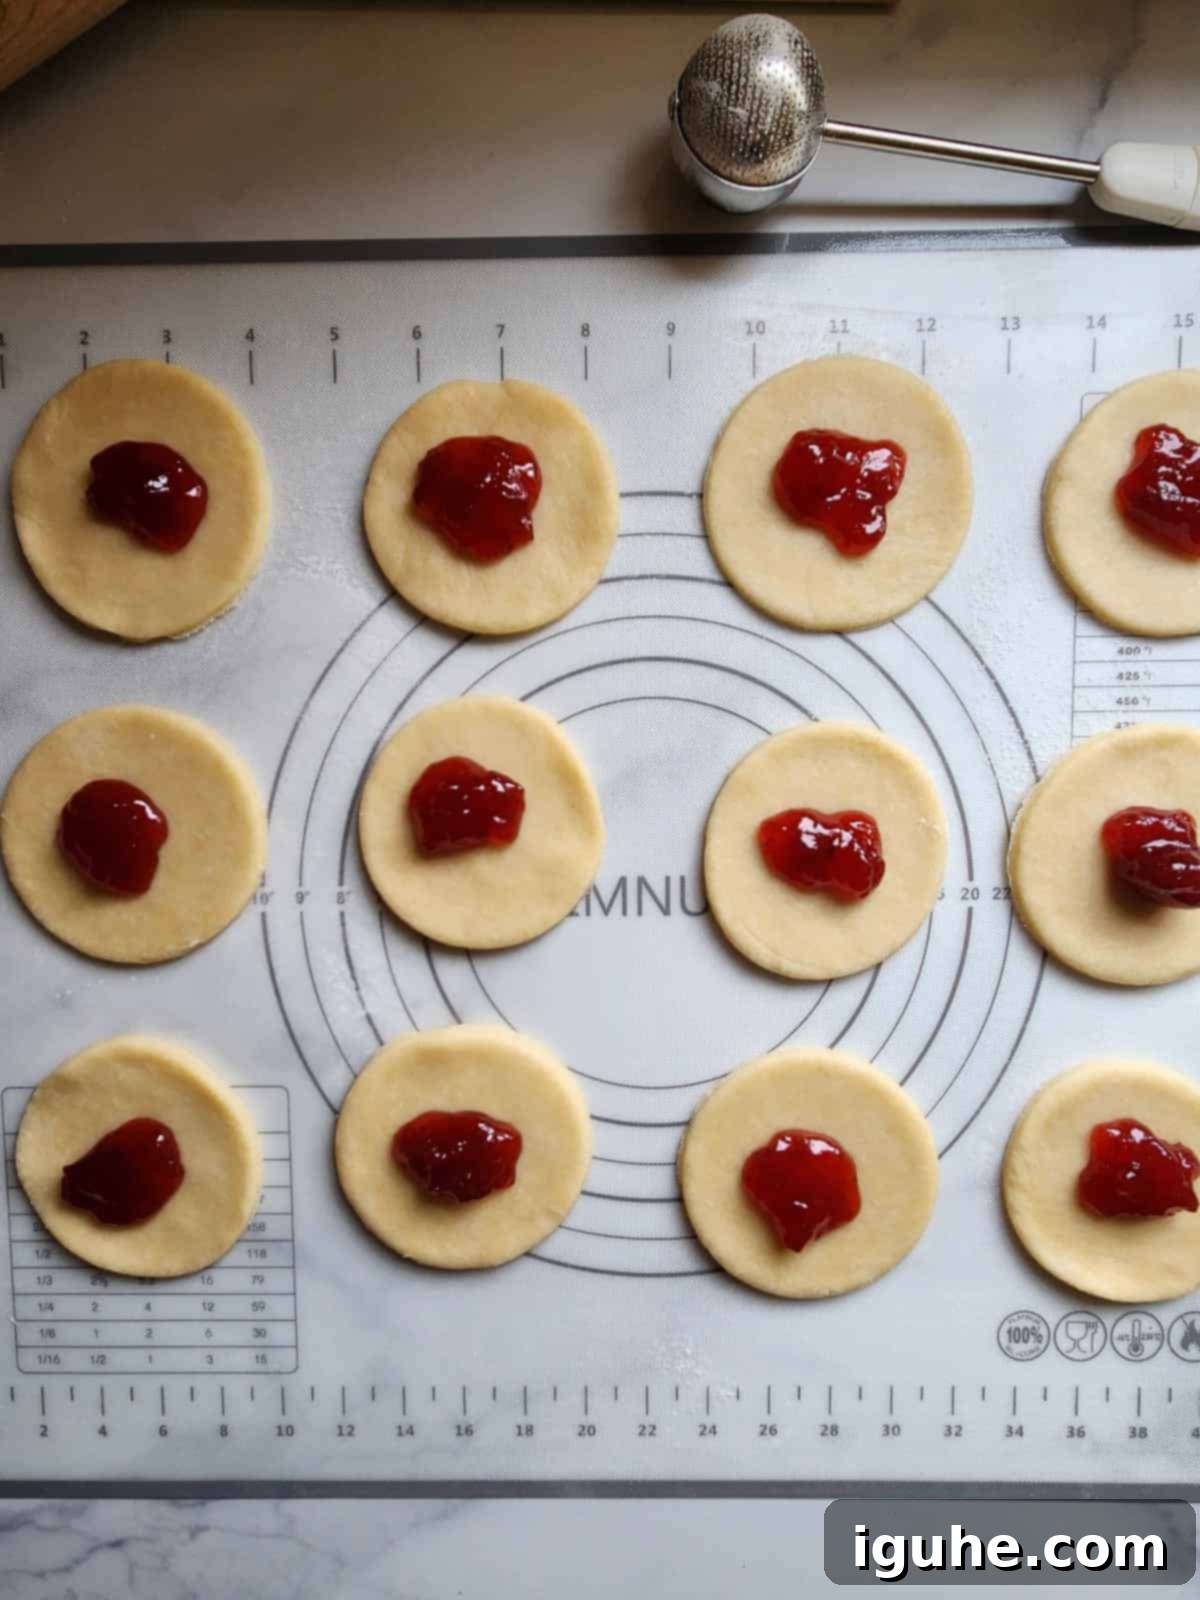
Lay out the cut dough circles on a parchment-lined baking sheet. Place about ½ tablespoon of your chosen strawberry jam directly in the center of each circle. It’s crucial not to overstuff them! While it might be tempting to add more jam, too much filling can cause the pies to burst or leak during baking, creating a sticky mess and compromising the structure of your beautiful pies. A modest amount ensures the perfect balance and a clean bake.
Filling and Sealing Your Pies
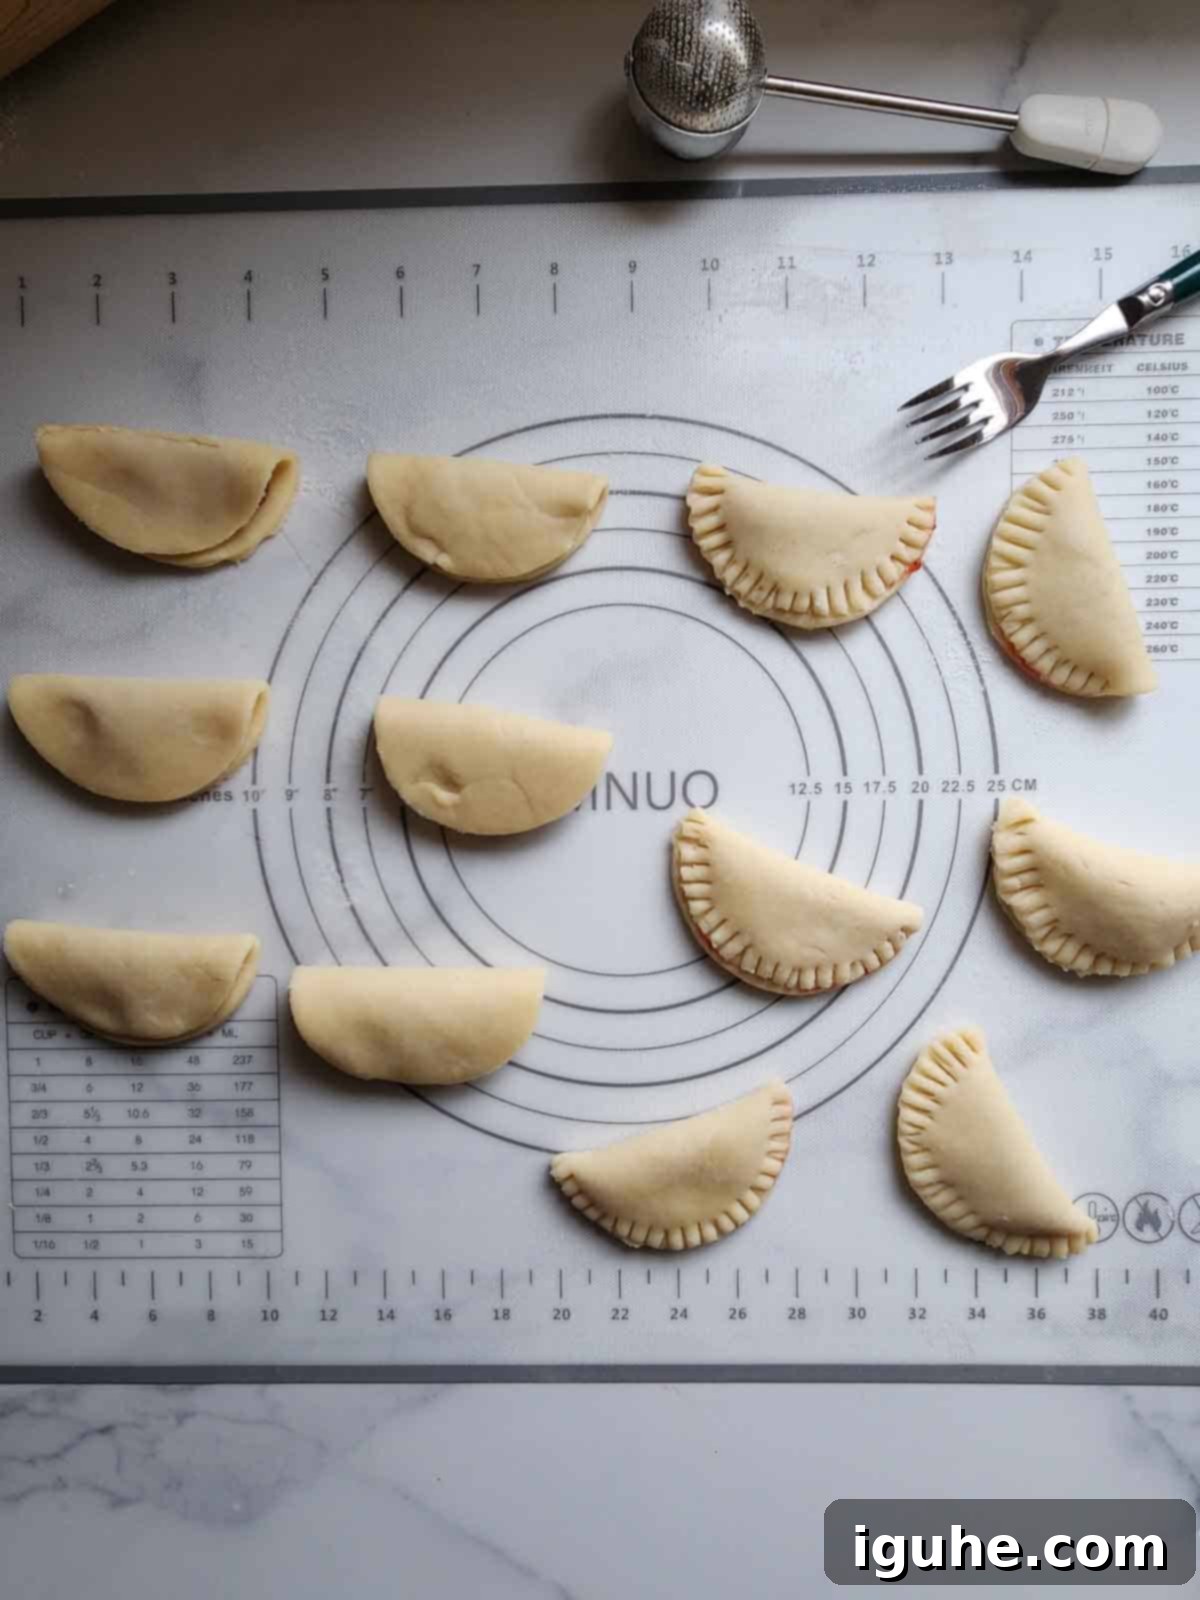
Once your jam is in place, carefully fold each dough circle in half, creating a semi-circle shape over the filling. Align the edges neatly. Using the tines of a fork, gently but firmly crimp the edges together all around the perimeter. This not only creates a lovely decorative pattern but, more importantly, seals the edges securely to prevent the jam from leaking out during baking. After sealing, place the assembled mini pies back into the fridge for another 15 minutes. This quick chill helps the butter solidify again, ensuring the crust holds its shape and bakes up extra flaky.
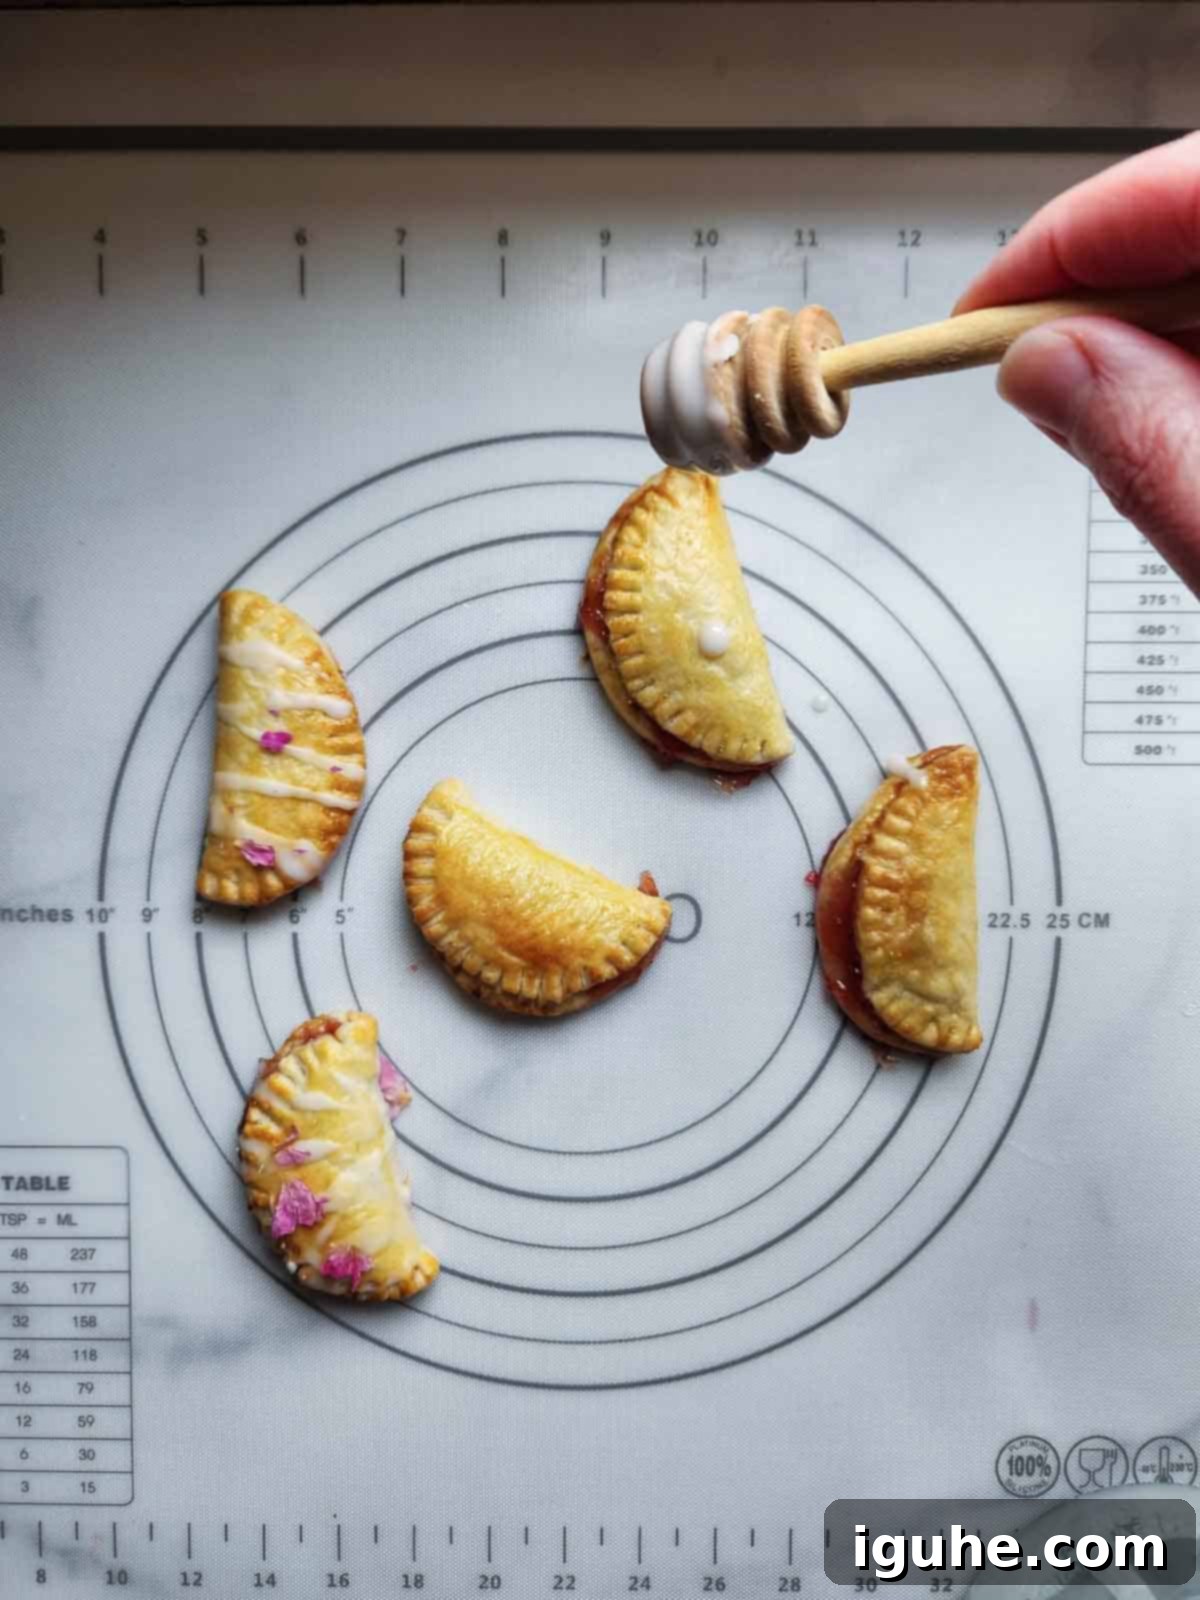
While your pies are chilling, preheat your oven to 400°F (200°C). Prepare your egg wash by whisking one large egg with one teaspoon of water in a small bowl. Remove the chilled pies from the fridge and brush the tops lightly with the egg wash. This will give them a beautiful golden-brown color and a lovely shine once baked. Bake for approximately 15-22 minutes, or until the crust is beautifully golden brown and the filling is bubbling slightly. Keep an eye on them, as oven temperatures can vary.
Baking to Golden Perfection and Adding the Rose Glaze
Once baked, transfer the hot mini pies to a wire rack and let them cool completely. This is crucial for the glaze application; if the pies are warm, the glaze will melt and run off. While your pies are cooling, it’s time to prepare the exquisite rose glaze. In a small bowl, combine the confectioner’s sugar, milk, and the all-important rose water or extract. Whisk vigorously until the mixture is smooth, thick, and pourable. The consistency should be runny enough to drizzle elegantly but thick enough to cling to the pies. Adjust with a tiny bit more milk or sugar if needed.
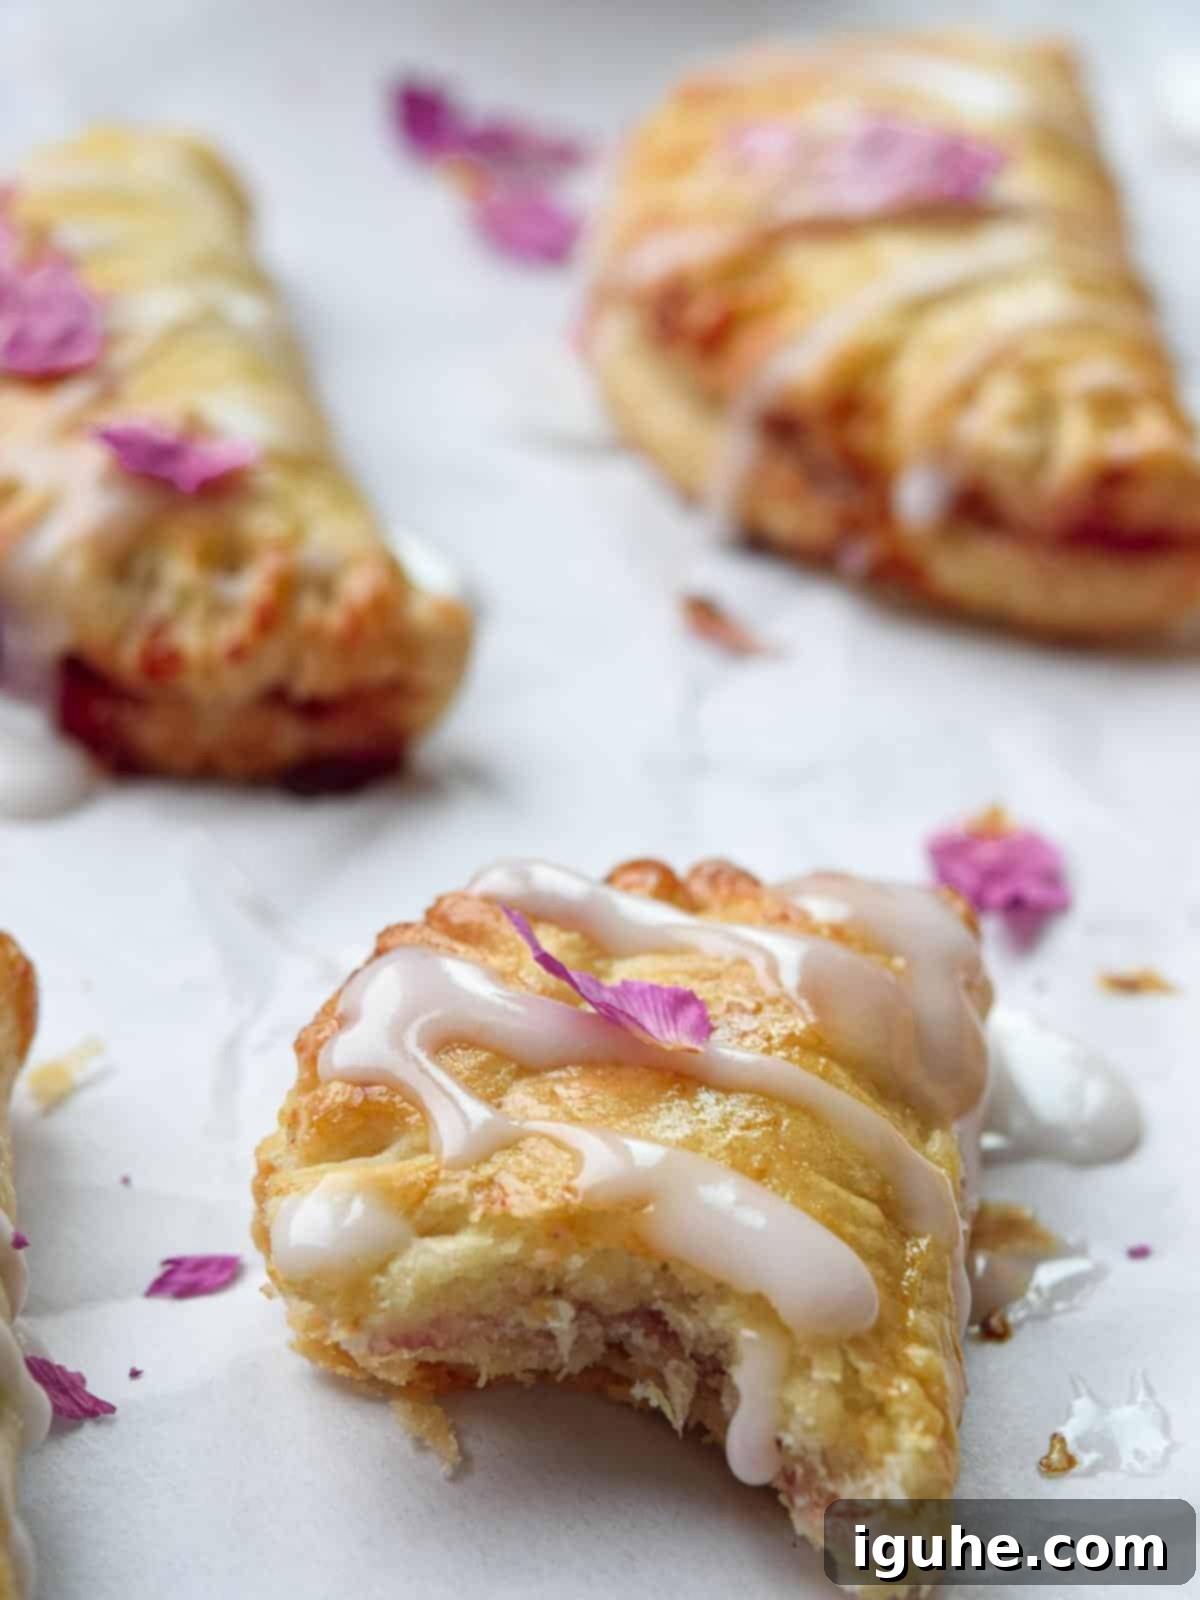
When the pies are thoroughly cooled, gently drizzle the rose glaze over each one. For an extra touch of visual charm and aromatic delight, sprinkle a few culinary rose petals on top of the glaze if you choose to use them. The glaze will set quickly, creating a beautiful finish. Serve immediately to enjoy their fresh-baked goodness, or store them for later. These Strawberry Mini Pies with Rose Glaze are now ready to be savored!
Make It Your Own: Customizing Your Mini Pies
This recipe provides a fantastic base, but don’t hesitate to unleash your creativity and make these mini pies uniquely yours! The beauty of baking lies in experimentation. Below is a list of ideas to inspire your own delicious flavor combinations and customizations:
- Experiment with Different Jams: Strawberry is classic, but why stop there? Feel free to swap it out for other fruity favorites. Imagine the tart sweetness of raspberry jam, the juicy burst of blueberry, or the unique, slightly tangy profile of rhubarb jam. You could even create a varied batch, offering a delightful assortment of different jam fillings for your guests to choose from.
- Add Color to Your Icing: For an extra touch of charm and a subtle visual cue to the strawberry filling, add a tiny drop of red or pink food coloring to your glaze. Alternatively, a small amount of raspberry or strawberry jam can be swirled into the icing for a natural, fruity pink hue and an added layer of fruit flavor.
- Amplify the Rose Flavor: If you are a true lover of rose and desire a more pronounced floral note, consider adding an extra drop (or two, depending on potency and personal preference) of rose water directly to your strawberry jam mixture before filling the pies. This will infuse both the filling and the glaze with that captivating rose essence, creating a more cohesive floral experience.
- Skip the Glaze for a Different Texture: For those who prefer a less sweet, more rustic top, you can easily skip the rose glaze. Instead, before baking, sprinkle the tops of your egg-washed mini pies with a generous pinch of demerara sugar. This will create a wonderfully crunchy, caramelized sweet crust that offers a delightful textural contrast.
- Introduce a Pinch of Spice: Elevate your jam filling with a warming hint of spice. A tiny pinch of ground cinnamon pairs beautifully with strawberry, adding depth and coziness. For a more exotic and aromatic twist, consider a whisper of cardamom, which complements both strawberry and rose exquisitely.
Storage Tips & Making Ahead for Freshness and Convenience
These delightful strawberry mini pies are not only delicious but also remarkably convenient when it comes to storage and preparation in advance. Here’s how to keep them fresh and enjoy them whenever a craving strikes:
Storing Baked Mini Pies:
Once your mini pies are baked and the rose glaze has fully set, they store beautifully at room temperature. Place them in an airtight container, separating layers with wax paper or parchment paper to prevent the glaze from sticking. Stored on the counter, they will remain fresh and delicious for up to 3 days. If you live in a warm, humid climate or prefer a firmer glaze, you can also store them in the refrigerator. The cooler temperature will help the icing maintain its integrity and prevent it from becoming too soft or melting. Just be aware that refrigeration can slightly alter the texture of the pie crust, making it a little less flaky, but they will still be incredibly tasty.
Making Pie Dough in Advance:
One of the best ways to simplify your baking day is to prepare the pie dough ahead of time. This step saves a significant amount of effort when you’re ready to assemble and bake. You have two excellent options:
- Refrigerate (Short-Term): The prepared pie dough disk can be stored in the refrigerator for up to 3 days. After forming it into a disk, wrap it tightly in plastic wrap to prevent it from drying out or absorbing refrigerator odors. When you’re ready to use it, let it sit at room temperature for about 10-15 minutes to soften slightly, making it easier to roll out.
- Freeze (Long-Term): For even longer storage, the pie dough can be frozen for up to 3 months. Again, flatten the dough into a disk, wrap it thoroughly in multiple layers of plastic wrap, and then place it in a freezer-safe plastic bag. Label it with the date. When you’re ready to bake, transfer the frozen dough to the refrigerator to thaw overnight. Once thawed, you can proceed with rolling and shaping as usual.
Preparing the components in advance means you can whip up a batch of these charming mini pies with minimal effort when the mood strikes, or when unexpected guests arrive!
📝Expert Baking Secrets for Flawless Mini Pies
When making the pie crust, the temperature of your ingredients is paramount. Always ensure your butter is cubed and as cold as possible, and your water is ice cold. This meticulous attention to temperature prevents the butter from fully integrating into the flour. Instead, it creates tiny pockets of butter within the dough. As these pockets melt during baking, they release steam, which pushes up the layers of dough, resulting in that incredibly light, airy, and irresistible flaky texture. Furthermore, do not skip chilling the dough after mixing and again after shaping. This step helps the gluten relax, preventing the crust from shrinking, and crucially, keeps the butter firm. Everything needs to be cold before hitting the hot oven to guarantee those magical flaky layers!
Frequently Asked Questions (FAQ) About Strawberry Mini Pies
Here are some common questions you might have about making these delightful mini pies:
Absolutely! While homemade pie crust is easy to make and will undoubtedly yield the flakiest, most superior crust, using a good quality store-bought pie crust is a fantastic option if you’re looking to save time and effort. Just make sure to use a brand you trust for flavor and texture. Follow the package instructions for baking, but adjust based on the mini pie size.
While jam provides a consistent sweetness and thick texture that prevents leaking, you can use fresh strawberries. If using fresh, dice them finely and toss them with a teaspoon of sugar and a quarter teaspoon of cornstarch or flour to absorb excess moisture. This will help prevent the filling from becoming too watery and leaking out during baking. Keep the quantity to ½ tablespoon per pie.
Several factors contribute to preventing leaks: 1) Don’t overfill the pies – stick to ½ tablespoon of jam. 2) Ensure the edges are firmly crimped with a fork all around. You want a good seal. 3) Make sure your jam isn’t too runny. If it is, you can gently simmer it on the stovetop for a few minutes to thicken it before using. 4) Chilling the pies before baking also helps the dough seal and hold its shape.
Yes, you can! Substitute the all-purpose flour in the pie crust recipe with a high-quality 1:1 gluten-free baking flour blend (ensure it contains xanthan gum). You might need to adjust the amount of ice water slightly, as gluten-free flours can absorb liquids differently. The instructions for the filling and glaze remain the same.
Rose water gives these pies their signature delicate floral flavor. If you don’t have it, you can omit it and still have delicious strawberry mini pies. For a different floral note, you could try a tiny drop of orange blossom water or a hint of vanilla extract in the glaze for a more classic flavor. Just be mindful that the unique rose flavor will be absent.
More Delicious Strawberry Recipes to Explore
If you’ve enjoyed the sweet allure of strawberries in these mini pies, you’re in for a treat! Strawberries are incredibly versatile, lending their vibrant flavor to a wide array of dishes. Here are a few more strawberry-centric recipes that are sure to delight your palate and perhaps inspire your next kitchen adventure:
- Mixed Berry Granola
- Strawberry Salad with Goat Cheese
- Strawberry Balsamic BLT
- Small Batch Strawberry Rhubarb Jam
Did you make this recipe? We would absolutely love to hear about your experience! Please take a moment to leave a ⭐⭐⭐⭐⭐ rating and a thoughtful comment right below the recipe card. Your feedback is invaluable to us and other bakers. If you capture a photo of your beautiful creation, don’t forget to tag us on Instagram @brunchandbatter. We can’t wait to see your mini pies!
📖Recipe Card: Strawberry Mini Pies with Rose Glaze

Strawberry Mini Pies with Rose Glaze
Pin Recipe
Equipment
-
3½ or 4-inch cookie or biscuit cutter or drinking glass of the same size
-
large baking sheet
-
food processor
-
rolling pin
Ingredients
Pie Crust
- 1¼ cup all-purpose flour
- 1 tablespoon white granulated sugar
- ¼ teaspoon kosher salt
- ½ cup cold unsalted butter, cut into cubes 8 oz or 1 stick
- 3-5 tablespoon ice water
Strawberry Filling
- 6 tablespoon strawberry jam
Egg Wash
- 1 large egg
- 1 teaspoon water
Rose Glaze
- ⅓ cup confectioner’s (powdered sugar)
- 2 teaspoon milk
- ⅛ teaspoon rose water or rose extract
- culinary rose petals for decorating optional
Instructions
-
Preheat the oven to 400°F (200°C). Line a large baking sheet with parchment paper and set aside.
-
In a food processor, combine the all-purpose flour, white granulated sugar, and kosher salt. Pulse a few times to blend. Add the cold unsalted butter (cut into cubes) and pulse 5-6 more times until the mixture resembles coarse crumbs. (If you don’t have a food processor, place the dry ingredients in a large bowl and use a pastry cutter or two forks to cut in the butter until coarse crumbs form).1¼ cup all-purpose flour, 1 tablespoon white granulated sugar, ¼ teaspoon kosher salt, ½ cup cold unsalted butter, cut into cubes
-
Add 3 tablespoons of ice water and pulse until just combined. Add up to 2 more tablespoons of ice water, one at a time, pulsing after each addition, just enough to make fine crumbs that start to pull away from the sides of the processor and form a crumbly dough. The dough should stick together when pinched.3-5 tablespoon ice water
-
On a lightly floured surface, turn out the dough and gently knead a few times until it comes together into a cohesive ball. Flatten it into a disk, wrap tightly in plastic wrap, and refrigerate for at least 30 minutes. Once chilled, roll the dough into a roughly 10-12 inch circle, about ⅛ inches thick.
-
Using a 3.5 or 4-inch cookie cutter, cut circles from the dough. Dip the cutter in flour after each cut to prevent sticking. Gather the dough scraps, gently re-roll them, and cut more circles until you have about 12 circles in total.
-
Lay out your dough circles on the prepared baking sheet. Place ½ tablespoon of strawberry jam in the center of each circle. Be careful not to overstuff, as the jam will leak out during baking if there’s too much.6 tablespoon strawberry jam
-
Fold each circle in half over the jam. Using the tines of a fork, firmly crimp the edges together to seal the pies securely. Place the assembled pies back in the refrigerator for about 15 minutes to firm up. While they chill, prepare your egg wash by whisking the large egg and 1 teaspoon water together.1 large egg, 1 teaspoon water
-
Remove the pies from the fridge and brush the tops with the egg wash. Bake for 15-22 minutes, or until they are beautifully golden brown on top. Let the pies cool completely on a wire rack before icing. While the pies are baking and cooling, make the rose glaze (see instructions below).
-
Once completely cooled, generously drizzle each mini pie with the prepared rose icing. For an extra touch of elegance, sprinkle with culinary rose petals if desired. Serve immediately or store for later enjoyment.culinary rose petals for decorating
Rose Glaze Instructions
-
In a small bowl, whisk together the confectioner’s sugar, milk, and rose water or rose extract until smooth. The glaze should be thick but still runny enough to drizzle easily. Add a tiny bit more milk for a thinner glaze or more powdered sugar for a thicker one, if needed.⅓ cup confectioner’s (powdered sugar), 2 teaspoon milk, ⅛ teaspoon rose water or rose extract
Notes
Make Ahead: The pie dough is excellent for preparing in advance. Flatten the dough into a disk, wrap it well in plastic wrap, and store it in a freezer-proof plastic bag for up to 3 months. Thaw in the refrigerator overnight before use. For shorter make-ahead, store the dough in the fridge for up to 3 days.
Nutrition*
*Nutrition information is provided as a courtesy and is an estimate only. Nutrition information can vary depending on many factors, such as products used, measurements and substitutions, therefore it is recommended that you obtain nutritional calculations based on your own finished recipe.
