Authentic Italian Lemon Drop Cookies: Your Guide to Bakery-Style Anginetti
Prepare yourself to bake up a batch of these exquisite Italian Lemon Drop Cookies, just like the beloved treats you find at your favorite local Italian bakery. These delightful cookies boast a wonderfully cakey, tender texture infused with bright, zesty lemon flavor, baked to a perfect light golden brown. Once cooled, each cookie is generously enrobed in a vibrant, fresh lemon icing, creating an irresistible balance of sweetness and tang. Simply divine!

Italian lemon drop cookies are more than just a sweet treat; they are a cherished tradition, often synonymous with holiday baking in Italian-American households. Sometimes affectionately referred to as Anginetti, these delightful lemon-glazed cookies are a staple at festive gatherings, especially making their way to Easter and Christmas tables. Their delicate flavor and comforting texture evoke a sense of warmth and celebration that’s truly unique.
Why This Lemon Drop Cookie Recipe Stands Out
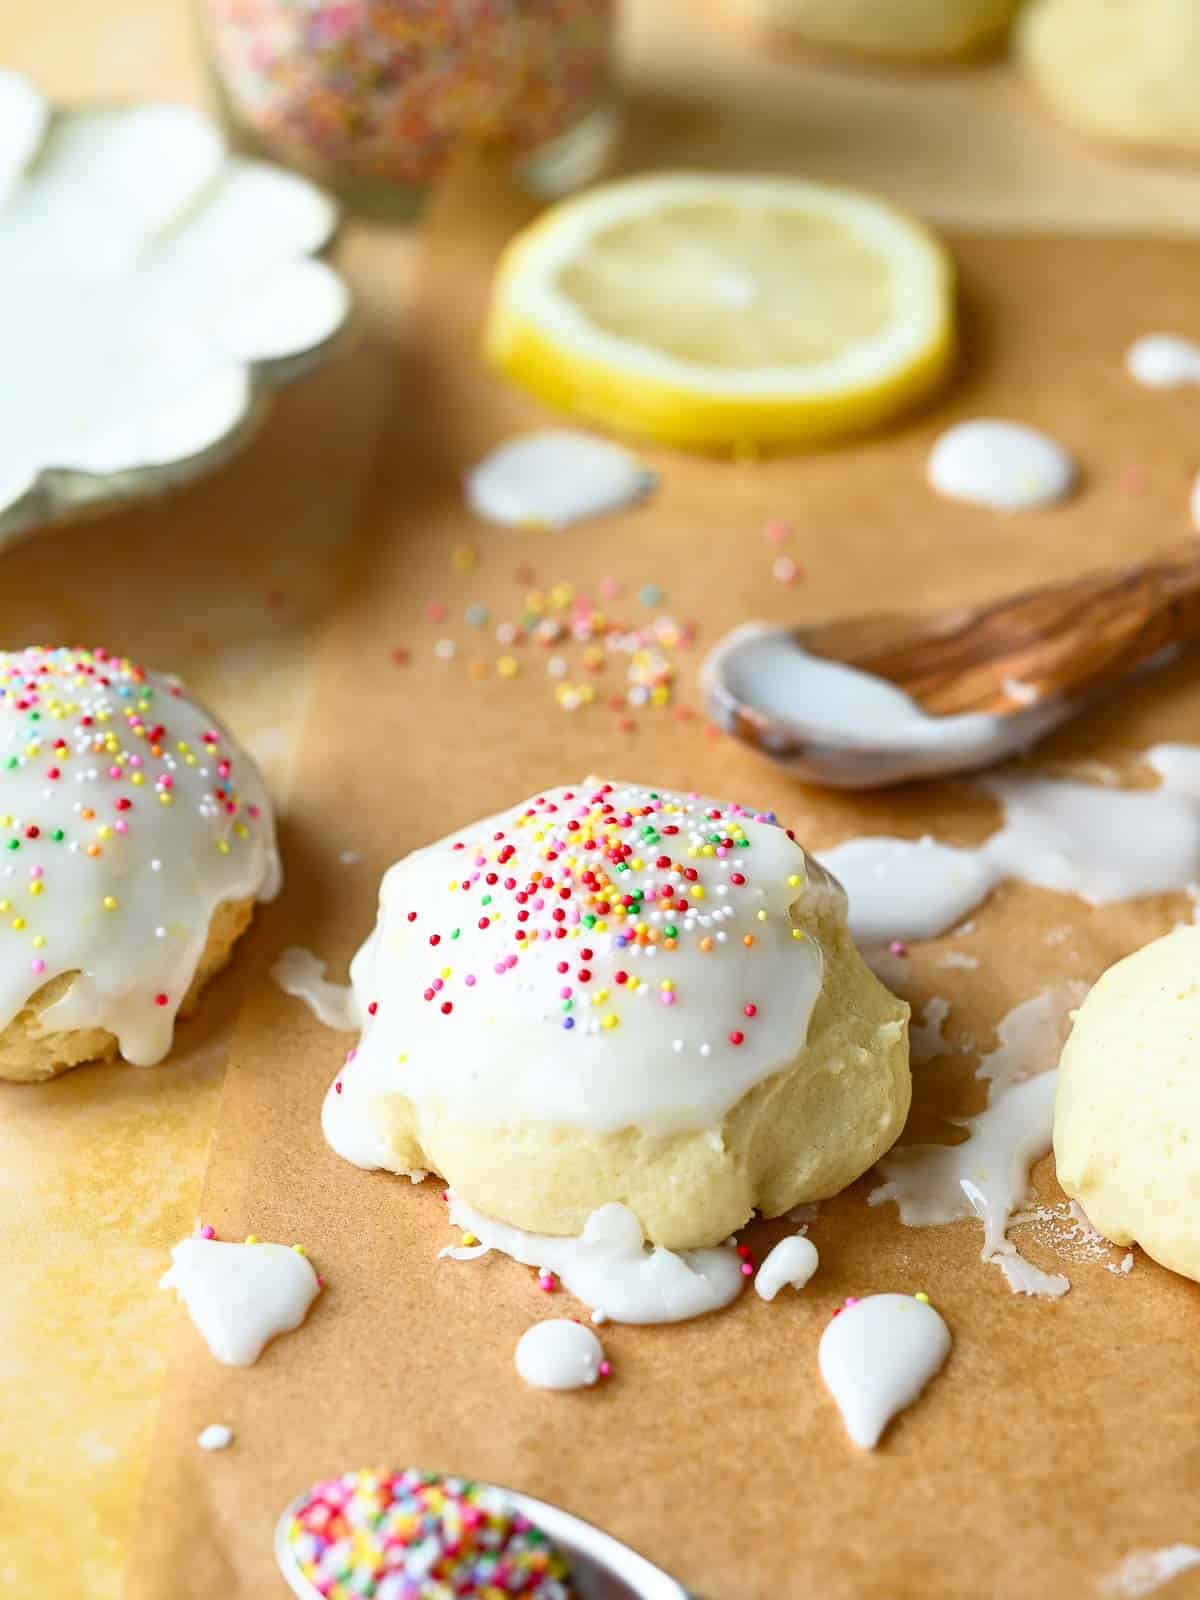
What sets these particular lemon drops apart is their incredible softness and pillowy interior, a stark contrast to some denser, drier store-bought varieties. Each bite offers a tender crumb that melts in your mouth, bursting with fresh lemon flavor. While many traditional versions are adorned with tiny, colorful sprinkles known as nonpareils, a personal preference is to enjoy them “naked,” showcasing the beautiful, shimmery, and satiny lemon icing in its pure, elegant form. This recipe ensures a cookie that is moist, flavorful, and perfectly balanced.
This cherished recipe comes from my dear friend Christine, whose culinary wisdom has enriched countless gatherings. Her Italian lemon cookies have always been a favorite, and I’m thrilled to share her secret with you. Make a batch for your own friends and family today and watch their faces light up with joy. Or, if you’re looking for another Italian lemon delight, try my delicious Italian lemon pizzelles!
A Brief History of Italian Lemon Cookies
Italian cookies, especially those like Lemon Drops or Anginetti, hold a special place in Italian culinary traditions, particularly during holidays and celebrations. These cookies are believed to have originated in Southern Italy, where lemons are abundant and a staple in many dishes. The simplicity of ingredients, combined with the bright, refreshing taste of lemon, made them a popular choice for festive occasions, symbolizing purity and new beginnings, especially around Easter. Over generations, Italian immigrants brought these recipes to new lands, where they became beloved staples in Italian-American communities. Each family often has its own slightly varied version, passed down through grandmothers and mothers, making them a true testament to family heritage and the joy of shared food.
Whether called Lemon Drops, Anginetti, or simply “Italian cookies,” their essence remains the same: a light, fluffy cookie with a distinctive lemon tang, often finished with a sweet glaze. This recipe honors that tradition, bringing you a taste of Italy right to your kitchen.
[feast_advanced_jump_to]
Essential Ingredients for Perfect Lemon Drop Cookies
To recreate these bright and flavorful cookies, you’ll need a selection of common baking ingredients, with a special emphasis on fresh lemons. Stocking up on good quality lemons will allow you to whip up these delightful treats any time the craving strikes!
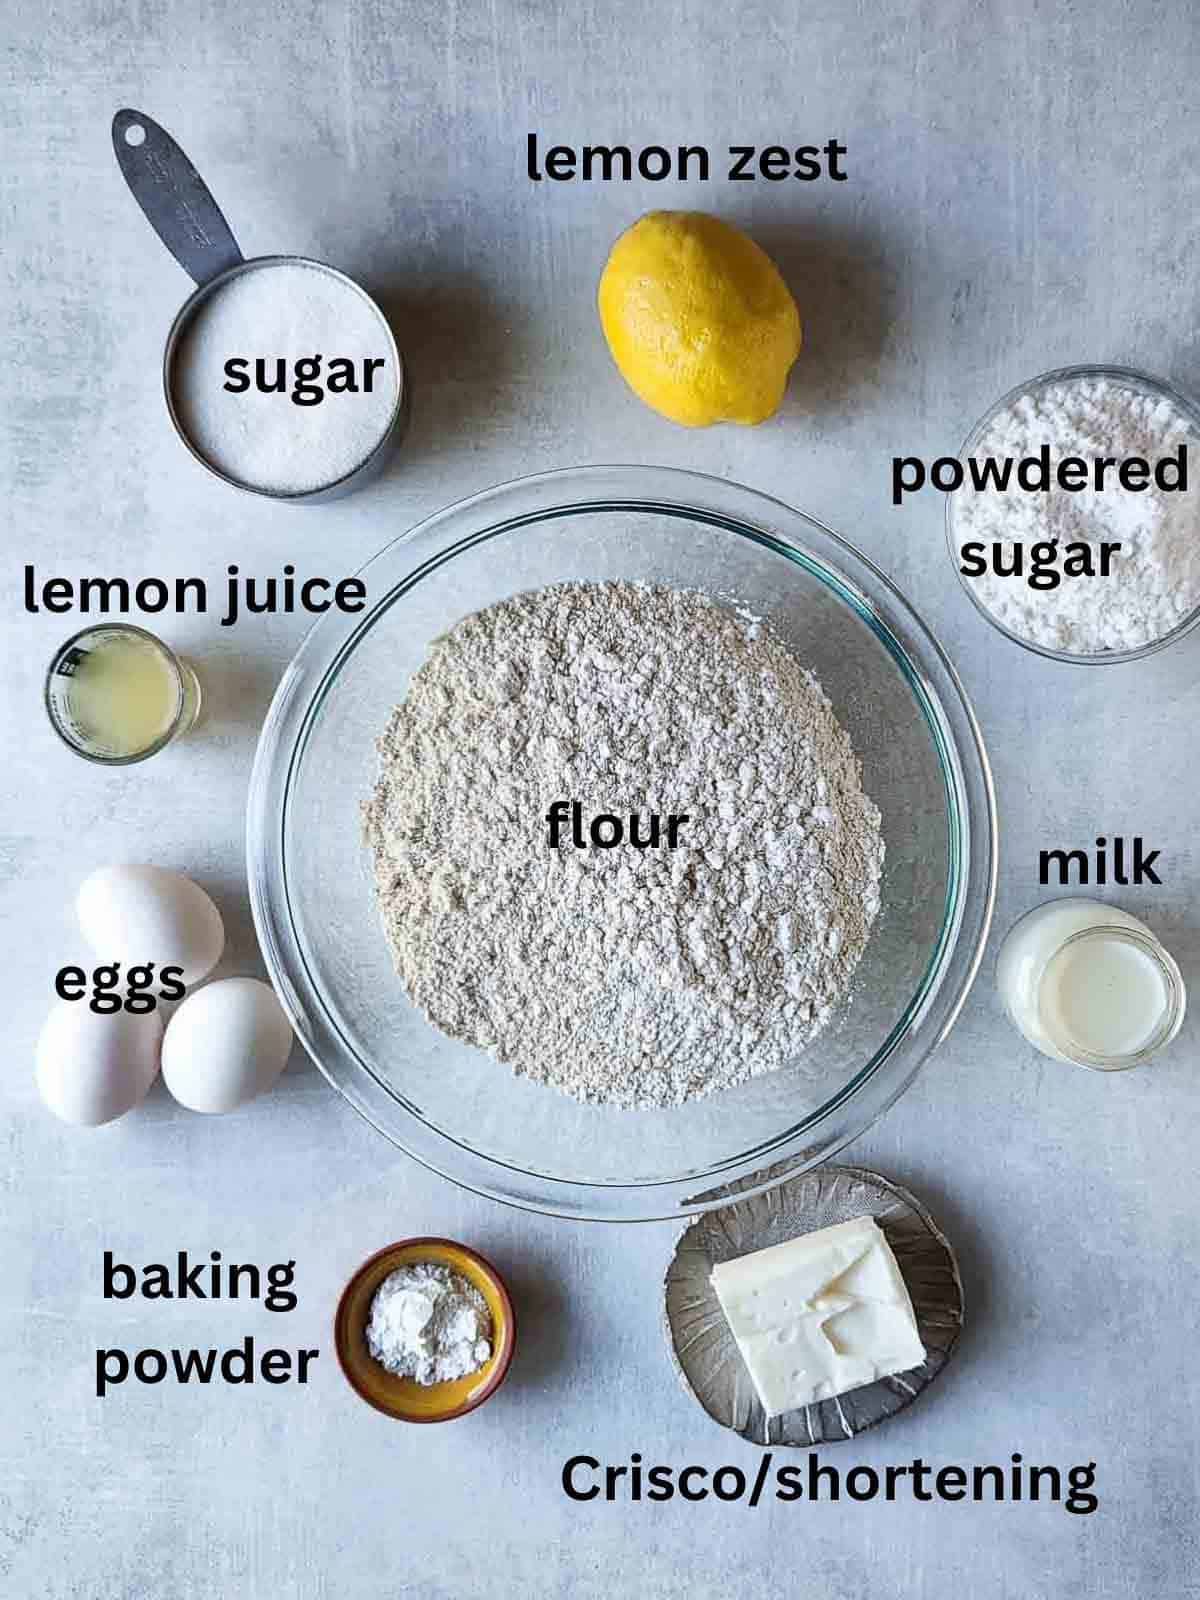
- All-Purpose Flour: The foundation of our cookies, providing structure and body.
- Baking Powder: This leavening agent is crucial for giving the cookies their characteristic soft, cake-like rise and pillowy texture.
- Granulated Sugar: Sweetens the dough and contributes to the tender crumb.
- Eggs: Act as a binder, adding richness and moisture to the cookies. Ensure they are at room temperature for better emulsion with other ingredients.
- Milk: Adds moisture and helps to create a soft, supple dough. Use room temperature milk for best results.
- Vegetable Shortening (like Crisco): Unlike butter, shortening provides a unique tenderness and helps the cookies maintain their shape without spreading too much. It’s key to that classic cakey texture.
- Fresh Lemons: You’ll need both the bright zest for intense lemon flavor and fresh juice for both the cookies and the vibrant icing. Always zest your lemons before juicing them!
- Powdered (Confectioner’s) Sugar: The essential ingredient for creating that smooth, satiny lemon icing that makes these cookies so special.
- Multicolored Sprinkles (Nonpareils): Optional, but they add a festive touch and a bit of playful crunch. Look for these tiny, colorful sugar balls in the baking or sprinkles aisle of your grocery store, or find them online. These are a good example.
Crafting Your Italian Lemon Drop Cookies: A Visual Guide
Follow this detailed visual guide to bake the most delicious and tender Italian lemon cookies. For a complete list of precise measurements and step-by-step instructions, please refer to the comprehensive recipe card located further down the page.
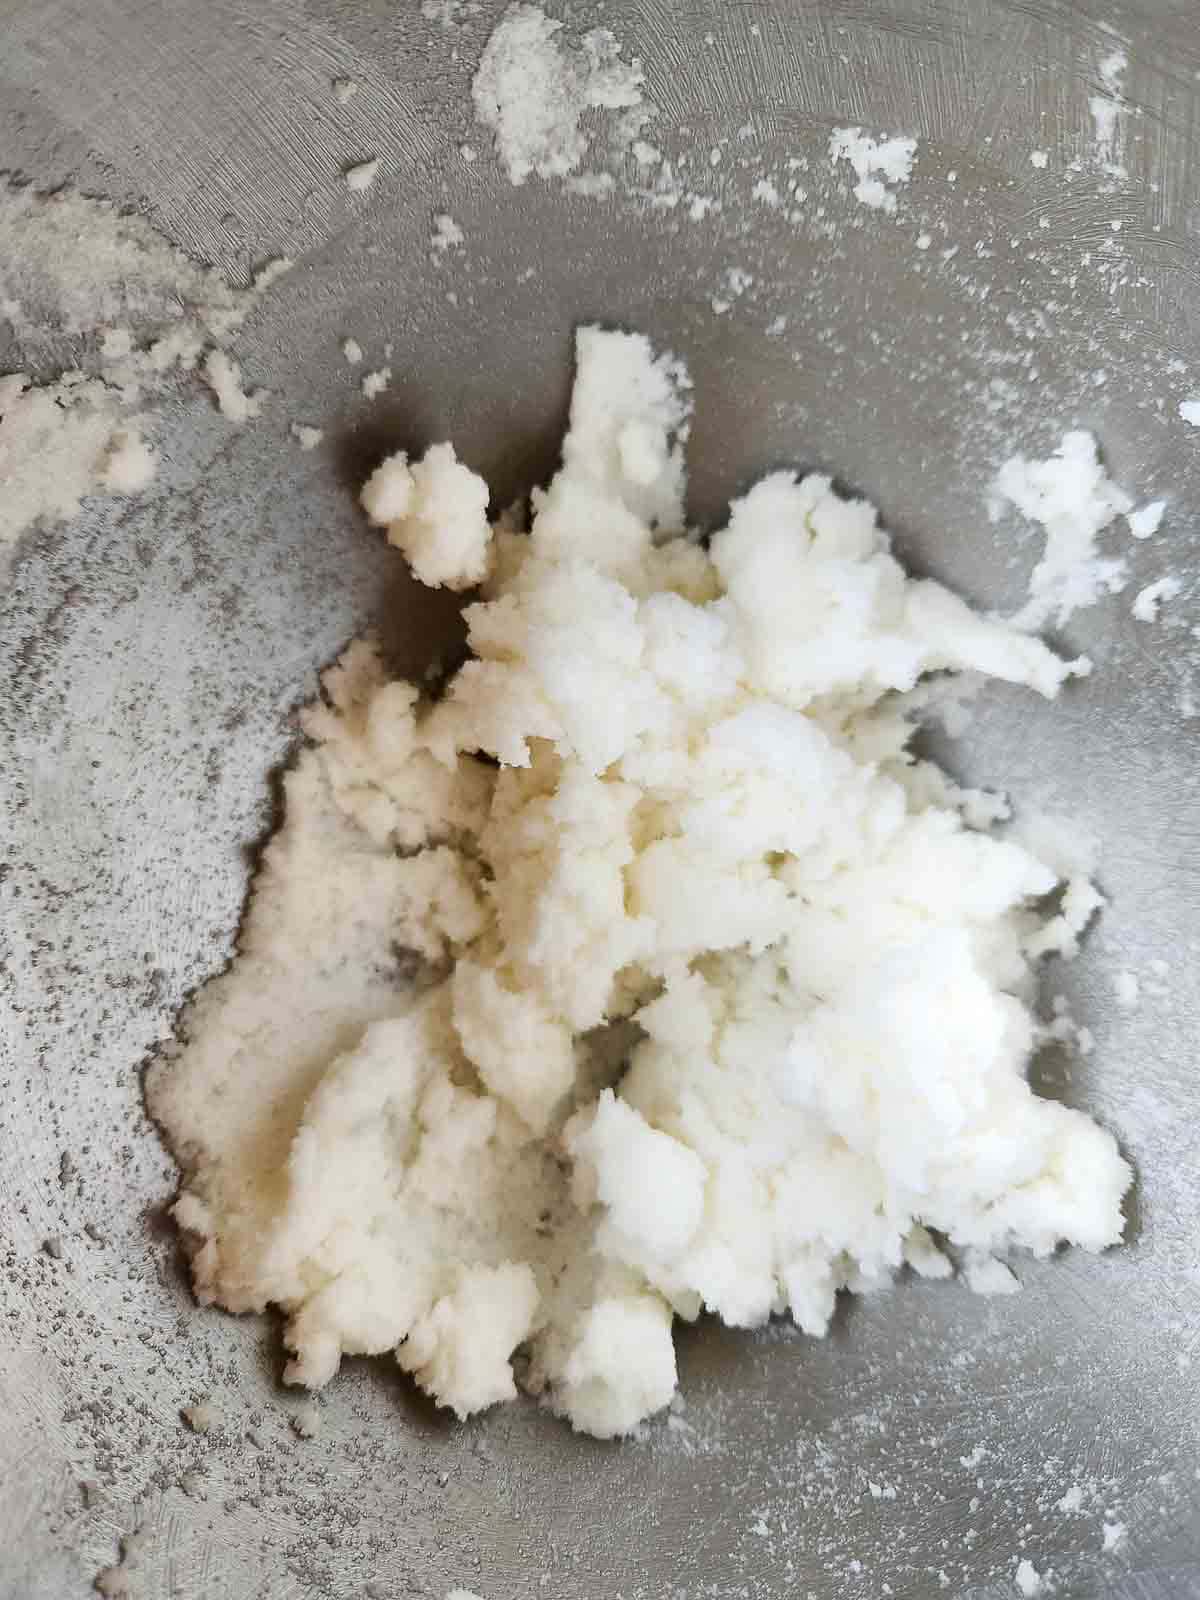
Begin by combining the flour and baking powder in a large mixing bowl; whisk them together thoroughly and set aside. In a separate electric mixer, beat the granulated sugar and vegetable shortening on medium speed until the mixture becomes light, fluffy, and pale in color, resembling freshly packed snow. This creaming step is vital for a tender cookie.
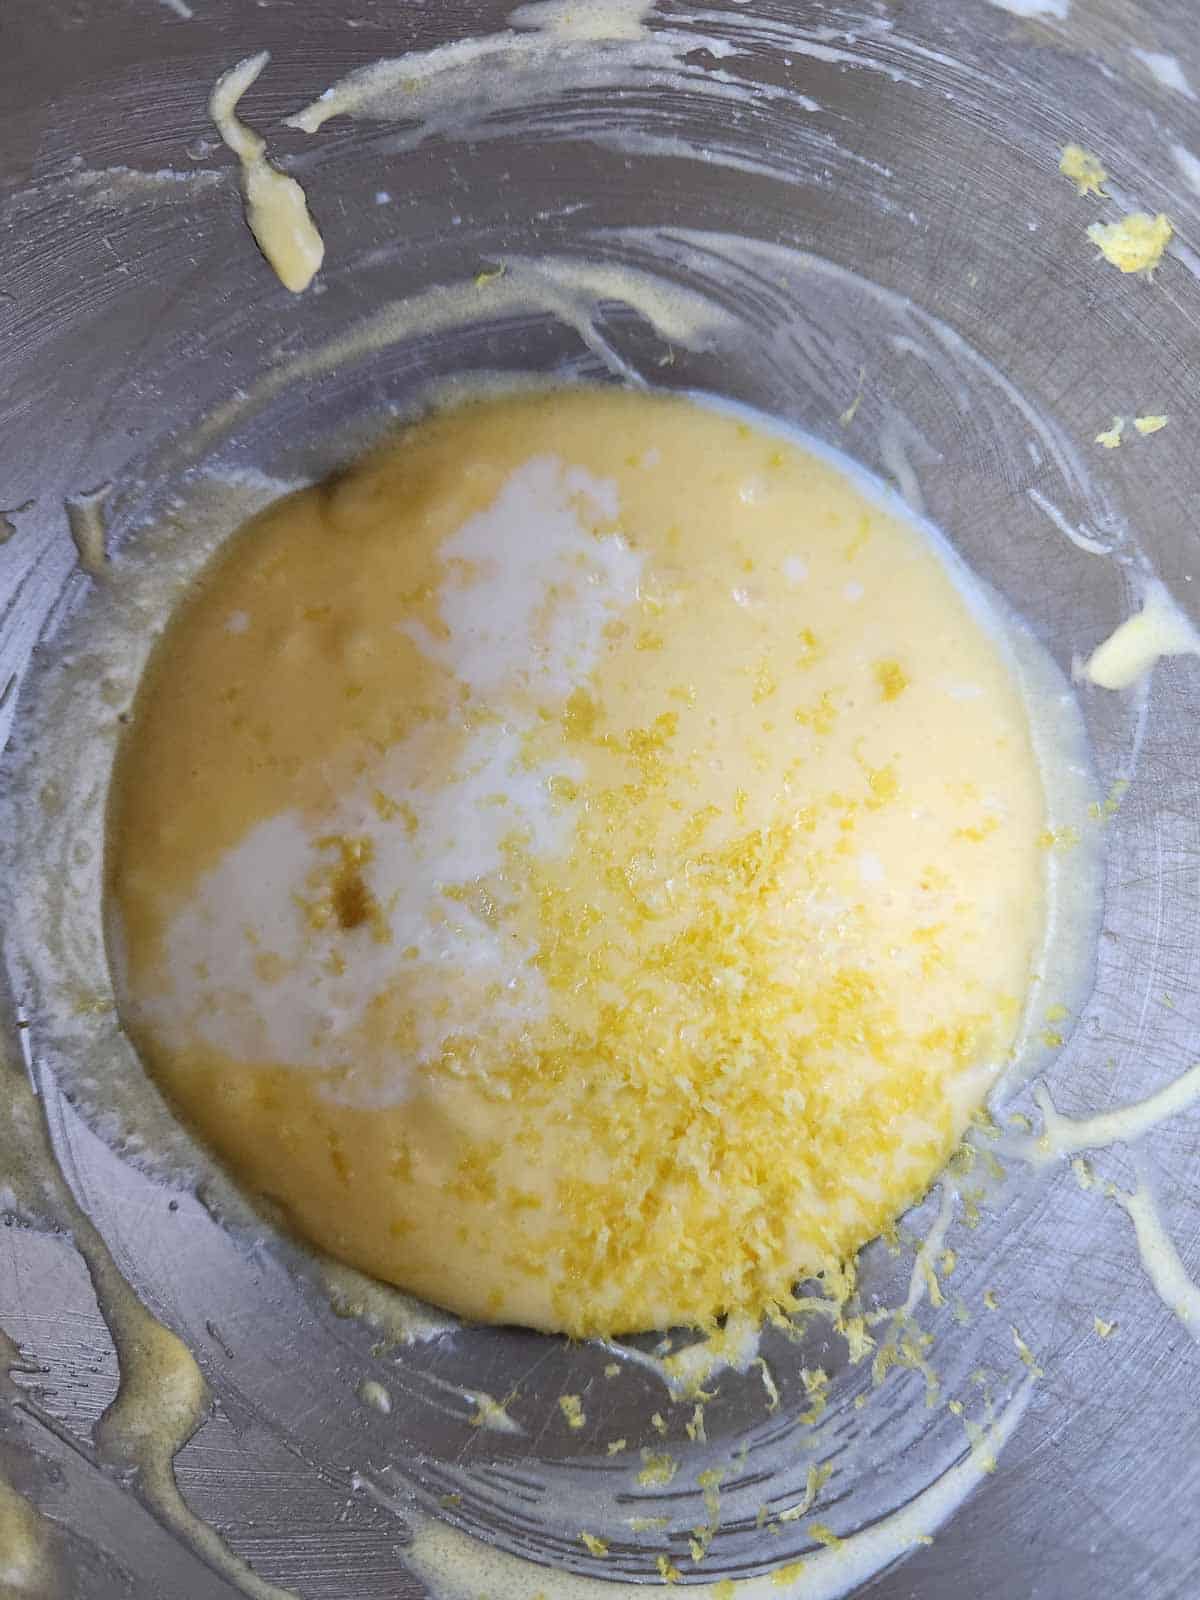
Next, crack in the eggs, one at a time, ensuring each is fully incorporated before adding the next. This helps create a smooth, emulsified batter. Once the eggs are blended, gently fold in the milk, fresh lemon juice, and aromatic lemon zest. The zest is where much of the lemon’s essential oils and intense flavor reside, so don’t skimp on it!
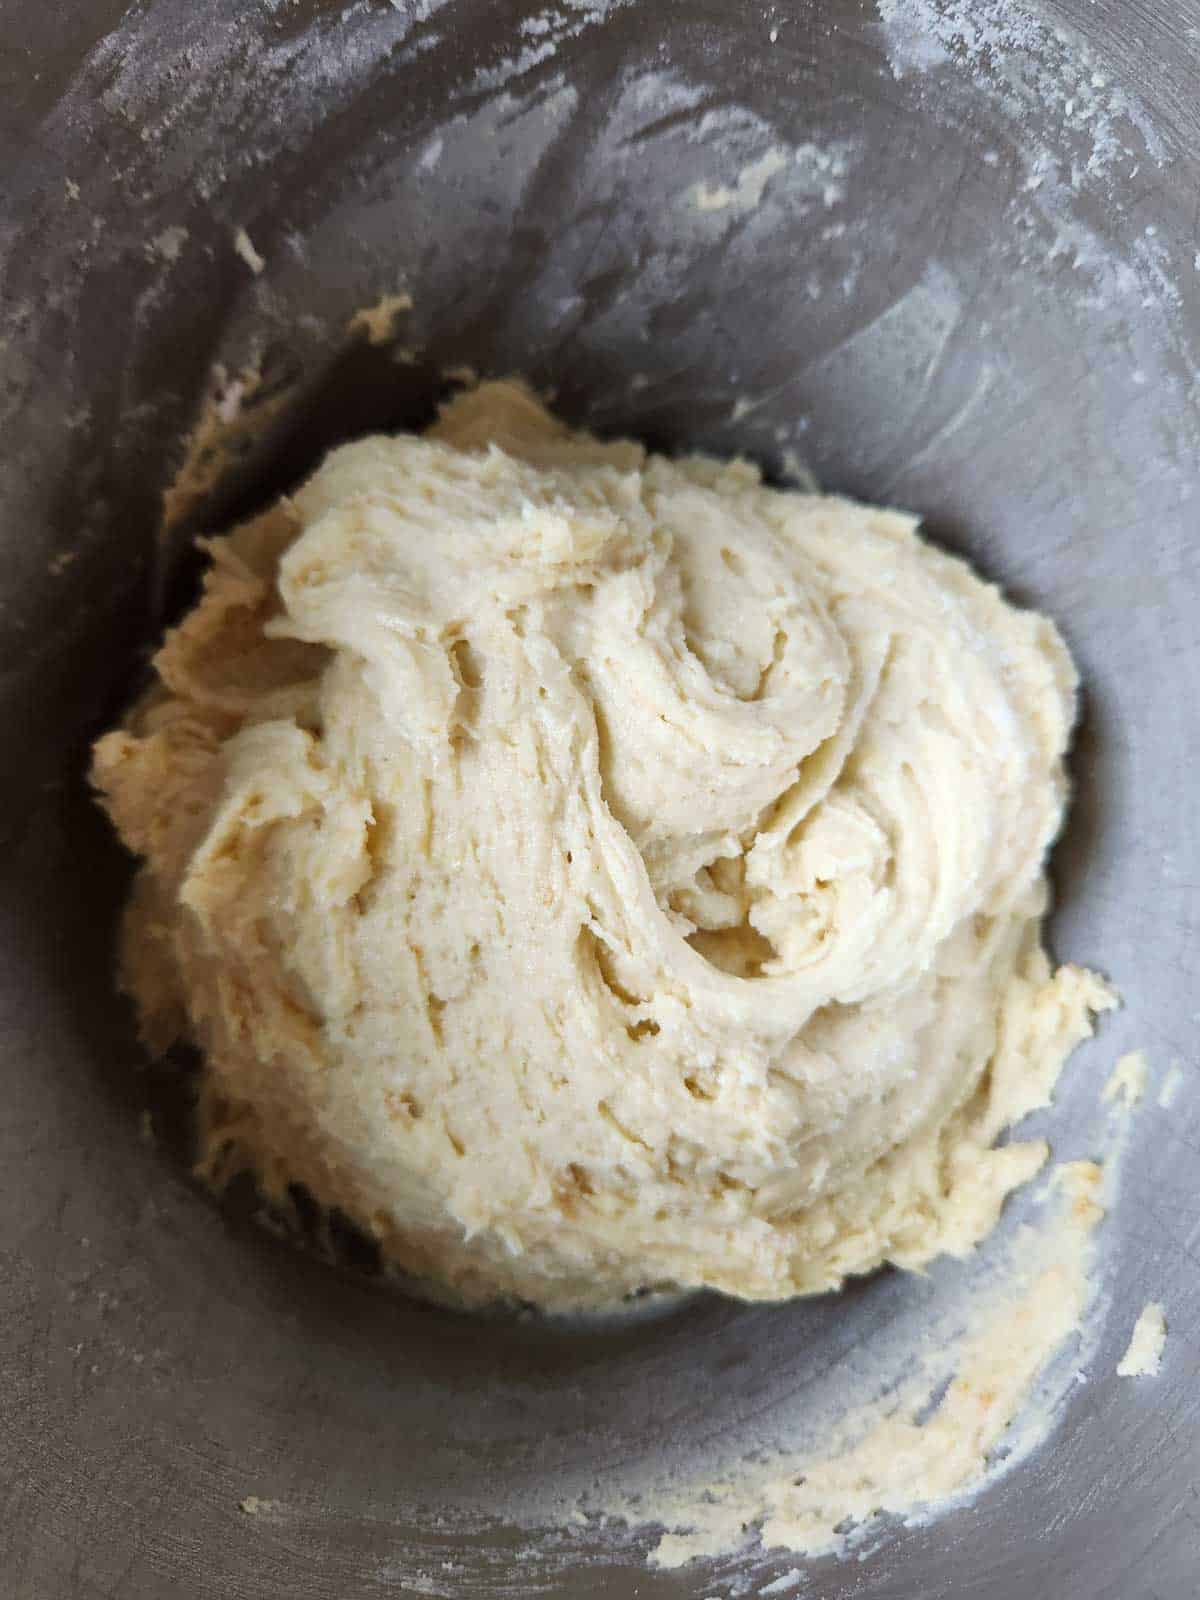
Finally, gradually add the dry ingredients (flour and baking powder mixture) to the wet ingredients. Beat on low speed until just combined and smooth, being careful not to overmix. Overmixing can develop the gluten in the flour, leading to tougher cookies. The dough should be soft and manageable.

Once your dough is ready, cover it tightly with plastic wrap or simply cover the mixing bowl and chill it in the refrigerator for at least 1 hour. This crucial step helps the shortening solidify, which will prevent the cookies from spreading too much and ensures a good rise. After chilling, pinch off small portions of dough and lightly roll them into balls, roughly the size of a golf ball. Place them about 2 inches apart on a parchment-lined baking sheet.
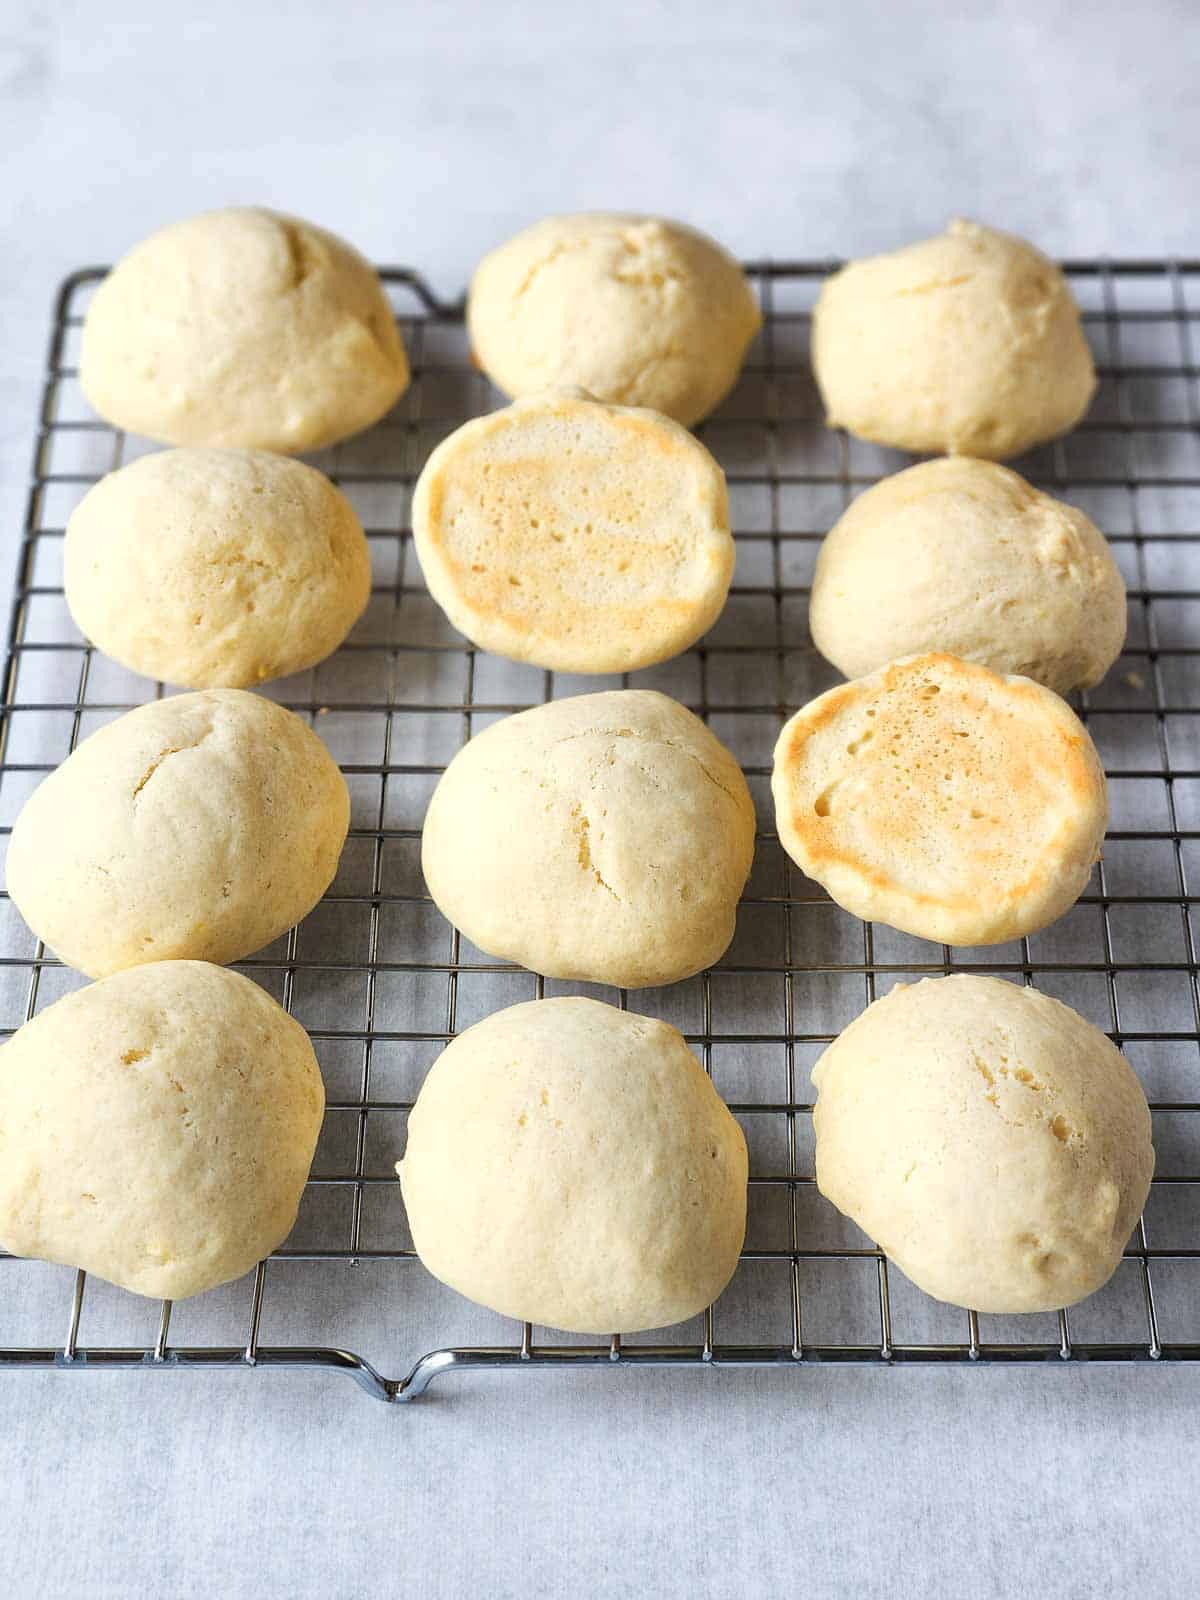
Bake the cookies for approximately 12-15 minutes in a preheated oven until they are firm to the touch when gently pressed. Crucially, the tops should remain pale and not brown, while the bottoms will develop only a very light golden hue. This ensures a soft, tender interior. Once baked, transfer the cookies to a wire rack to cool completely before moving on to the delicious icing stage.
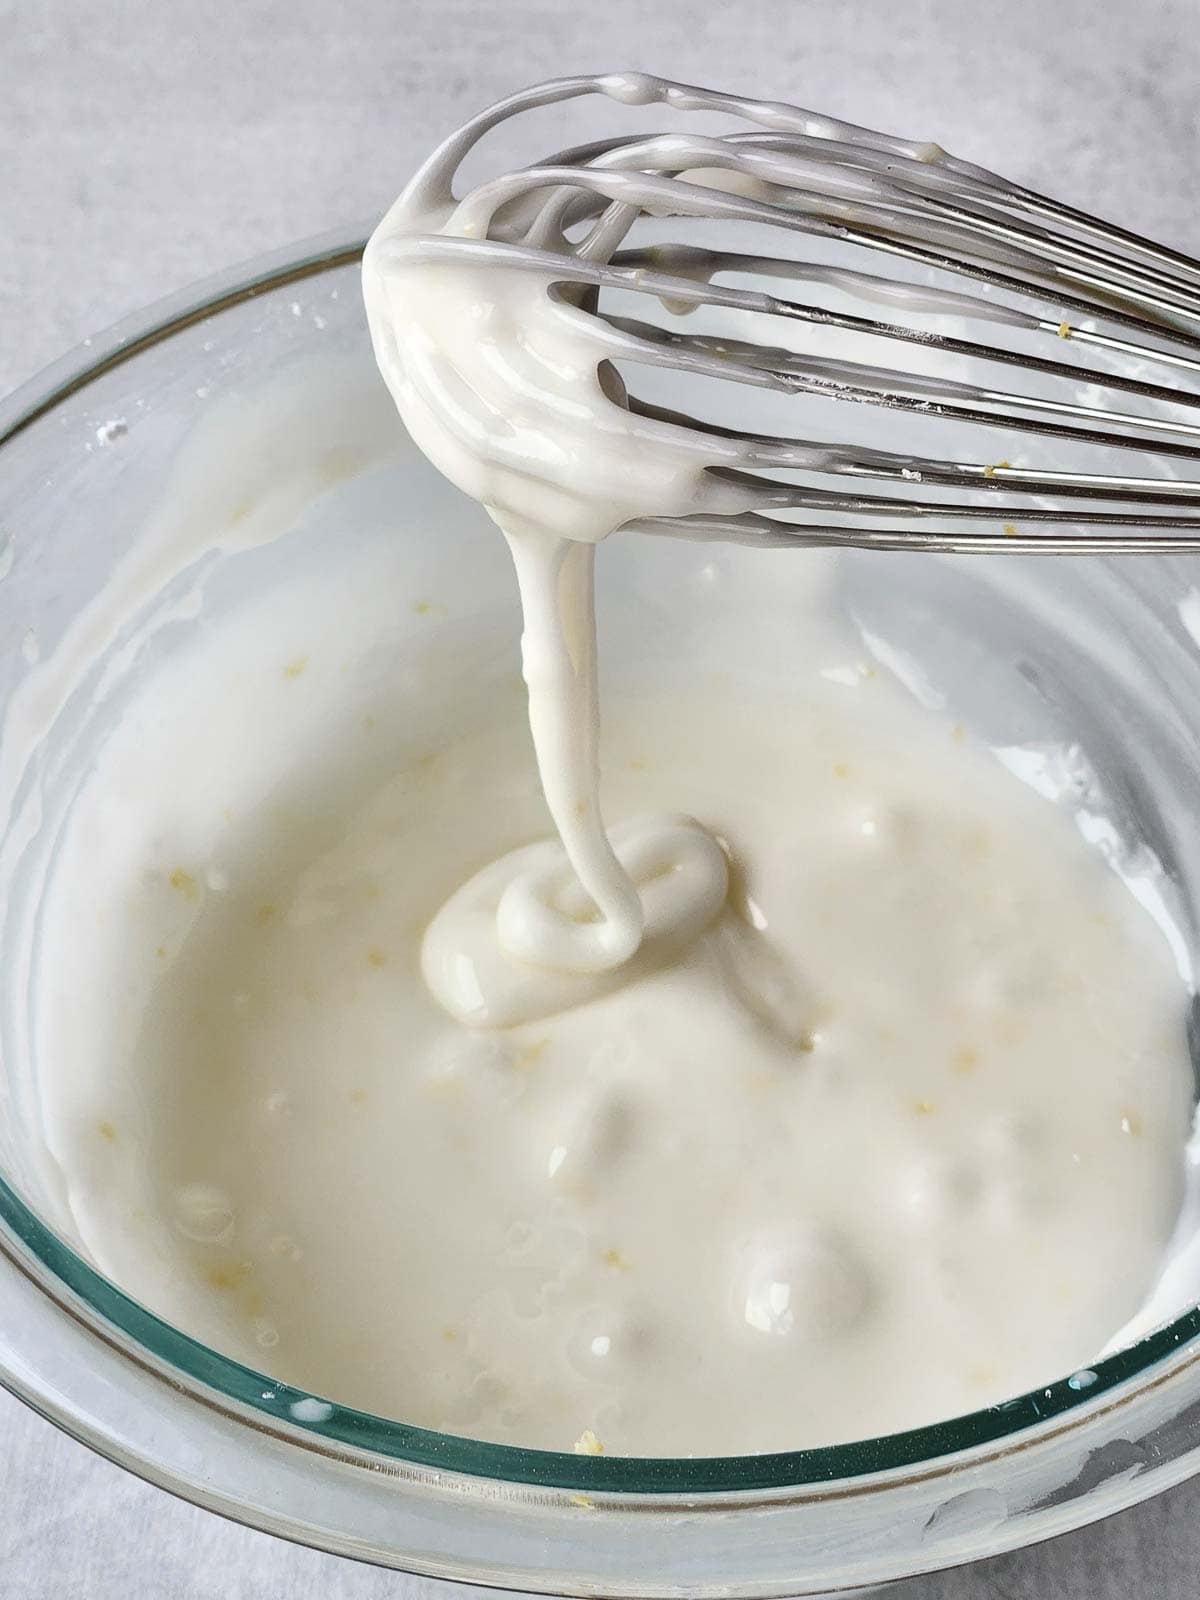
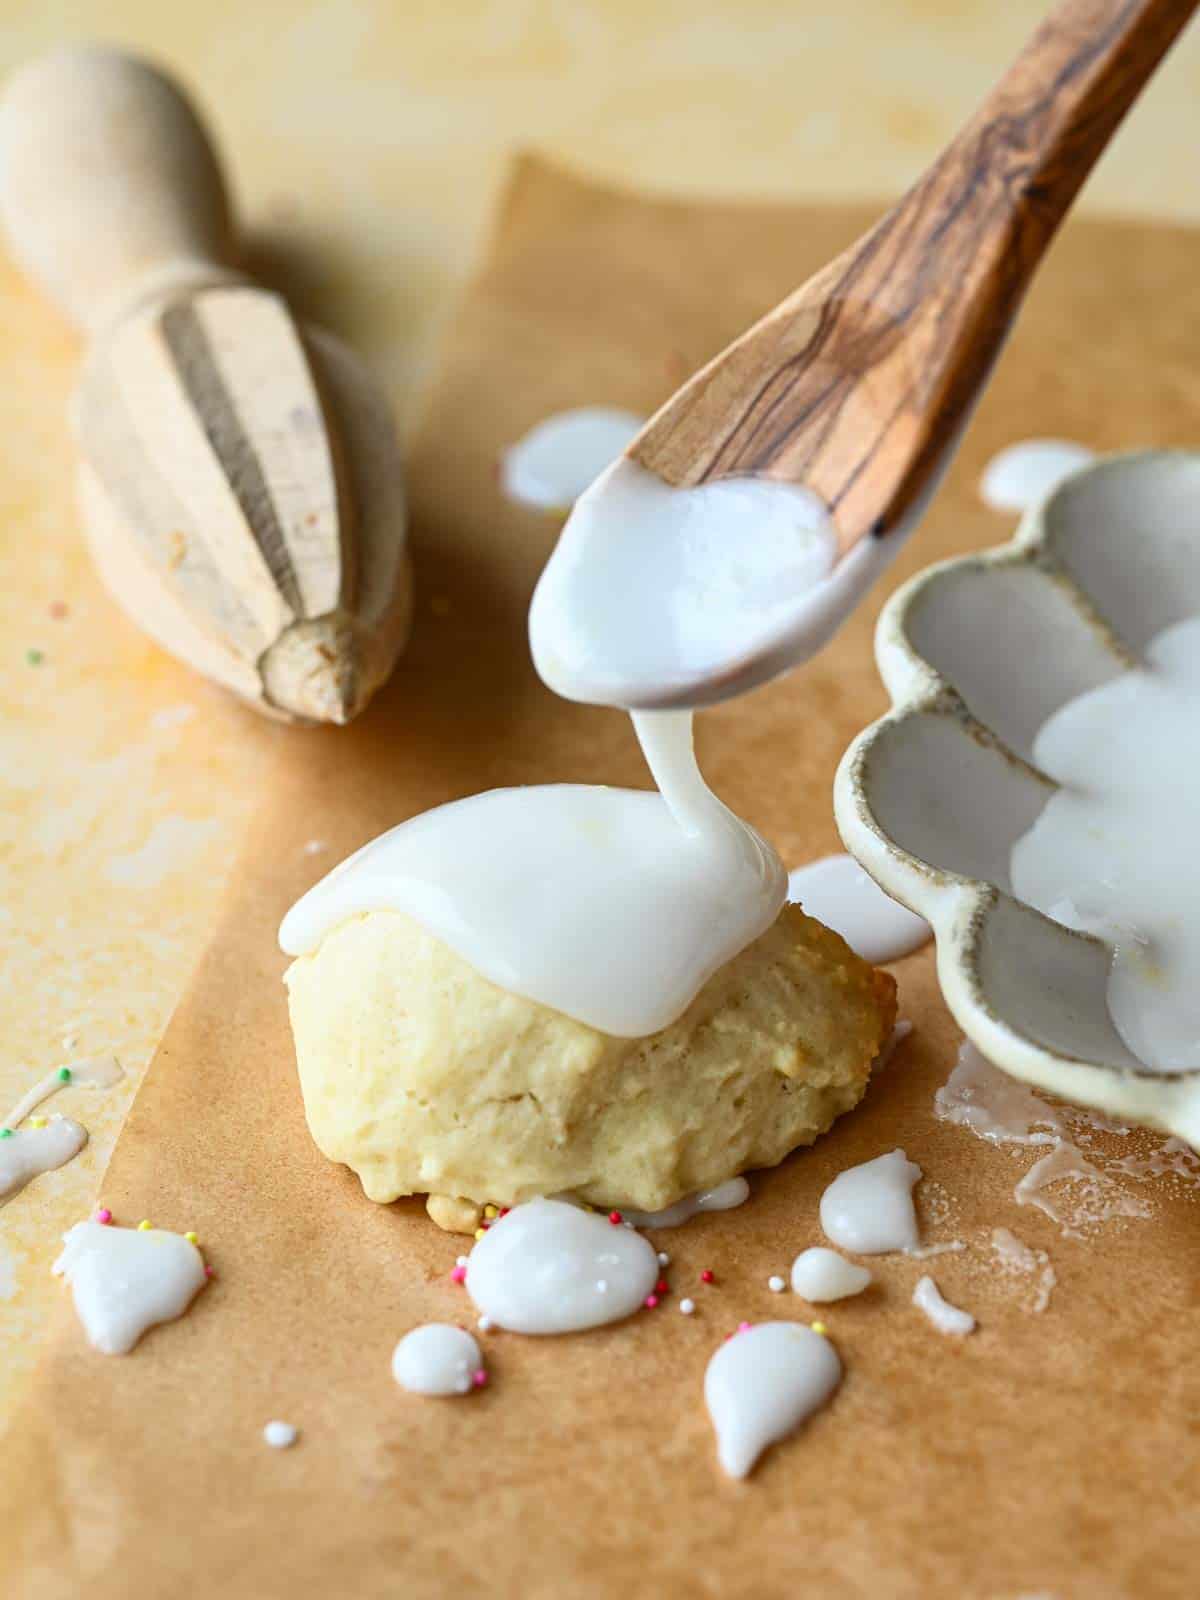
Once the cookies have cooled completely, it’s time to prepare your luscious lemon icing. The icing should be thick enough to cling to the cookies but still pourable. You can either dip the tops of the cooled cookies directly into the bowl of icing or use a spoon to generously drizzle it over each one. Let the icing set before serving, allowing it to firm up into that beautiful, satiny finish.
👩🍳 Expert Tips for Bakery-Perfect Italian Lemon Drops
- Don’t skip the resting time in the fridge. This step is absolutely critical! Chilling the dough allows the vegetable shortening to firm up, preventing the cookies from spreading too much in the oven. This results in those perfectly puffy, cakey lemon drop cookies we all love.
- Ensure room temperature ingredients for the dough. Eggs and milk should be at room temperature to ensure they emulsify properly with the shortening and sugar, creating a smooth, cohesive batter. Cold ingredients can lead to a lumpy dough and a less uniform texture.
- Measure accurately. Baking is a science! Use a kitchen scale for flour if possible, or the “spoon and level” method (spoon flour into a measuring cup and level off with a straight edge) to avoid compacting the flour, which can lead to dense cookies.
- Use a cookie scoop for consistent size. To ensure all your cookies bake evenly and look uniformly beautiful for serving, I highly recommend using a cookie scoop (a #60 scoop is ideal for this recipe). You could also weigh each ball of dough (approximately 0.5 ounces each) for ultimate consistency. This recipe yields a generous 36-40 cookies.
- Avoid overmixing the dough. Once you add the dry ingredients, mix just until combined. Overmixing develops gluten, which can make your lemon drop cookies tough instead of tender.
- Baking sheet placement matters. Avoid placing baking sheets on the very bottom rack of your oven, as this can cause the cookie bottoms to brown too quickly. Bake in the middle and/or top racks, rotating the sheets halfway through baking for even cooking. Do not bake more than two sheets at a time to prevent uneven heat distribution.
Mastering the Art of Lemon Icing
Spreading that vibrant, zesty lemon icing onto the cooled cookies is, for many, the most enjoyable part of the whole process! This is also the perfect moment to enlist the help of little (or big) kitchen assistants, as long as they don’t eat all the icing straight from the bowl (a temptation I know all too well!). If you plan to use sprinkles, make sure to add them immediately after icing each cookie, while the glaze is still wet, so they adhere properly.
The key to perfect lemon drop cookies is a THICK icing. It should be rich and opaque, clinging beautifully to the cookies. If your icing appears too runny, simply whisk in a bit more powdered sugar, a tablespoon at a time, until it reaches the desired consistency. Conversely, if your icing feels too hard to spread, add a single drop of milk or a tiny bit more lemon juice, mixing well until it becomes smoothly spreadable. Remember, the icing won’t set up immediately. Allow the iced cookies to stand at room temperature to set, or for a quicker process, you can carefully place them in the refrigerator.
Variations and Serving Suggestions
Customize Your Lemon Drop Cookies
While this classic Italian lemon drop cookie recipe is perfect as is, you can easily customize them to suit your taste or occasion:
- Citrus Swap: Replace lemon zest and juice with orange or lime for a different citrus twist. Orange Anginetti are especially popular!
- Almond Extract: Add a teaspoon of almond extract to the dough for a subtle nutty undertone, a common flavor in many Italian pastries.
- Different Sprinkles: Beyond traditional nonpareils, consider using sanding sugar for a sparkly finish, or themed sprinkles for specific holidays (e.g., green and red for Christmas, pastel for Easter).
- No Sprinkles: For a more elegant look, simply leave them with just the satiny lemon glaze. Their natural beauty is often enough.
When and How to Serve
Italian Lemon Drop Cookies are wonderfully versatile and perfect for many occasions:
- Holiday Platters: They are a must-have on any Italian holiday cookie platter, especially for Easter and Christmas.
- Coffee or Tea Time: Their light, cakey texture pairs beautifully with a warm cup of coffee or herbal tea.
- After-Dinner Dessert: A refreshing finish to any meal, whether a casual family dinner or a more formal gathering.
- Homemade Gifts: Pack them in a beautiful box or bag as a thoughtful and delicious gift for friends, neighbors, or teachers.
- Baby Showers & Bridal Showers: Their bright color and delicate flavor make them a charming addition to any celebratory spread.
Storage Tips for Freshness
To maintain the delightful freshness and tender texture of your Italian lemon drop cookies, proper storage is key. These cookies can be stored in an airtight container at room temperature for up to 5 days. For optimal flavor and texture, I recommend enjoying them within the first 2-3 days.
If you live in a particularly humid environment, or if you prefer a firmer icing, you can store the cookies in the refrigerator. This will help prevent the icing from becoming sticky or melting, though it might slightly alter the softness of the cookie dough itself. Simply bring them back to room temperature for about 15-20 minutes before serving for the best experience. You can also freeze these cookies, both before and after icing, for longer storage. Simply place them in an airtight container, separated by parchment paper, for up to 2-3 months.
Frequently Asked Questions (FAQs)
Can I use butter instead of shortening?
While you can use butter, it will change the texture of the cookies. Shortening gives these Italian lemon drops their signature cakey, soft, and somewhat puffy texture, and helps them maintain their shape without spreading too much. Butter will result in a flatter, crispier cookie. For the authentic “bakery-style” Anginetti, shortening is highly recommended.
Why are my lemon cookies flat or hard?
Flat cookies can result from several factors: not chilling the dough long enough (the cold shortening helps them hold shape), using too much flour (measure accurately!), or baking at too low a temperature. Hard cookies are usually a sign of overmixing the dough (developing too much gluten) or overbaking them. Remember, the tops should remain pale.
How do I get the best lemon flavor?
Fresh lemon zest is crucial for intense lemon flavor, as it contains essential oils. Use a microplane or fine grater to get only the yellow part of the peel, avoiding the bitter white pith. Freshly squeezed lemon juice is also vital for both the cookies and the icing. Don’t use bottled lemon juice for this recipe.
Can I make these cookies ahead of time?
Absolutely! The dough can be prepared and chilled in the refrigerator for up to 2-3 days before baking. Once baked and cooled, the cookies can be iced and stored as described above. They also freeze beautifully, allowing you to have a delicious treat ready whenever you need one.
What’s the difference between Lemon Drops and Anginetti?
These terms are often used interchangeably, particularly in Italian-American communities. “Lemon Drop Cookies” typically refer to the lemon-flavored, soft, cakey cookies with a lemon glaze. “Anginetti” is a broader term for traditional Italian glazed cookies, which can come in various shapes and flavors (often anise or lemon) but share that distinct soft texture and icing.
More Italian Delights to Explore
If you loved these lemon drop cookies, be sure to try some of my other favorite Italian dishes and desserts! They are perfect for expanding your culinary repertoire or for your next holiday gathering.
- Easy Lemon Pizzelle
- Panettone French Toast
- Espresso Coffee Panna Cotta
- Easy Italian Pignoli Cookies
Did you make this recipe? I would love to hear about it! Please leave a ⭐⭐⭐⭐⭐ rating with a comment right below the recipe card. If you snap a photo of your creation, don’t forget to tag me on Instagram @brunchandbatter.
📖 Recipe

Italian Lemon Drop Cookies
Prevent your screen from going dark
Pin Recipe
45 minutes
15 minutes
1 hour
30 minutes
2 hours
30 minutes
Dessert
Italian
36
cookies
95
kcal
Equipment
-
large bowl
-
stand mixer
-
baking/cookie sheets
Ingredients
-
4
cups
all-purpose flour -
4
teaspoon
baking powder -
1
cup
white granulated sugar -
½
cup
vegetable shortening (Crisco) -
3
large
eggs, room temperature -
½
cup
milk, room temperature -
2
teaspoon
lemon zest
from about 1 medium lemon -
2
tablespoon
freshly squeezed lemon juice
zest the lemon first before squeezing -
4-6
tablespoon
multicolored sprinkles
optional
Lemon Icing
-
3
cups
powdered (confectioner’s) sugar -
4
teaspoon
lemon zest
from about 1 large lemon -
2
tablespoon
freshly squeezed lemon juice
zest the lemon first before squeezing -
2-4
tablespoon
milk; more if needed
Instructions
-
Line 2-3 large baking sheets with parchment paper. If you don’t have parchment paper, you can use 2-3 ungreased cookie sheets.
-
In a large bowl, sift together the flour and baking powder. Set aside.4 cups all-purpose flour,
4 teaspoon baking powder -
In an electric mixer fitted with the paddle attachment, beat the sugar and shortening at medium speed, until light and fluffy (it will resemble freshly packed snow).1 cup white granulated sugar,
½ cup vegetable shortening (Crisco) -
Beat in eggs, one at a time, until well blended.3 large eggs, room temperature
-
Stir in the milk, lemon juice and lemon zest.½ cup milk, room temperature,
2 teaspoon lemon zest,
2 tablespoon freshly squeezed lemon juice -
Add the flour mixture, and beat until combined and smooth.
-
Gather the dough into a ball, wrap it in plastic wrap, and refrigerate for 1 hour. I cover my mixing bowl and place the whole bowl in the fridge.
-
Preheat the oven to 350℉. Remove the dough from the refrigerator. Pinch off a piece of the dough (either by hand or using a cookie scoop- #60, or weighing the dough, about 0.5 ounces each). The dough should be roughly the size and shape of a golf ball. Place on the prepared baking sheet 1.5 inches apart.
-
Place the sheets in the middle and/or top rack of the oven (no more than 2 sheets at a time- so they bake evenly). Bake for 12-15 minutes, until firm when pressed, but not brown on top. The bottoms should be lightly golden brown. When ready, remove from the oven to a wire rack to cool.
-
Let cookies completely cool before frosting, or you can put them in the refrigerator to speed up the cooling process.
-
When the cookies have cooled, dip or spoon the icing over the tops. Place them over foil or wax paper to avoid any mess. If using sprinkles, add them right after you ice them. Allow to set and enjoy!4-6 tablespoon multicolored sprinkles
Lemon Icing
-
Whisk the lemon juice, zest, and powdered sugar. Add milk, 1 tablespoon at a time to thin slowly until it reaches a very thick, but spreadable consistency.3 cups powdered (confectioner’s) sugar,
4 teaspoon lemon zest,
2 tablespoon freshly squeezed lemon juice,
2-4 tablespoon milk; more if needed
Notes
- Don’t skip the resting time in the fridge. You want the shortening to be cold for a good rise in the oven and to prevent excessive spreading.
- Avoid the bottom rack of the oven, as it will cause the bottoms to brown too quickly while the tops remain undercooked. Bake in the middle/top racks of the oven, rotating halfway through for best results and even baking. Don’t bake more than 2 sheets at a time to prevent uneven baking due to crowded ovens.
- Your icing should be THICK and opaque. If it’s too runny, gradually add more powdered sugar until desired consistency is reached. If the icing is too hard to spread, add a single drop of milk or a tiny bit more lemon juice. The icing won’t set up immediately; allow the cookies to sit at room temperature to set, or place them in the fridge to speed up the process. I like a LOT of icing on my cookies, so I often make a double batch of the glaze.
Nutrition*
Serving:
1
cookie
Calories:
95
kcal
Carbohydrates:
19.4
g
Protein:
2.1
g
Fat:
2.2
g
Saturated Fat:
0.8
g
Cholesterol:
29
mg
Sodium:
20
mg
Potassium:
1042
mg
Fiber:
0.7
g
Sugar:
6.5
g
Calcium:
442
mg
Iron:
1
mg
*Nutrition information is provided as a courtesy and is an estimate only. Nutrition information can vary depending on many factors, such as products used, measurements and substitutions, therefore it is recommended that you obtain nutritional calculations based on your own finished recipe.
Have you tried this recipe?
Leave a comment below and share a photo on Instagram. Tag @brunchandbatter or hashtag it with #brunchandbatter
