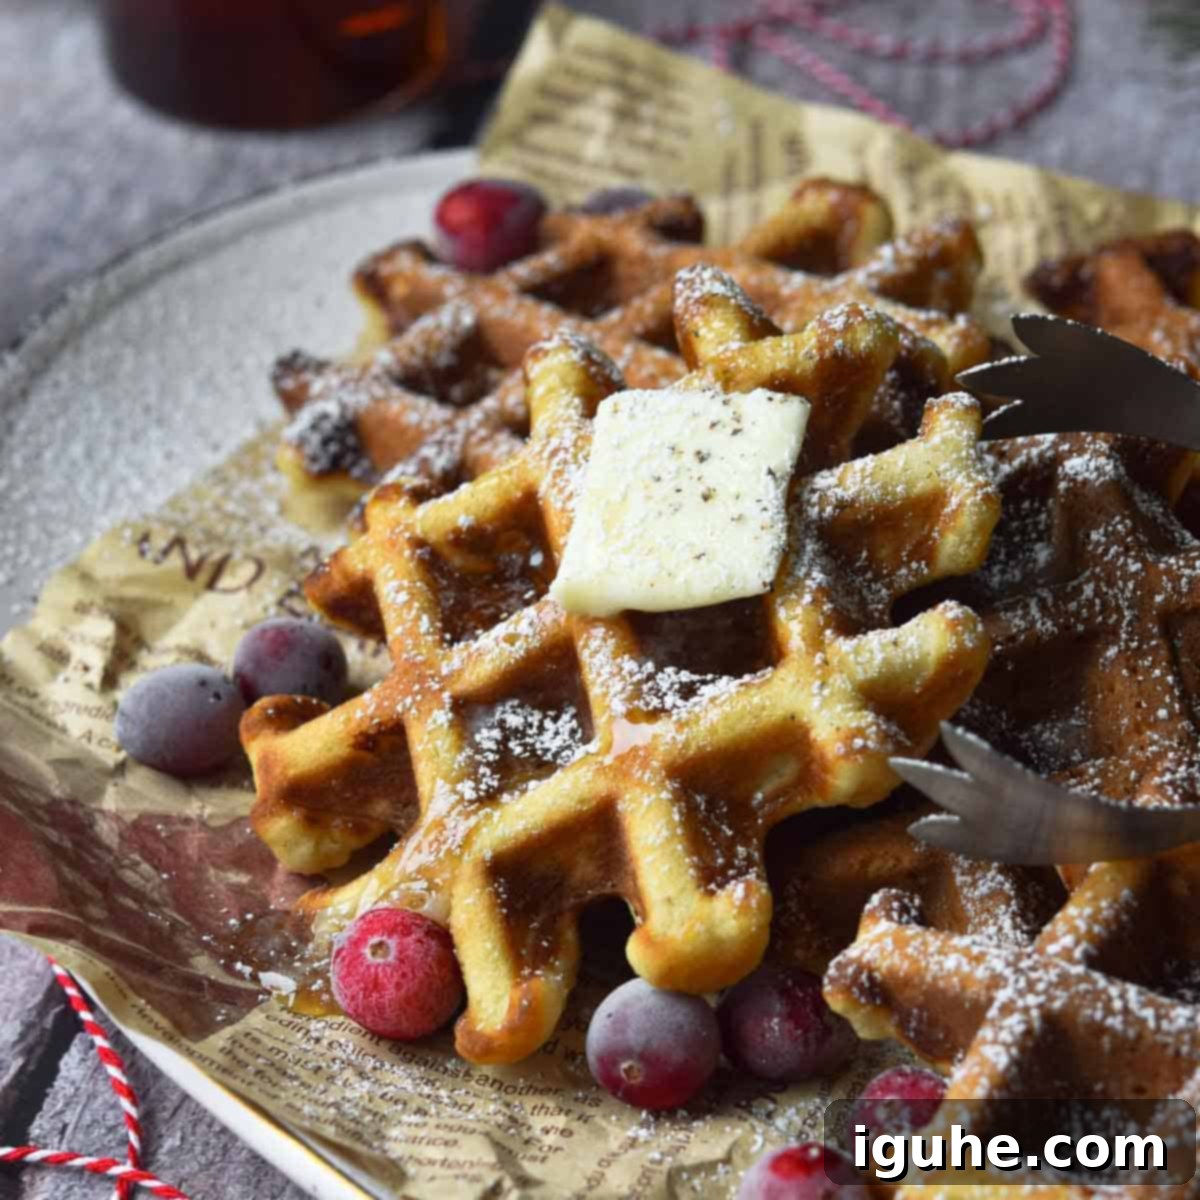
Easy Spiced Eggnog Waffles: The Ultimate Holiday Breakfast Recipe
There’s something inherently magical about eggnog during the holiday season. Its rich, creamy texture and warm, inviting spices instantly transport you to cozy winter mornings and festive gatherings. While it’s a beloved drink on its own, have you ever considered transforming this yuletide favorite into a truly unforgettable breakfast treat? Enter these easy spiced eggnog waffles – a delightful twist on a classic that will quickly become a cherished part of your holiday traditions.
Crafted with the convenience of store-bought eggnog, this recipe simplifies holiday baking without sacrificing flavor. Each waffle is infused with the comforting essence of cinnamon and freshly grated nutmeg, creating a breakfast experience that’s both festive and incredibly satisfying. Imagine a stack of golden, crispy waffles, fluffy on the inside, glistening with maple syrup, and carrying the subtle, sweet aroma of your favorite holiday beverage. It’s the perfect way to kick off Christmas morning, a New Year’s brunch, or any chilly winter day that calls for a touch of seasonal cheer.
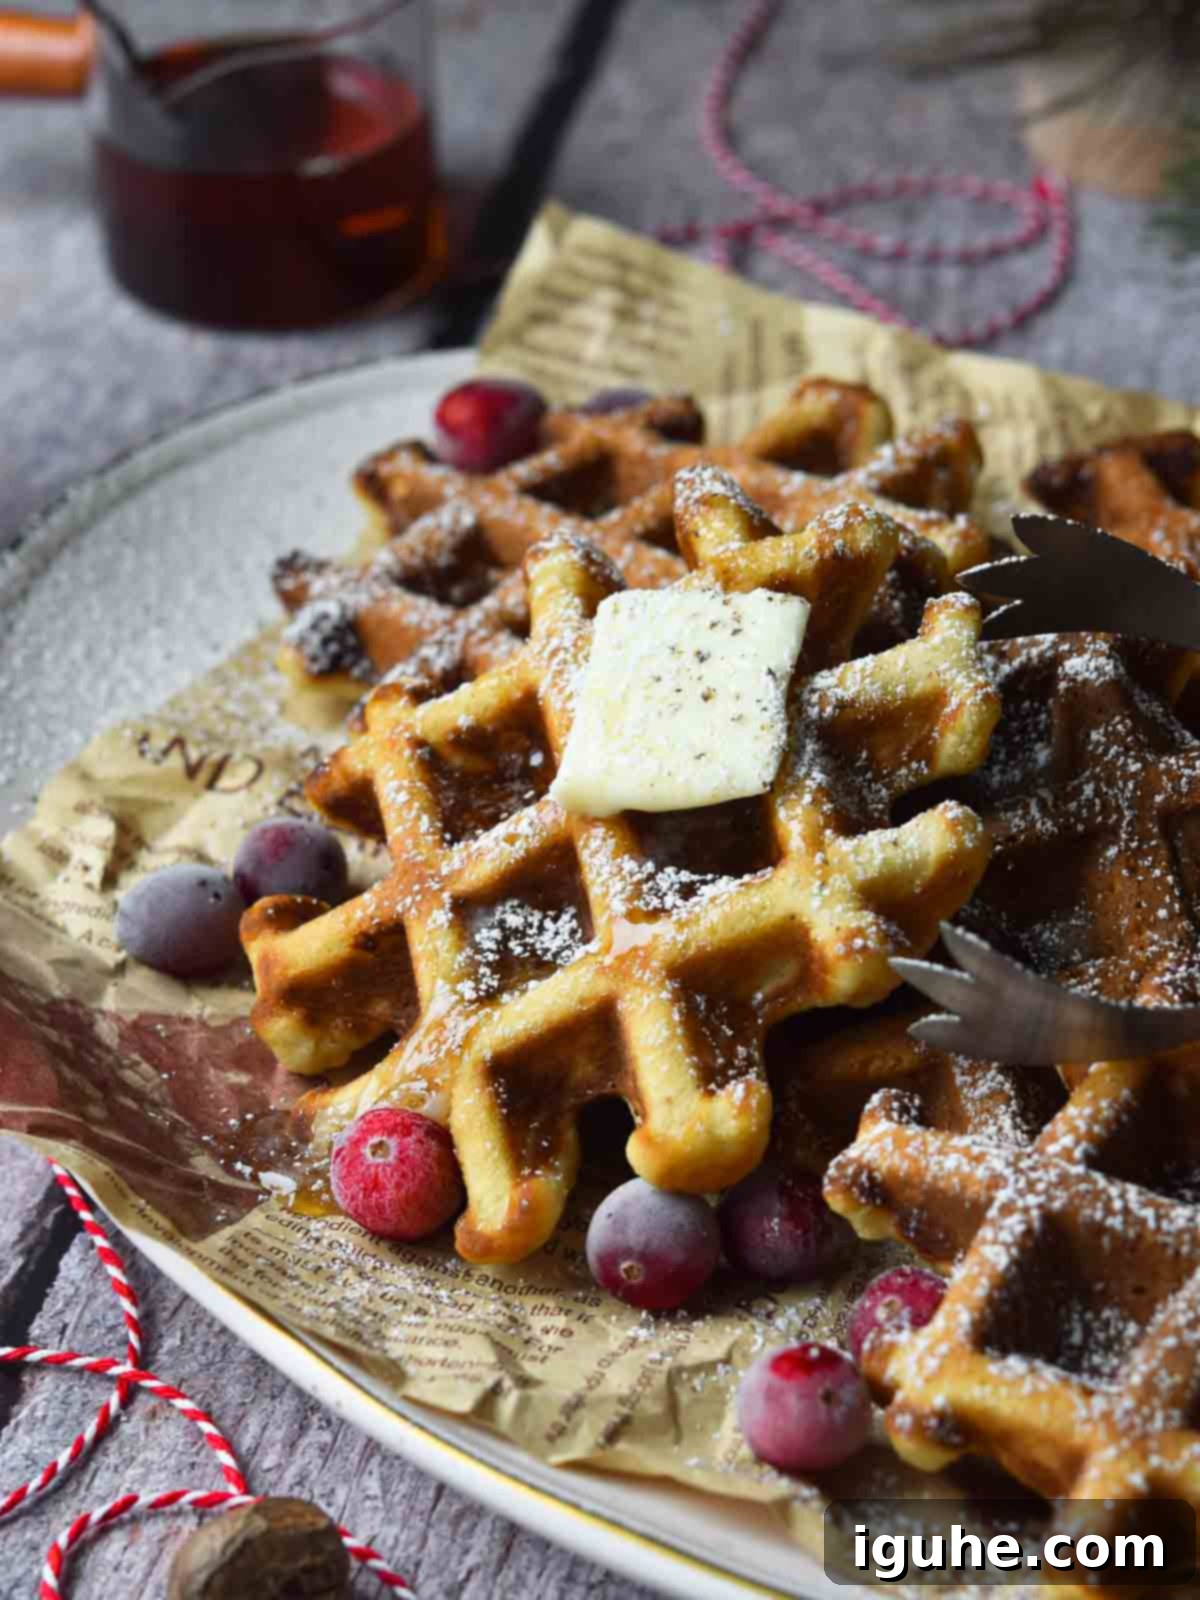
As Christmas carols fill the air and New Year celebrations draw near, eggnog is undoubtedly making its grand return to your holiday table this year. Instead of just sipping it, why not elevate your breakfast game with this festive and incredibly delicious spin on the beloved classic waffle? These eggnog waffles are designed for ease and enjoyment, utilizing readily available store-bought eggnog, ensuring they are non-alcoholic and suitable for the entire family. They are gently spiced with a harmonious blend of warm cinnamon and aromatic nutmeg, creating a flavor profile that is both familiar and exciting. Pair them with a generous drizzle of rich maple syrup and a dollop of warmed, melted butter for a truly indulgent start to your day.
Whether you’re hosting a holiday brunch or simply seeking a special breakfast for your loved ones, these eggnog waffles offer a simple yet sophisticated solution. Their golden-brown exterior and tender interior provide the perfect canvas for the festive flavors of eggnog. Get ready to impress your guests and delight your family with a breakfast that embodies the warmth and joy of the season, creating lasting memories one delicious bite at a time.
Why This Recipe Is a Holiday Must-Make
When it comes to holiday cooking, convenience and deliciousness are often at the top of the list. This eggnog waffle recipe delivers on both fronts, making it an ideal choice for busy festive mornings or a relaxed weekend treat. Here’s why these waffles will become a staple in your holiday repertoire, offering a perfect blend of ease and irresistible flavor:
- Effortlessly Easy to Make: You don’t need to be a seasoned chef to whip up a batch of these extraordinary waffles. The instructions are straightforward, requiring minimal fuss and simple mixing techniques. This means less time in the kitchen stressing over complicated steps and more time enjoying the festivities with your family and friends. It’s truly a beginner-friendly recipe that yields impressive results.
- Utilizes Convenient Store-Bought Eggnog: Forget the complexities of making eggnog from scratch for a recipe. This recipe cleverly uses readily available store-bought eggnog, saving you valuable time and effort while still delivering that unmistakable, authentic holiday flavor. Just grab your favorite brand (non-alcoholic, of course!) from the dairy aisle, and you’re halfway to a fantastic, fuss-free breakfast.
- Mild, Beautifully Balanced Holiday Flavors: We’ve carefully crafted this recipe to offer a gentle, yet distinct eggnog flavor, perfectly complemented by warm holiday spices like cinnamon and nutmeg. It’s not overwhelmingly sweet or spicy, but rather a comforting and balanced taste that appeals to everyone, even those who might be hesitant about strong eggnog flavors. The spices are just right to evoke that cozy holiday feeling.
- Made with Simple, Readily Available Ingredients: You won’t need to hunt down obscure or expensive items for this recipe. All the ingredients – from flour and baking powder to eggs and butter – are common pantry staples and easy to find at any grocery store, ensuring a stress-free shopping experience during an already busy time of year.
- Excellent for Storing and Freezing: Planning ahead for holiday meals is a game-changer, and these waffles are perfect for batch cooking. They store beautifully in the refrigerator for several days and freeze exceptionally well for longer periods, meaning you can easily make them in advance and enjoy a taste of the holidays whenever the craving strikes, long after the season has passed.
- Conveniently Re-heats in a Toaster: The best part about making a larger batch? Reheating is an absolute breeze! Simply pop a frozen or refrigerated waffle into your toaster, and in just a few minutes, you’ll have a warm, crispy, and delicious breakfast that tastes just like it was made fresh. This makes them ideal for quick weekday breakfasts or anytime you need a comforting treat without the effort.
These features combined make these easy spiced eggnog waffles a standout recipe for the holidays and beyond. They offer maximum flavor with minimum effort, proving that delicious doesn’t have to mean complicated when you have the right recipe.
Key Ingredients for Perfect Eggnog Waffles
Creating these festive holiday eggnog waffles requires a few simple ingredients, most of which you likely already have in your pantry. Each component plays a crucial role in achieving the perfect texture, flavor, and aroma that makes these waffles so special. Here’s a detailed look at what you’ll need to gather to bring this delicious breakfast to life:
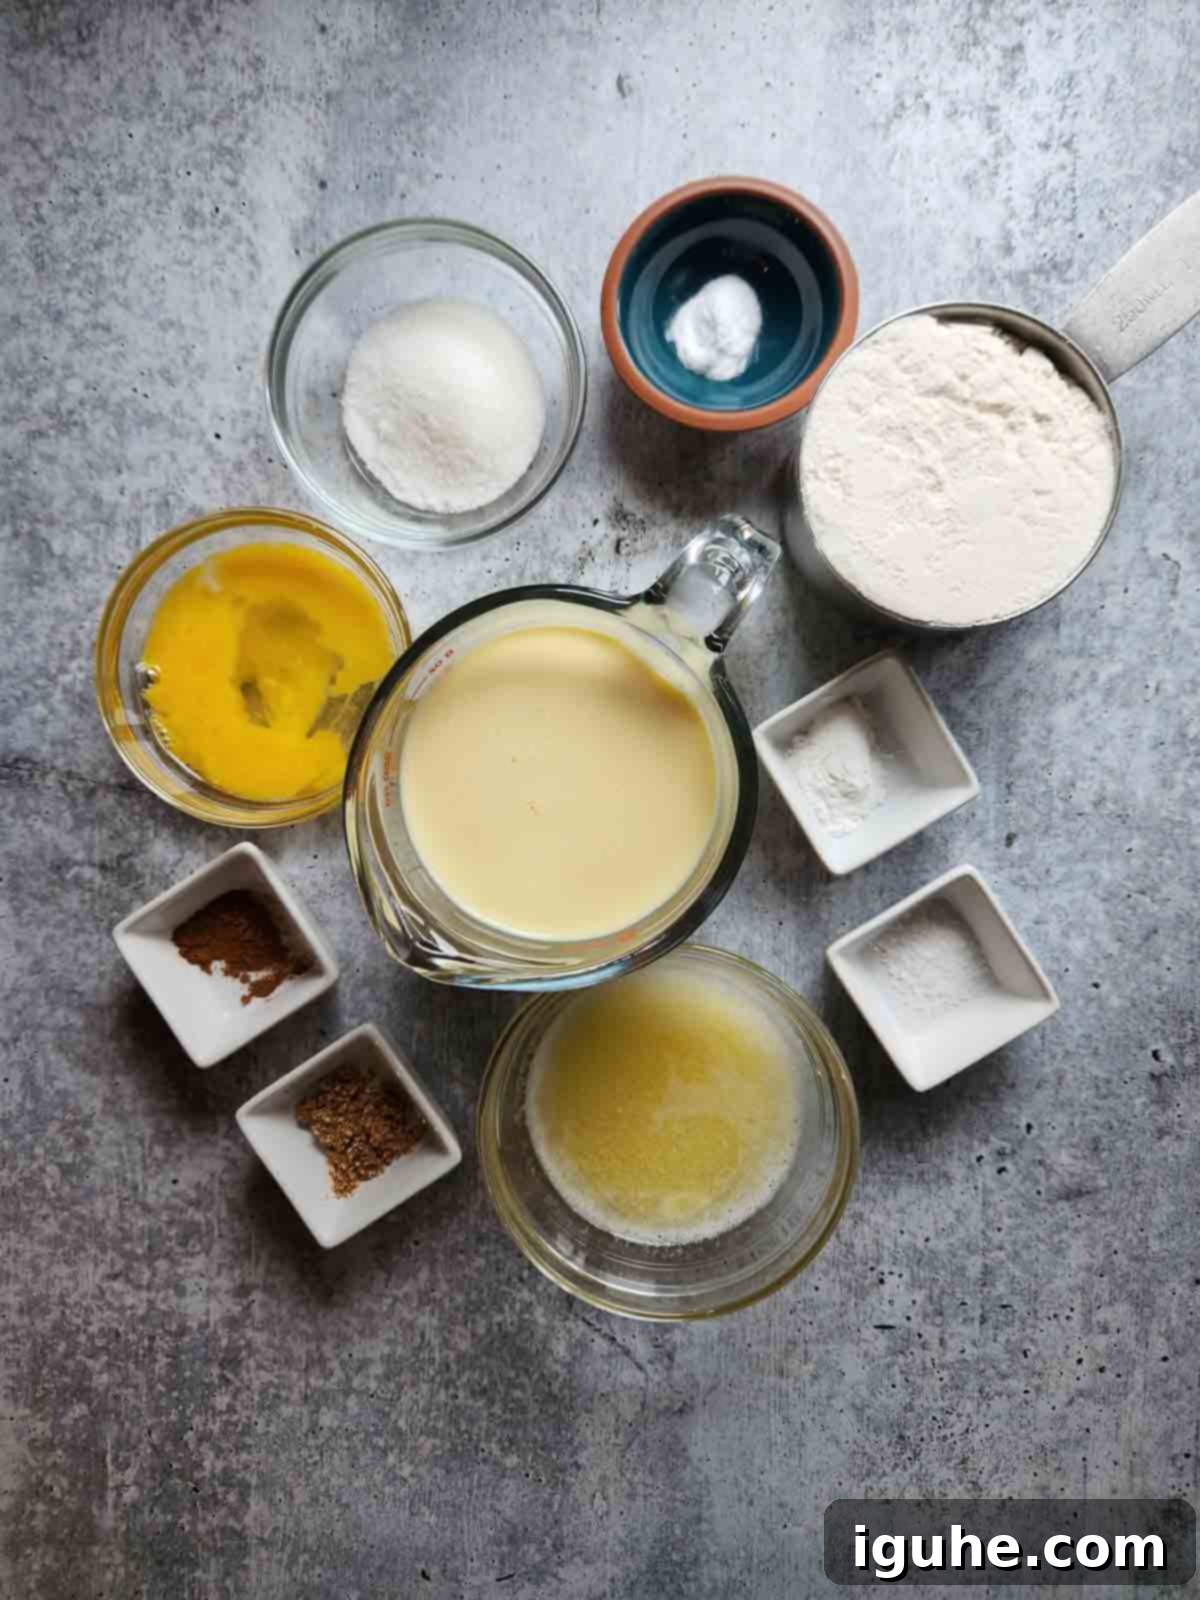
- All-Purpose Flour: This is the foundational ingredient for our waffles. All-purpose flour provides the necessary structure and body, ensuring your waffles are sturdy enough to hold their shape and toppings, yet remain wonderfully tender with every bite. For best results, measure your flour accurately by lightly spooning it into a measuring cup and leveling it off with a straight edge, rather than scooping directly from the bag, which can compact the flour and lead to dense, heavy waffles.
- Baking Powder and Baking Soda: These two ingredients are your powerhouse leavening agents, working in tandem to create those desirable light, airy, and fluffy waffles. Baking powder reacts when it comes into contact with liquid and then again with the heat of the waffle iron. Baking soda, on the other hand, requires an acid to activate, which is often present in eggnog, helping to achieve maximum lift and a delicate crumb.
- Salt: A small but mighty ingredient, just a pinch of salt is crucial for enhancing all the other flavors in the waffle batter. It balances the sweetness, makes the spices pop, and prevents the waffles from tasting flat. Don’t skip it, as it’s essential for a well-rounded and flavorful profile. We recommend Kosher or fine sea salt.
- Cinnamon: A quintessential holiday spice, ground cinnamon brings a warm, comforting, and sweet-woody aroma and flavor to these waffles. It pairs perfectly with the nutmeg and eggnog, contributing significantly to that classic festive taste we all love during the winter months.
- Nutmeg: For truly exceptional flavor, we highly recommend using freshly grated nutmeg. While pre-ground nutmeg works in a pinch, fresh nutmeg offers a much more vibrant, aromatic, and complex flavor that elevates these waffles from good to outstanding. A small grater, like a microplane, makes this an easy and worthwhile task, adding an unparalleled depth of flavor.
- Large Egg: A single large egg acts as a vital binder, helping to hold the waffle batter together and provide structure. It also contributes to the richness of the waffles and aids in achieving that beautiful golden-brown color and tender crumb. Ensure the egg is lightly beaten before adding it to the wet ingredients to ensure it incorporates smoothly without lumps.
- Granulated Sugar: A modest amount of granulated sugar adds just the right touch of sweetness to the batter, complementing the inherent sweetness of the eggnog without making the waffles overly sugary. This balance allows the subtle eggnog and spice flavors to shine through.
- Unsalted Butter (Melted): Butter is essential for both flavor and for achieving that desirable crispy exterior that makes waffles so satisfying. Using unsalted butter allows you to control the overall salt content of the recipe. It’s important to melt the butter and allow it to cool slightly before adding it to the wet ingredients to prevent cooking the egg prematurely.
- Eggnog (Store-Bought): The undeniable star of the show! Opt for a high-quality, fresh store-bought eggnog. Look for one preferably without any artificial additives and, most importantly, ensure it is non-alcoholic, especially if serving to children or those who avoid alcohol. Full-fat eggnog will yield the richest flavor and best texture for your waffles. This recipe is specifically designed around the convenience of store-bought varieties, making it quick and easy to prepare. If you happen to have any leftover eggnog after making these delightful waffles, consider using it to create a creamy chai eggnog latte for another comforting holiday treat!
Refer to the recipe card below for the precise quantities of each ingredient to ensure perfect results every time. Gathering your ingredients and having them measured out before you start (mise en place) will make the entire process smoother and more enjoyable.
Essential Equipment for Waffle Success
To make these delicious eggnog waffles, the most crucial piece of equipment you’ll need is a reliable waffle maker. The type you choose can influence the final texture and appearance of your waffles, but any standard model will work wonderfully, bringing the festive flavors of eggnog to your breakfast table.
I personally love and recommend this Belgium waffle maker. Belgian waffle makers typically produce thicker waffles with deeper pockets, which are absolutely perfect for holding generous amounts of syrup, fresh fruit, and whipped cream. These deep pockets also contribute to a wonderfully crisp exterior while keeping the interior light and fluffy. However, if you have a classic waffle iron that makes thinner, shallower-pocketed waffles, it will work perfectly fine – just keep an eye on cooking times as they may be slightly shorter. The key is to ensure your waffle iron is well-maintained, clean, and properly preheated for optimal results and to prevent sticking.
Beyond the waffle maker, you’ll need a few basic kitchen tools that are likely already in your culinary arsenal:
- Two Mixing Bowls: Essential for keeping your dry ingredients separate from your wet ingredients until it’s time to combine them. This ensures proper mixing and activation of leavening agents.
- Whisk: A good whisk is indispensable for thoroughly combining ingredients and incorporating air, which contributes to light and fluffy waffles.
- Rubber Spatula or Large Spoon: Perfect for gently folding the wet and dry mixtures together without overmixing.
- Measuring Cups and Spoons: Accurate measurements are key to baking success. Ensure you have a full set for precise ingredient proportions.
- Ladle or ¼ cup measure: For neatly pouring the batter onto the waffle iron sections. This helps control portion size and prevents spills.
Ensuring your waffle maker is clean and adequately greased (if it’s not non-stick) before each use will prevent sticking and guarantee beautifully formed waffles every time. Always follow your specific waffle maker’s instructions for preheating and cleaning to achieve the best and most consistent results.
How to Make Easy Spiced Eggnog Waffles: A Visual Guide
Making these delightful eggnog waffles is a straightforward process, perfect for any home cook, regardless of their baking experience. Follow these simple steps to create a batch of warm, beautifully spiced waffles that will impress your holiday guests and bring immense joy to your family. The visual guide below will help you along the way, ensuring each step is clear and easy to follow:
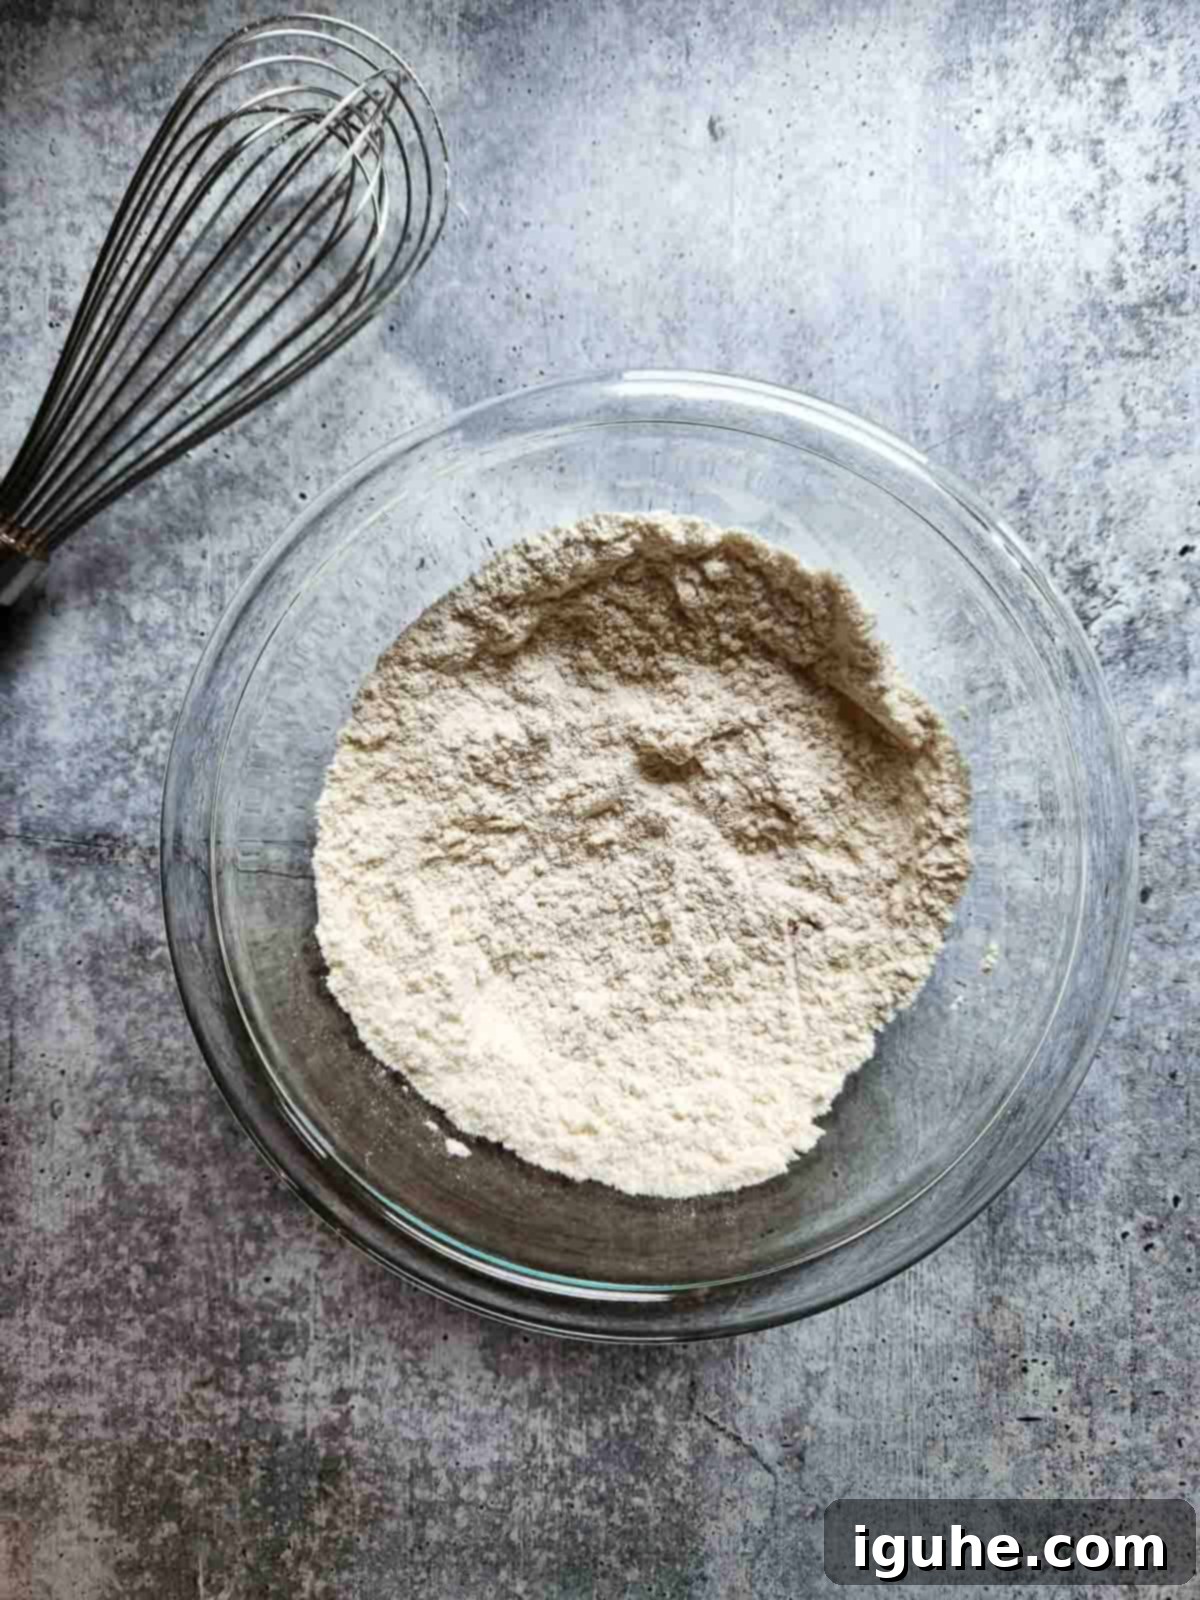
Step 1: Prepare Your Dry Ingredients. Begin by heating your waffle iron according to the manufacturer’s instructions. This is crucial to ensure it’s perfectly hot and ready when your batter is prepared, guaranteeing crispy waffles. In a large mixing bowl, whisk together the all-purpose flour, baking powder, baking soda, salt, cinnamon, and freshly grated nutmeg. Whisk thoroughly for about 30 seconds, or until all the ingredients are evenly distributed. This step is vital for consistent texture and flavor in every single waffle you make.
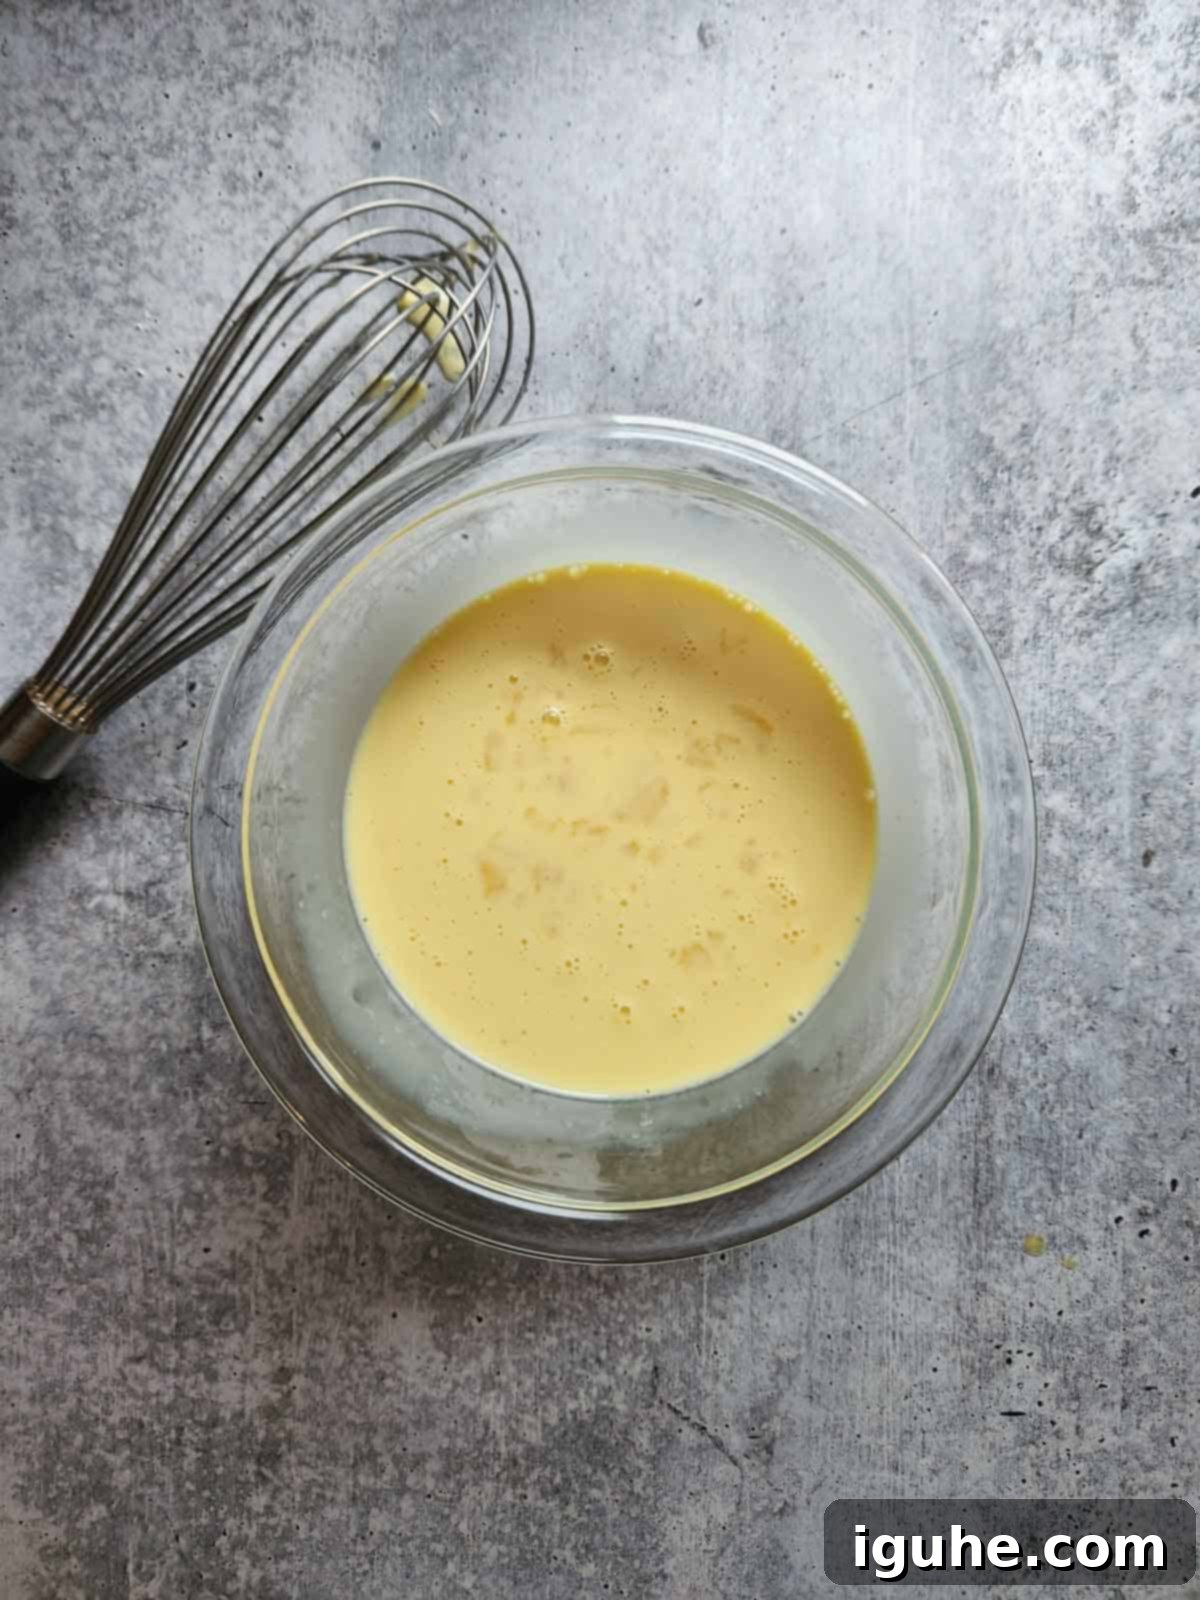
Step 2: Combine Wet Ingredients. In a separate, medium-sized bowl, whisk together the lightly beaten egg, granulated sugar, and the delightful store-bought eggnog until all components are well combined and smooth. Next, gradually add the melted unsalted butter, whisking continuously as you pour it in. It’s important to add the butter slowly to ensure it fully incorporates without separating, and to avoid adding hot butter too quickly, which could potentially start to cook the egg. The mixture should be smooth and creamy.
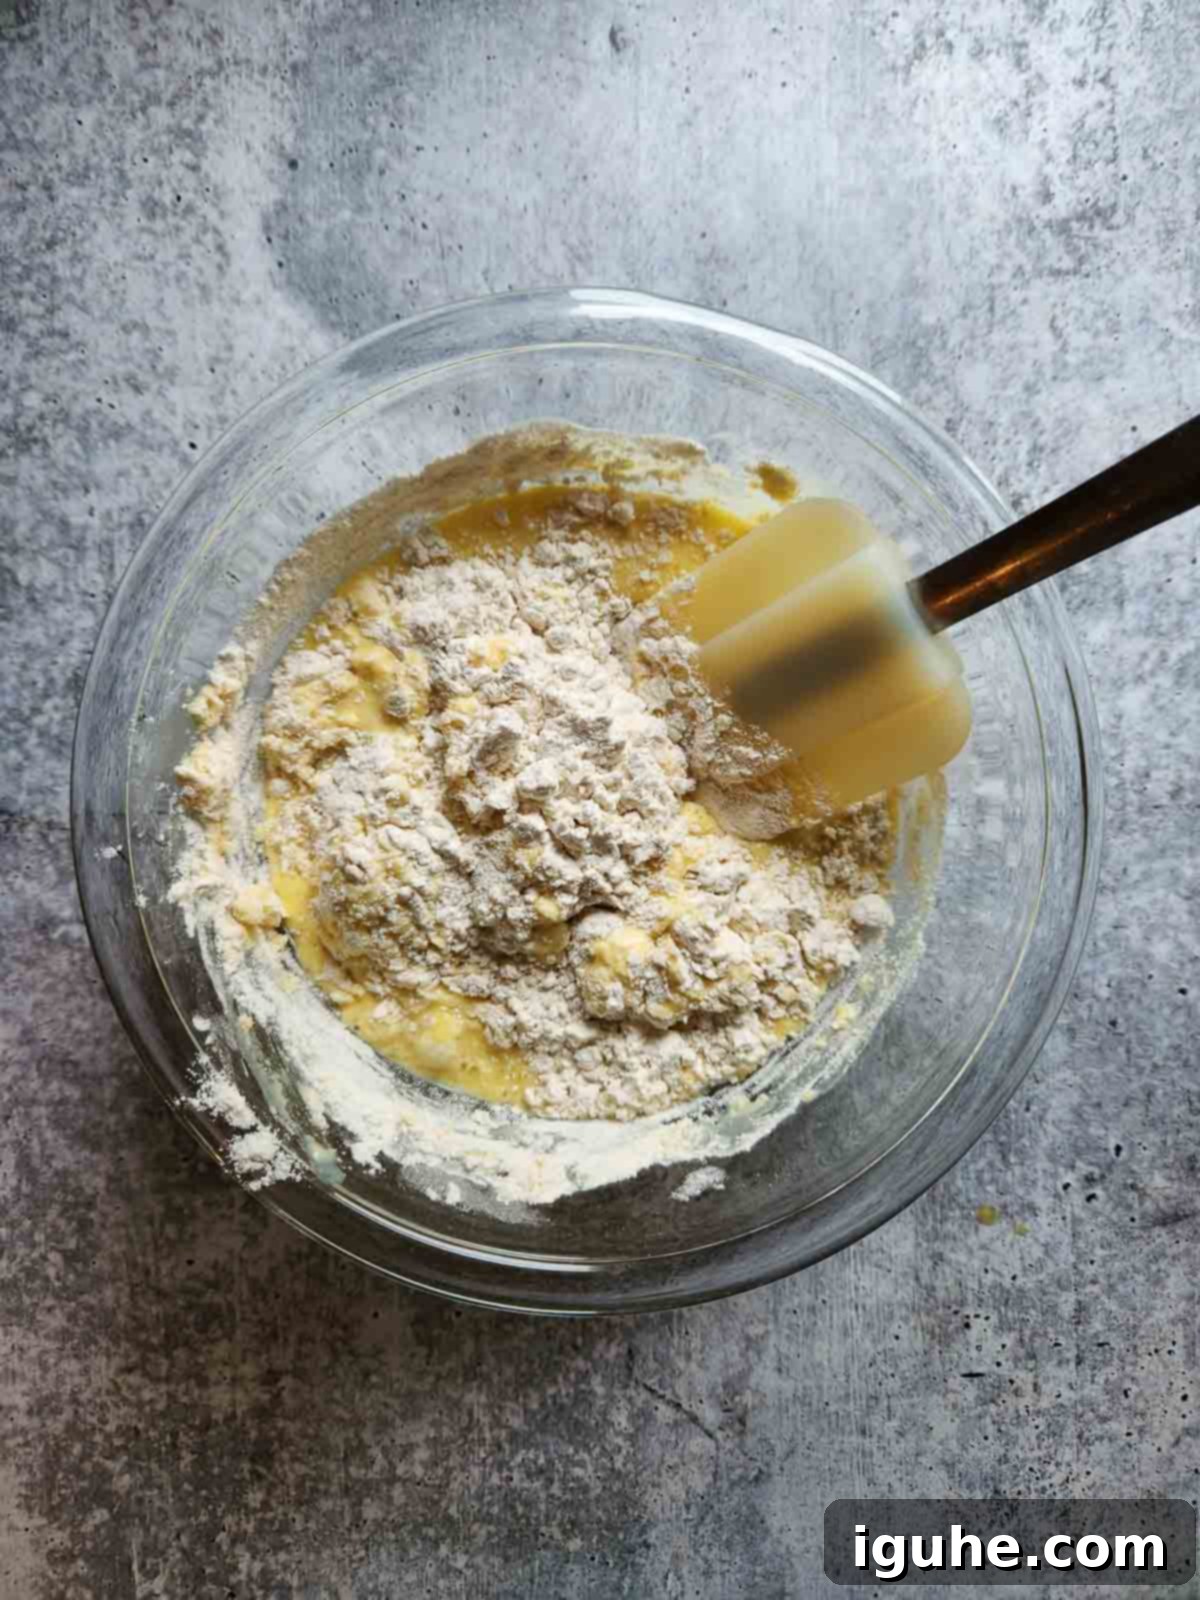
Step 3: Gently Combine Wet and Dry Mixtures. Pour the prepared dry flour mixture into the bowl containing the wet eggnog mixture. Using a rubber spatula or a large spoon, gently stir the ingredients together until just combined. The key here is not to overmix the batter; a few lumps are perfectly normal and actually desirable for tender, light waffles. Overmixing develops the gluten in the flour, which can lead to tough, chewy waffles. Stir just until no dry streaks of flour remain visible.
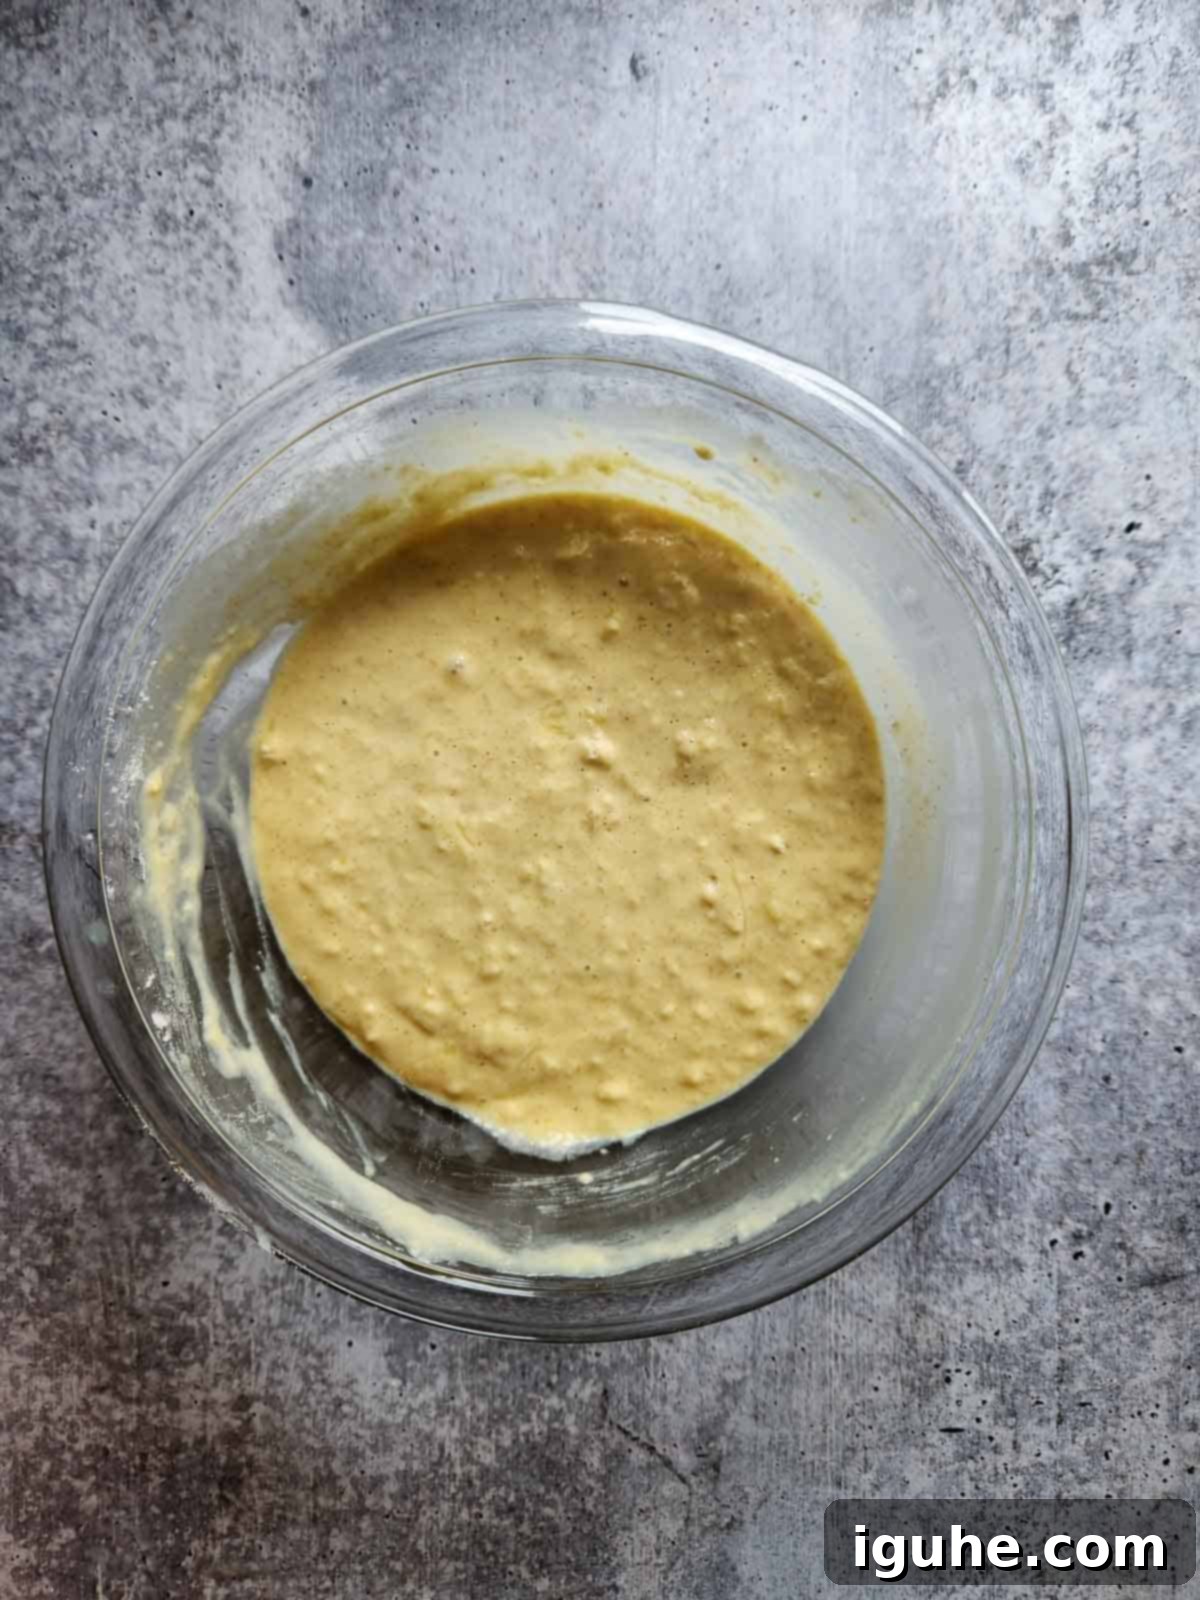
Step 4: Rest the Batter for Optimal Texture. Allow the prepared waffle batter to rest for a period of about 5 to 10 minutes. This resting period is an important step that allows the gluten in the flour to relax, which ultimately contributes to a more tender and delicate waffle texture. Additionally, it gives the leavening agents (baking powder and baking soda) a bit of time to begin their work, resulting in a lighter and fluffier final product.
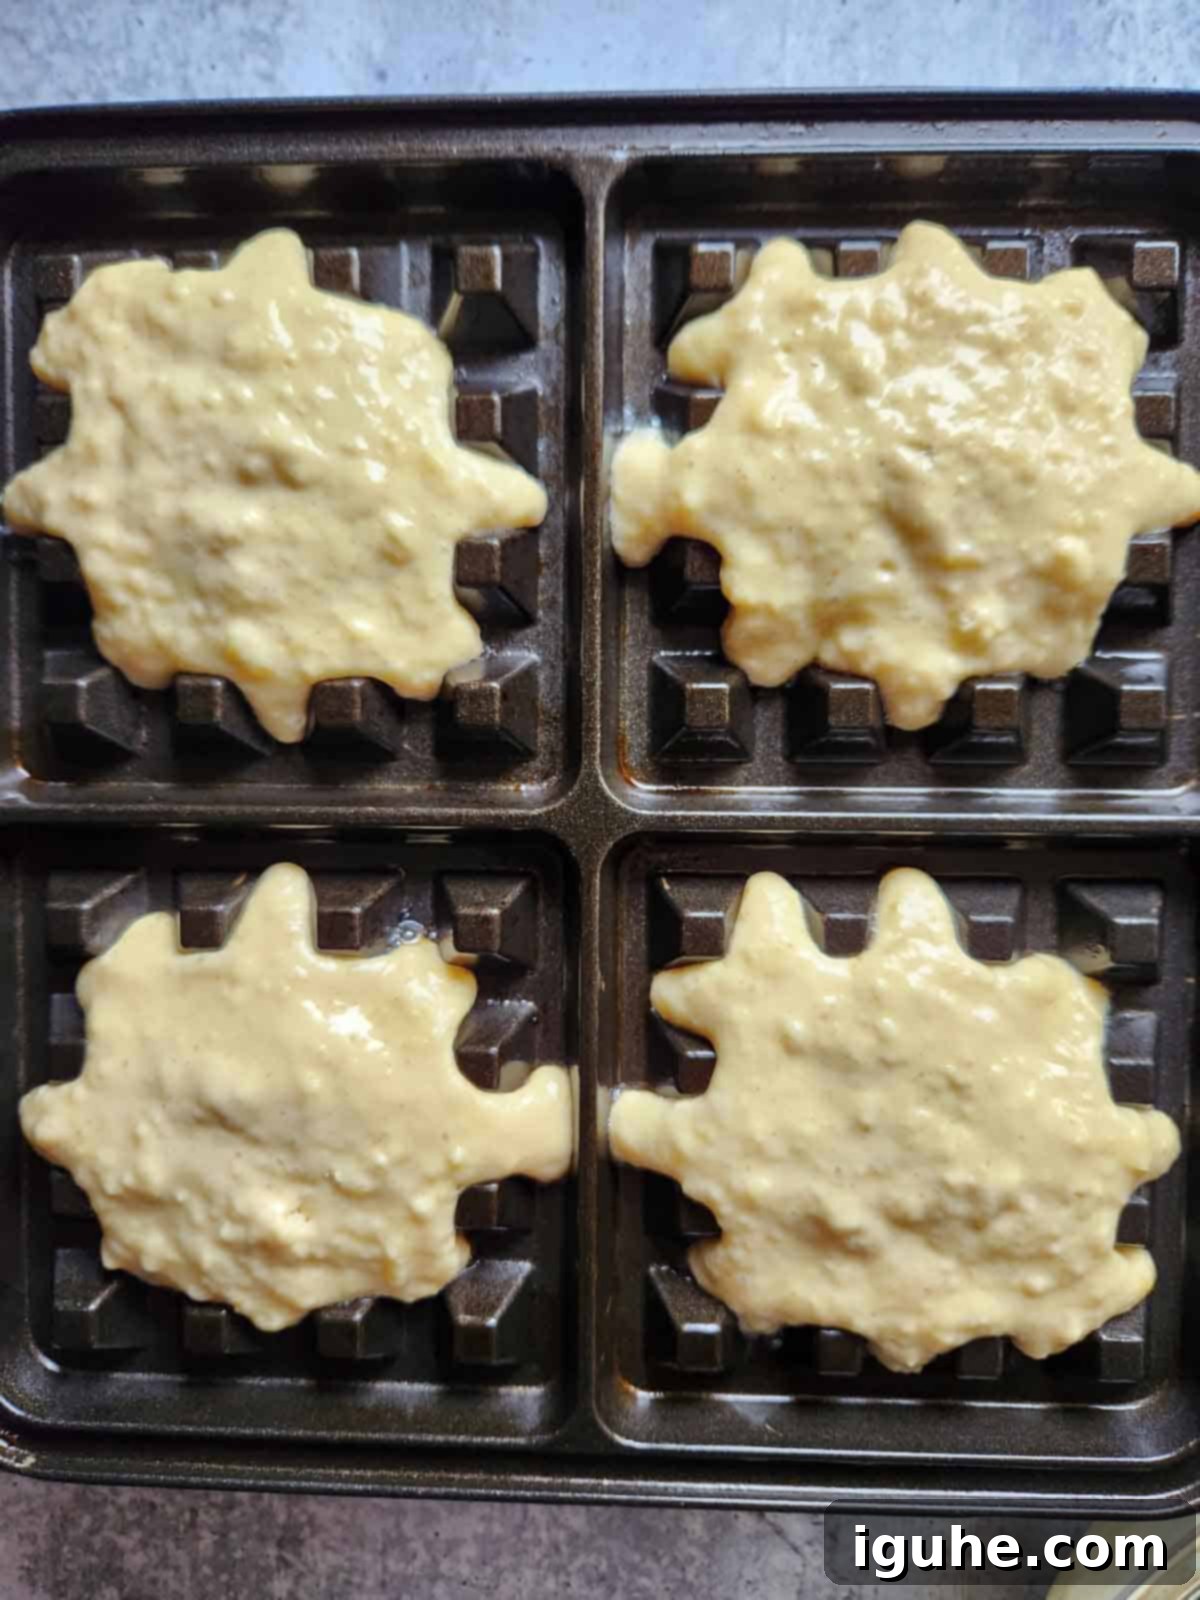
Step 5: Cook the Waffles to Golden Perfection. Once your waffle iron is fully preheated and indicates it’s ready (most models have an indicator light), lightly grease it with a little butter or cooking spray if your iron is not non-stick. Pour the batter evenly onto the waffle iron sections using a ladle or a ¼-cup measure, taking care not to overfill the sections. Close the cover gently and cook for the recommended time as per your manufacturer’s instructions. Cooking times can vary between different waffle makers, so keep a close eye on your waffles to prevent over- or under-cooking.

Step 6: Serve Your Delicious Waffles Immediately. Your eggnog waffles should emerge from the iron a beautiful golden brown on both sides, boasting a satisfyingly crispy exterior and a soft, fluffy interior. Carefully remove them from the waffle iron using a fork or tongs. Serve them immediately while they are hot and at their absolute best, topped with your favorite accompaniments. If you’re cooking for a crowd, you can keep cooked waffles warm in a single layer on a wire rack set over a baking sheet in a low oven (around 200°F / 95°C) while you finish the rest of the batch.
💡Top Tip for Picture-Perfect Waffles
To achieve the beautifully defined waffle-style look you see in these pictures, with distinct squares and crispy edges, avoid completely filling each waffle section with batter. Instead, for Belgian style waffles, take a heaping ¼ cup of batter and pour it directly into the center of each section. This allows the batter to spread naturally without overflowing, creating those distinct, deep pockets and wonderfully crispy edges. Proceed with cooking as usual, and watch your waffles take on that professional, appealing appearance.
Eggnog Substitutions for Dietary Needs or Availability
Don’t have eggnog on hand, or prefer an alternative due to dietary restrictions? No problem! You can still enjoy the delicious essence of these spiced waffles with a few simple substitutions. The goal is to replicate the rich, creamy texture and festive flavor profile that eggnog provides, ensuring everyone can partake in this delightful holiday treat.
- Dairy-Free Eggnog Alternatives: During the holiday season, many brands now offer excellent non-dairy eggnog options made from plant-based milks like almond, oat, soy, or coconut milk. These can typically be used as a direct 1:1 substitute for traditional dairy eggnog in this recipe. Just ensure the alternative you choose is also non-alcoholic if you’re serving to children or individuals who avoid alcohol. They often come pre-spiced, making them a very convenient choice.
- Homemade Eggnog Flavor (Without Actual Eggnog): If you want to create a similar profile from scratch without using actual eggnog, you can substitute the liquid component with a mixture of milk and cream. A good starting point is equal parts whole milk and heavy cream (or half-and-half) to achieve a similar richness and body. To really capture that signature eggnog taste, you’ll need to enhance the spices and sweetness. Add a little extra cinnamon and freshly grated nutmeg to the dry ingredients, and consider incorporating a dash of pure vanilla extract, and even a tiny pinch of ground cloves or allspice, to the wet ingredients. You might also want to increase the granulated sugar slightly to match the sweetness level of commercial eggnog.
- Coconut Milk/Cream: For a slightly different, yet still delicious, dairy-free and egg-free option (if using a pre-made non-dairy eggnog isn’t possible), full-fat canned coconut milk or cream can provide a rich base. Be aware that this will impart a subtle coconut flavor, which might be a welcome addition for some palates! As with other substitutions, remember to adjust the amount of added spices and sweetness to achieve your desired “eggnog-like” profile.
When making any substitutions, remember to taste your base liquid mixture (before adding the flour and other dry ingredients) to ensure it has the desired sweetness and spice level. This flexibility means that whether you have specific dietary needs or simply can’t find eggnog, you can still whip up a fantastic batch of these comforting holiday waffles!
Perfect Pairings for Your Spiced Eggnog Waffles
These spiced eggnog waffles are a delightful treat on their own, boasting rich flavors and a comforting aroma. However, they truly shine when paired with complementary toppings and sides, transforming a simple breakfast into an indulgent holiday spread. Whether you’re aiming for a lavish holiday brunch or a simple, comforting breakfast, these suggestions will elevate your waffle experience and delight your taste buds:
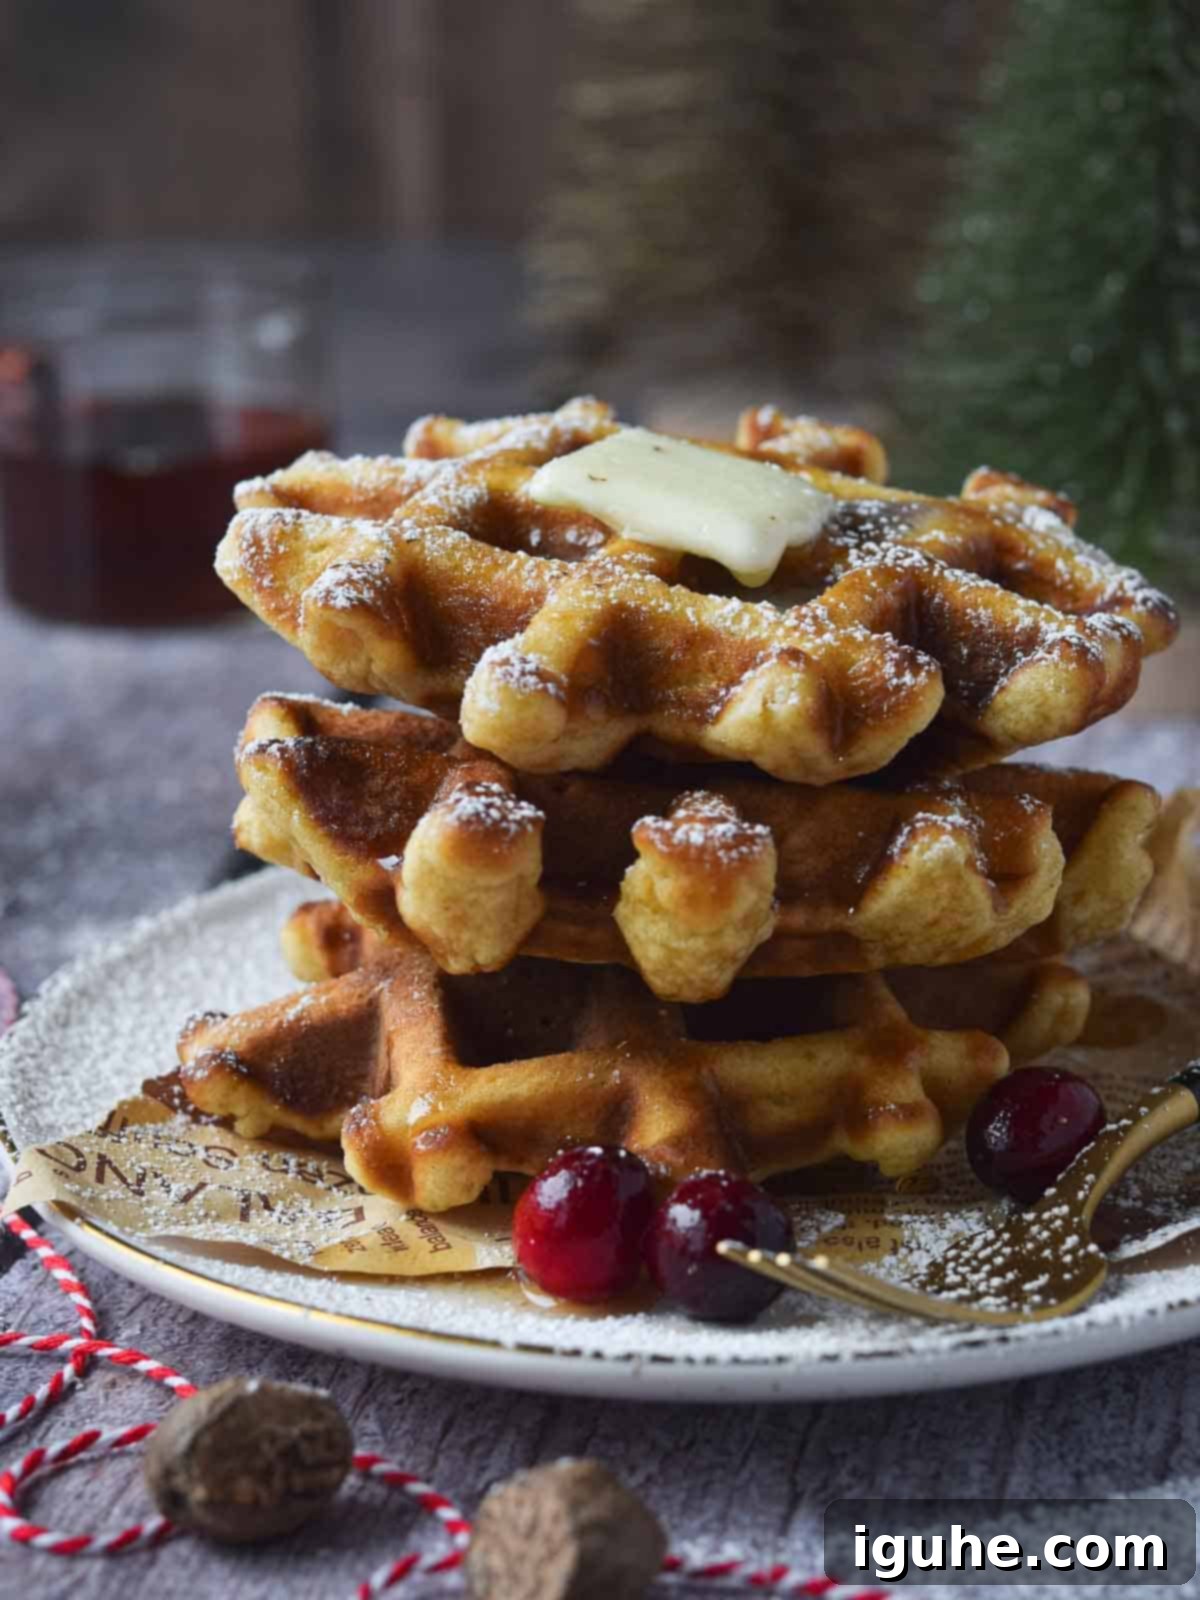
- Classic Maple Syrup: A timeless and unbeatable choice! A generous drizzle of warm, pure maple syrup is the ultimate accompaniment. Its rich, earthy sweetness perfectly complements the warm spices in the waffles. For an extra touch of comfort, gently warm your maple syrup before serving.
- Warmed Butter: A pat of softened or gently warmed butter melting into the golden, crispy nooks and crannies of a hot waffle is pure bliss. For an extra festive touch, consider making a simple cinnamon-sugar compound butter by mixing softened butter with a pinch of cinnamon and a spoonful of powdered sugar.
- Light & Airy Whipped Cream: A cloud of freshly whipped cream adds a luxurious, creamy texture and a touch of effortless elegance. You can even infuse it with a hint of vanilla extract or a dash of freshly grated nutmeg for an even more special holiday touch. Store-bought whipped cream works just as well for convenience during busy mornings.
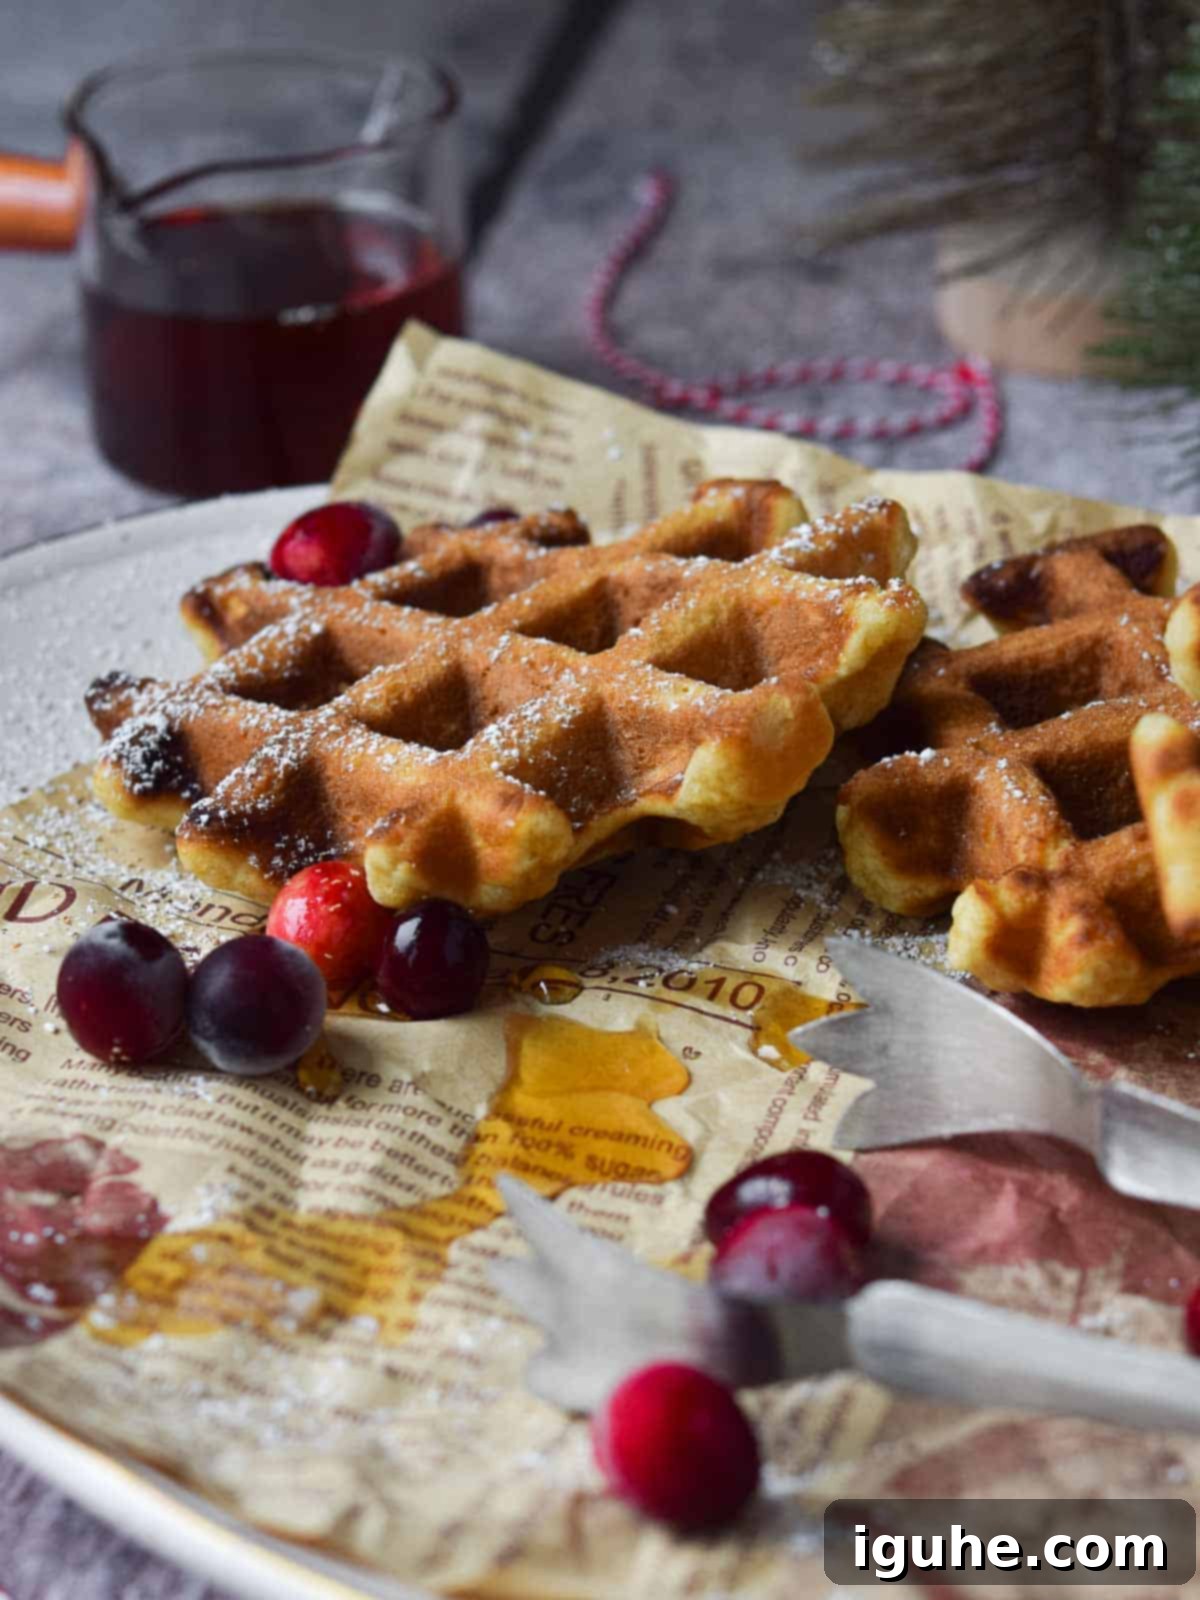
- Fresh Seasonal Fruit: Bright, tart fruits cut through the richness of the waffles beautifully, adding a refreshing contrast. Cranberries and pomegranate arils are perfect seasonal choices, offering a vibrant pop of color and a burst of juicy, tart flavor that sings of the holidays. Sliced bananas, mixed berries (raspberries, blueberries), or even caramelized apples also make wonderful toppings.
- Dusting of Powdered Sugar: For a simple yet elegant finish, a light and delicate dusting of powdered sugar (confectioners’ sugar) provides a subtle extra layer of sweetness and a beautiful, snowy appearance, making your waffles look especially festive for the holidays.
- Homemade or Store-Bought Cranberry Sauce: Don’t let that leftover cranberry sauce from Thanksgiving or Christmas dinner go to waste! A spoonful of sweet and tangy cranberry sauce makes an unexpectedly delicious and incredibly festive topping for these eggnog waffles, creating a wonderful sweet-tart combination that perfectly balances the rich waffle flavor.
- Indulgent Ice Cream: For a truly decadent dessert experience, transform your warm eggnog waffles into a show-stopping treat by topping them with a scoop of creamy vanilla ice cream. For the ultimate holiday indulgence, dare I suggest a scoop of rich eggnog ice cream with crushed gingersnaps? It’s a dessert that doubles as a festive celebration!
Feel free to mix and match these delicious suggestions based on your personal preferences, the dietary needs of your guests, and the occasion. Creating a festive breakfast or brunch spread that’s as unique and wonderful as your holiday season is part of the fun!
Storage and Reheating Tips for Leftover Waffles
One of the many benefits of these easy spiced eggnog waffles is how remarkably well they store and reheat, making them an excellent option for meal prepping or enjoying throughout the busy holiday week. You can easily make a double batch and have delicious, holiday-inspired breakfasts ready to go on demand!
- Refrigeration: To properly store cooled, leftover waffles in the refrigerator, it’s crucial that they are completely cool to the touch first. Once cooled, stack them with a piece of parchment paper or wax paper in between each waffle to prevent them from sticking together. Then, wrap the stack tightly in plastic wrap or place them in an airtight container. Stored this way, they will stay fresh and delicious for up to 5 days, ready for a quick breakfast.
- Freezing: For longer storage, these waffles freeze exceptionally well, allowing you to enjoy a taste of the holidays months later. Again, ensure they are completely cooled before freezing. To prevent them from sticking together in the freezer, first flash-freeze them: lay the waffles in a single layer on a baking sheet and place them in the freezer for about 30 minutes to an hour, until solid. Once frozen solid, transfer them to a freezer-safe zip-top bag or an airtight freezer container, layering with parchment paper if stacking. Frozen eggnog waffles can be stored for up to 3 months without loss of quality.
How to Reheat Waffles for Best Results:
- Toaster (Highly Recommended for Crispiness): The absolute best way to reheat both frozen and refrigerated waffles is in a toaster or toaster oven. This method brilliantly revives their crispy exterior and warms them through perfectly, making them taste almost as good as freshly made. Simply place waffle slices directly into the toaster slots and toast on a medium setting until they are heated through and golden brown. Adjust the setting as needed to achieve your desired level of crispness.
- Oven: If you’re reheating a larger batch, the oven is a great option. Preheat your oven to 350°F (175°C). Place the waffles in a single layer on a baking sheet. Heat for about 5-10 minutes for refrigerated waffles, or 10-15 minutes for frozen waffles, until they are thoroughly warmed through and have regained their desired crispness.
- Microwave: While convenient, the microwave is generally not recommended as it tends to make waffles soft, soggy, and rubbery rather than crispy. If it’s your only option, heat for very short bursts (15-30 seconds) until just warm, and then, if possible, transfer them to a toaster or pan for a quick crisp-up.
With these comprehensive storage and reheating tips, you can enjoy the festive flavor of these eggnog waffles long after they’re freshly made, making your holiday mornings even more convenient and deliciously stress-free.
Frequently Asked Questions About Eggnog Waffles
Curious about eggnog and making the best waffles? Here are answers to some common questions that often arise when preparing this delightful holiday breakfast:
Yes, traditional eggnog absolutely contains eggs! The name “eggnog” itself is believed to refer to “egg” and “nog,” which historically referred to a strong ale or an old English term for a strong beer. For the most part, classic, authentic eggnog is a rich, creamy mixture traditionally made from milk, heavy cream, sugar, and beaten eggs (often cooked into the mixture to ensure safety). It’s typically flavored with vanilla and warm spices like nutmeg. However, in modern times, with the rise of plant-based diets and diverse preferences, you can now easily find excellent dairy-free and egg-free eggnog alternatives right alongside the dairy versions in most supermarkets, especially during the festive holiday season. These alternatives are skillfully crafted to replicate the characteristic taste and texture of traditional eggnog without any animal products.
Absolutely! If you have a beloved homemade eggnog recipe, it will likely work wonderfully in these waffles, adding an even more personalized touch to your breakfast. Just be mindful of its consistency; homemade eggnog can sometimes be thicker or thinner than commercial varieties. If your homemade eggnog is significantly thicker, you might need to add a tablespoon or two of extra milk to the waffle batter to achieve the right pourable consistency. If it’s on the thinner side, you might reduce the total liquid slightly, though store-bought eggnog tends to have a consistent viscosity that works well for baking.
Achieving perfectly crispy waffles can depend on a few key factors. First and foremost, ensure your waffle iron is adequately preheated and very hot before adding the batter; an underheated iron will tend to steam the waffles rather than crisp them, resulting in a soft texture. Second, avoid overfilling the iron; too much batter can lead to uneven cooking and prevent proper crisping. Third, resist the urge to open the waffle iron too early during cooking. Let the steam dissipate – once steam stops actively escaping from the sides, they are usually done and have developed a crispy exterior. Fourth, the fat content (from the melted butter in the batter) contributes significantly to crispiness. Lastly, serve immediately! Waffles tend to lose their crispness relatively quickly as they cool, so enjoy them hot off the iron for the best texture.
Yes, you absolutely can! To make these eggnog waffles gluten-free, simply substitute the all-purpose flour with a 1:1 gluten-free baking flour blend. Look for a blend that contains xanthan gum for best results, as this helps with the structure and texture often provided by gluten. Follow the rest of the recipe instructions as written. The taste of the eggnog and spices will still shine through beautifully!
Looking for More Holiday Breakfast & Brunch Ideas?
These easy spiced eggnog waffles are just one wonderful way to infuse festive cheer into your mornings. If you’re looking for other delicious recipes to complement your holiday spread, impress guests at a brunch, or simply want to explore more seasonal flavors and cozy delights, try some of my favorites:
- Sugared Cranberry Christmas Mimosa
- Apple Pie Oatmeal Brûlée
- Cranberry Orange Cream Scones
- Roasted Fig and Rosemary Butter Board
Did you make this recipe? I would love to hear about it! Please leave a ⭐⭐⭐⭐⭐ rating with a comment right below the recipe card. Your feedback helps other home cooks discover and enjoy this recipe. If you snap a photo of your creation, don’t forget to tag me on Instagram @brunchandbatter and use the hashtag #brunchandbatter. Your culinary creations truly make my day and inspire others!
📖 Recipe Card: Easy Spiced Eggnog Waffles

Easy Spiced Eggnog Waffles
Pin Recipe
Equipment
-
waffle iron classic or Belgium-style
Ingredients
- 1 cup all purpose flour
- 1 teaspoon baking powder
- ¼ teaspoon baking soda
- ⅛ teaspoon cinnamon
- ¾ teaspoon fresh ground nutmeg
- ¼ teaspoon Kosher or fine salt
- 1 large egg, lightly beaten
- 2 tablespoon sugar
- 1 cup eggnog non-alcoholic, preferably all-natural with no additives
- 3 tablespoon unsalted butter, melted
Instructions
-
Heat your waffle iron according to the manufacturer’s instructions until it’s fully preheated and ready for use.
-
In a medium mixing bowl, combine the all-purpose flour, baking powder, baking soda, cinnamon, freshly ground nutmeg, and Kosher or fine salt. Whisk these dry ingredients thoroughly for about 30 seconds to ensure they are well combined and the leavening agents are evenly distributed.1 cup all purpose flour, 1 teaspoon baking powder, ¼ teaspoon baking soda, ⅛ teaspoon cinnamon, ¾ teaspoon fresh ground nutmeg, ¼ teaspoon Kosher or fine salt
-
In a separate, larger bowl, whisk together the lightly beaten egg, granulated sugar, and the non-alcoholic eggnog until fully incorporated. Slowly pour in the melted unsalted butter while continuing to whisk until the mixture is just combined and smooth. Add the dry flour mixture to the wet eggnog mixture and stir gently with a spatula or spoon until just combined. Be careful not to overmix; it’s okay if a few lumps remain in the batter. Let the batter stand undisturbed for 5-10 minutes to allow the gluten to relax and the leavening agents to activate.1 large egg, lightly beaten, 2 tablespoon sugar, 1 cup eggnog, 3 tablespoon unsalted butter, melted
-
Pour the rested batter evenly onto the hot waffle iron sections, taking care not to overfill. Close the cover and cook according to your waffle maker’s recommendations until the waffles are golden brown on both sides, and crispy on the outside while remaining fluffy on the inside. Serve immediately with a generous pour of warm maple syrup and a pat of butter, and for an extra touch of holiday magic, sprinkle with an additional grating of fresh nutmeg on top.
Notes
Storage: For best results, allow cooked waffles to cool completely before storing. Wrap them tightly in plastic wrap or place them in an airtight container, and they will keep fresh in the refrigerator for up to 5 days. For longer storage, freeze waffles for up to 3 months by first flash-freezing them on a baking sheet, then transferring them to a freezer-safe bag or container.
To Reheat Frozen Waffles: Simply place frozen waffle slices directly into a toaster or toaster oven. Toast on a medium setting until they are heated through, crispy, and beautifully golden brown, just like they were freshly made.
Nutrition*
*Nutrition information is provided as a courtesy and is an estimate only. Nutrition information can vary depending on many factors, such as products used, measurements and substitutions, therefore it is recommended that you obtain nutritional calculations based on your own finished recipe.
