Fluffy, Flavorful, and Easy: The Best Savory Cheddar and Sage Biscuits Recipe
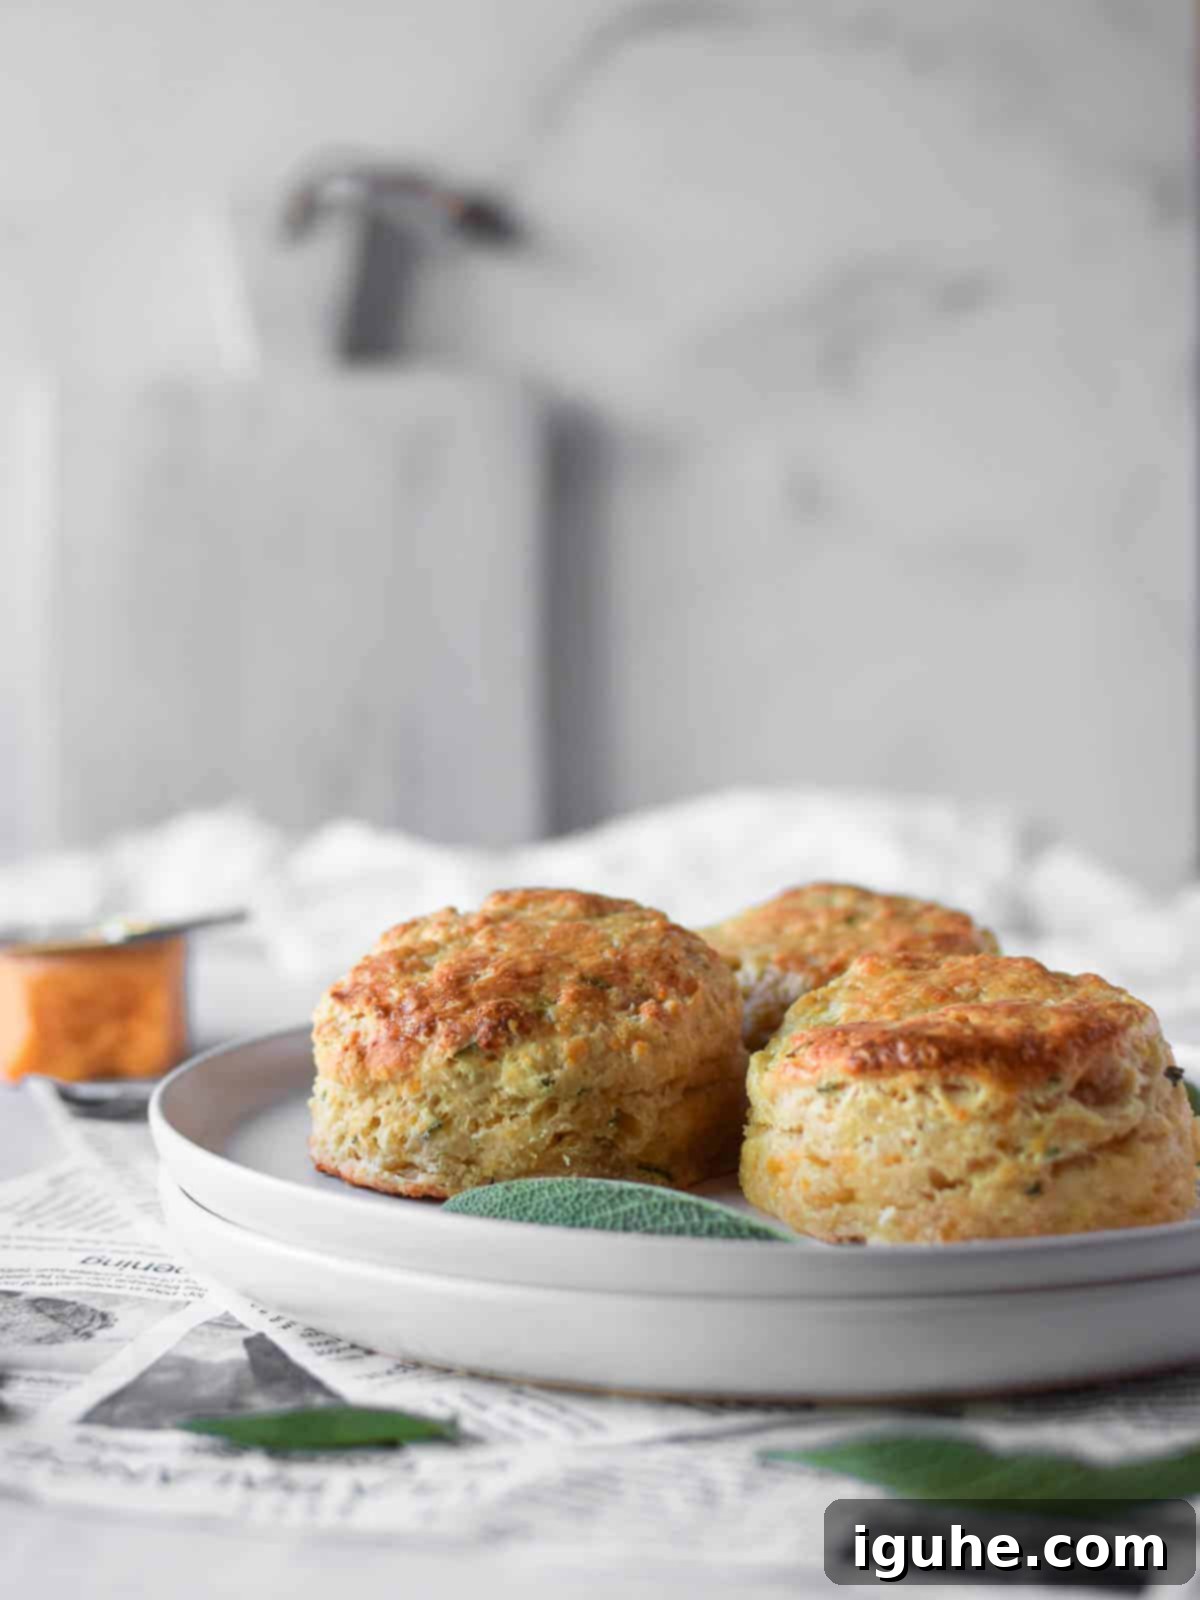
Prepare to be delighted by these incredible Savory Cheddar and Sage Biscuits! They are the epitome of light, fluffy, and buttery, offering a perfect harmony of sharp cheddar and earthy sage flavors in every bite. The subtle tang from the buttermilk, combined with the robust taste of sharp cheddar and the aromatic freshness of sage, creates a flavor profile that is truly a match made in heaven. These biscuits are not just a simple bread; they are a wonderful savory addition that will elevate your next brunch spread, make a standout side dish for holiday meals like Thanksgiving, or simply serve as a comforting treat any day of the week.

There’s something incredibly satisfying about freshly baked homemade biscuits, and these take that satisfaction to a whole new level. My own journey with sage began this year, and I was pleasantly surprised by how simple it was to grow and maintain. Even here on the east coast, in the chill of November, my sage plant is still thriving, providing an abundance of fresh, fragrant leaves perfect for baking. If you’ve been on the hunt for a truly exceptional savory biscuit – one that is wonderfully fluffy, perfectly salty, and rich with cheesy goodness – then your search ends here. This cheddar sage biscuit recipe is guaranteed to impress. And if you already adore classic buttermilk biscuits, you’re going to fall head over heels for these cheesy, herbaceous cousins. They offer all the familiar comfort of a traditional biscuit but with an exciting, gourmet twist that makes them feel extra special.
Why You’ll Love These Cheddar Sage Biscuits
These aren’t just any biscuits; they’re a culinary experience designed to bring warmth and flavor to your table. Here’s why these Savory Cheddar and Sage Biscuits will become a staple in your kitchen:
- Unbeatable Flavor Combination: The sharpness of cheddar cheese perfectly complements the earthy, aromatic notes of fresh sage. This pairing is classic for a reason – it’s bold yet comforting.
- Perfectly Fluffy Texture: Thanks to carefully chosen ingredients and a specific technique, these biscuits boast an incredibly light, airy, and flaky texture that melts in your mouth.
- Versatile for Any Meal: Whether served warm with dinner, alongside a hearty brunch, or as a cozy snack, these biscuits fit seamlessly into any meal plan. They’re especially fantastic during the fall and winter holidays.
- Simple to Make: Don’t be intimidated by homemade biscuits! This recipe breaks down the process into easy-to-follow steps, making it accessible for bakers of all skill levels.
- Homemade Goodness: There’s nothing quite like the taste and aroma of fresh, warm biscuits straight from your oven. You control the ingredients, ensuring the highest quality and freshest taste.
Once you try these, you’ll understand why they’re so beloved. They’re a delightful twist on a classic, offering a sophisticated flavor without any extra fuss.
Essential Ingredients for Savory Cheddar and Sage Biscuits
The secret to achieving those coveted light and airy pockets in your biscuits lies in a few key ingredients and one crucial technique: keeping everything nice and cold. The butter and buttermilk are particularly vital for creating that perfect texture, so ensure they are thoroughly chilled before you begin. Quality ingredients also make a noticeable difference in the final flavor.
- Self-Rising Flour: This is the cornerstone of our fluffy biscuits. Self-rising flour already contains baking powder and salt, but more importantly, it typically has a lower protein count compared to all-purpose flour. This means less gluten development, which directly translates to a more tender and less chewy biscuit. It’s truly key for achieving that desirable light, fluffy consistency.
- Kosher Salt: While self-rising flour contains some salt, an additional half teaspoon of kosher salt enhances the overall savory profile, perfectly balancing the richness of the cheese and butter. Always use kosher salt for baking when specified, as its coarser grain and lack of additives yield a clean, consistent flavor.
- Granulated Sugar: Just a touch of white granulated sugar is added to counter the saltiness and bring out the subtle sweetness in the other ingredients, creating a perfectly balanced flavor without making the biscuits sweet.
- Buttermilk (Chilled): Buttermilk is essential. Its acidity reacts with the baking powder in the self-rising flour, contributing to the biscuits’ rise and tender crumb. It also imparts a delicious tanginess that complements the cheddar beautifully. Remember, it absolutely must be cold to prevent the butter from melting prematurely.
- Unsalted Butter (Very Cold, Cubed): This is arguably the most critical ingredient for flaky biscuits. When cold butter is incorporated into the flour and then bakes, the water within the butter turns to steam, creating tiny pockets that separate the layers of dough. This process results in those wonderfully airy, flaky layers. Cutting it into small cubes and keeping it very cold (even putting it in the freezer for a few minutes before use) is paramount.
- Sharp Cheddar Cheese (Grated): Sharp cheddar cheese provides a robust, tangy flavor that stands out against the sage. While mild cheddar will work, sharp cheddar offers a deeper, more complex taste. For the best flavor and melt, always buy a block of cheddar and grate it yourself. Pre-shredded cheeses often contain anti-caking agents that can affect texture and melt.
- Fresh Sage: Fresh sage is non-negotiable for this recipe. Its distinct, earthy, slightly peppery, and piney aroma is the heart of these biscuits. Dried sage simply won’t provide the vibrant, nuanced flavor needed here; the essential oils and character of fresh sage are what truly make this recipe shine.
- Egg + 1 Teaspoon Water (for Egg Wash): A simple egg wash, made by whisking an egg with a teaspoon of water, is brushed over the tops of the biscuits before baking. This gives them a gorgeous golden-brown color and a lovely, slightly shiny finish, enhancing their visual appeal.
Always measure your ingredients accurately for the best results, and refer to the recipe card below for precise quantities and comprehensive instructions.
Step-by-Step Instructions for Making Savory Cheddar and Sage Biscuits
Creating these delightful biscuits is easier than you might think, especially with this visual guide and detailed steps. Remember, the key is to work quickly and keep your ingredients cold for the flakiest results.
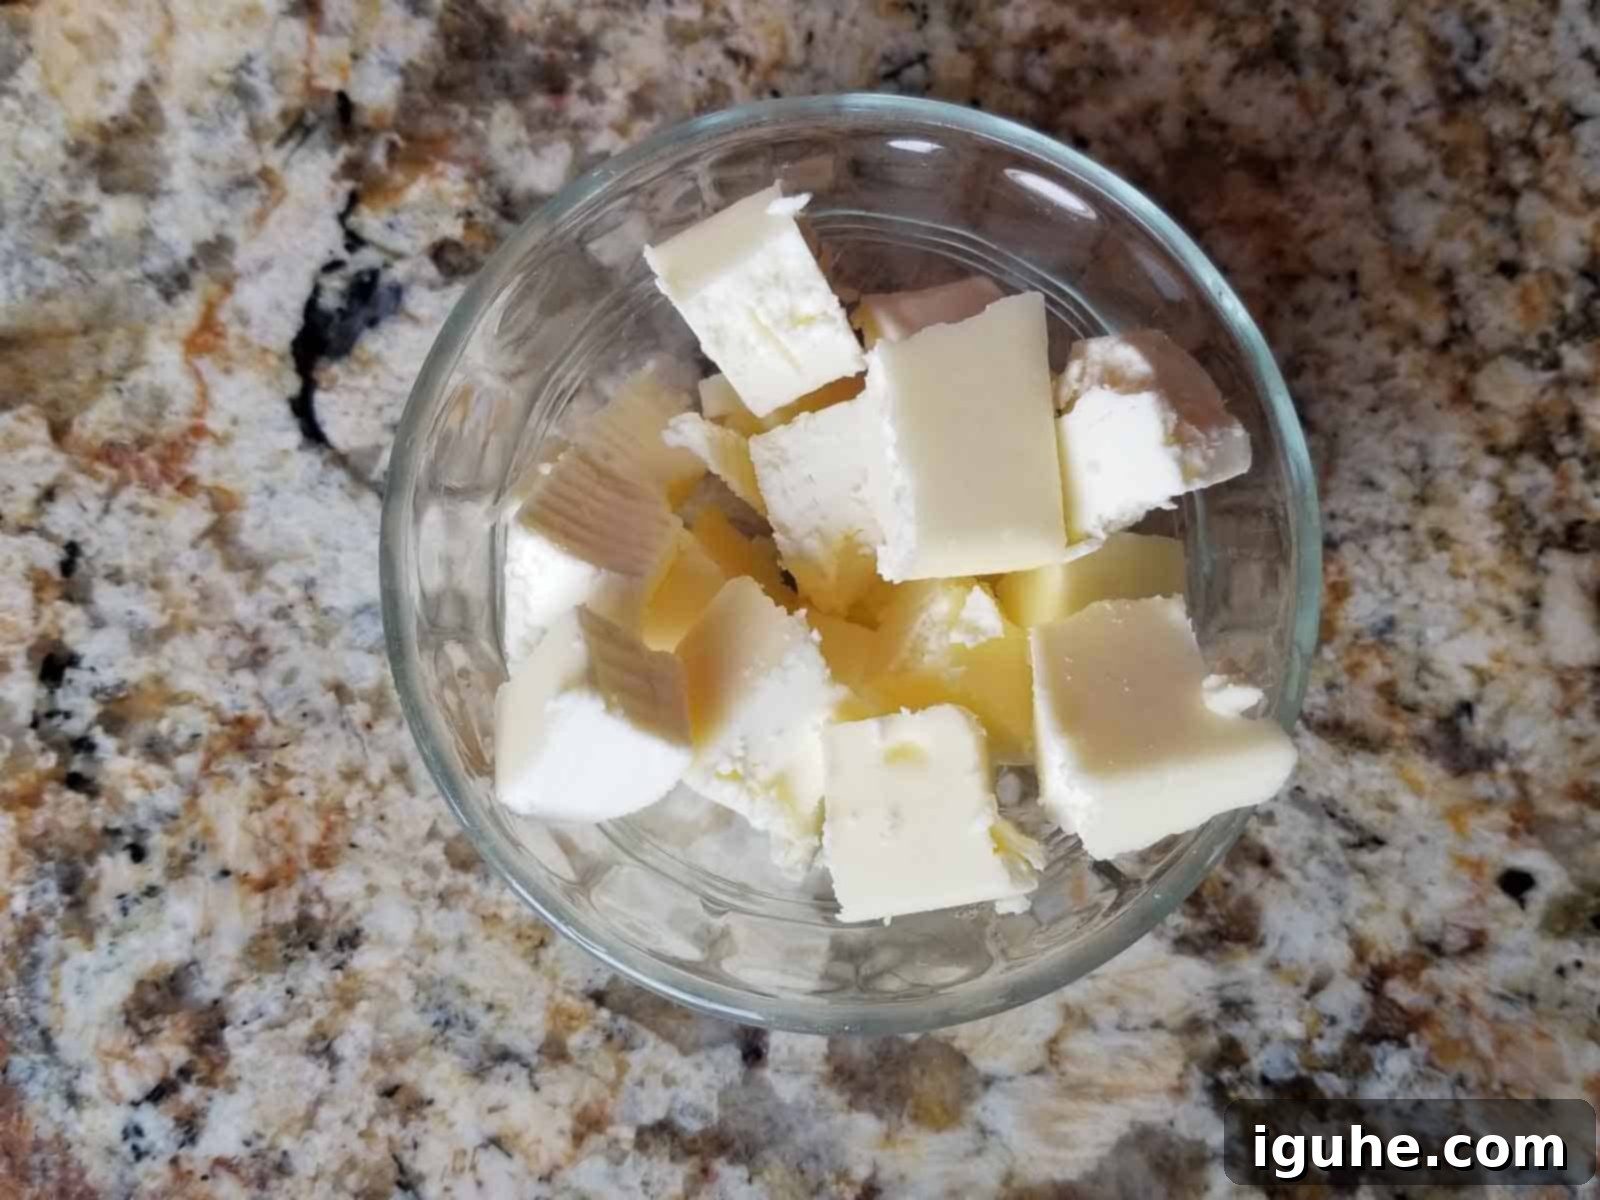
Step 1: Prepare Your Workspace and Ingredients. Preheat your oven to 425°F (218°C). Line a cast iron skillet or a standard baking pan with parchment paper. In a large mixing bowl, whisk together the self-rising flour, kosher salt, and granulated sugar until well combined. Now, add your very cold, cubed unsalted butter to the flour mixture.
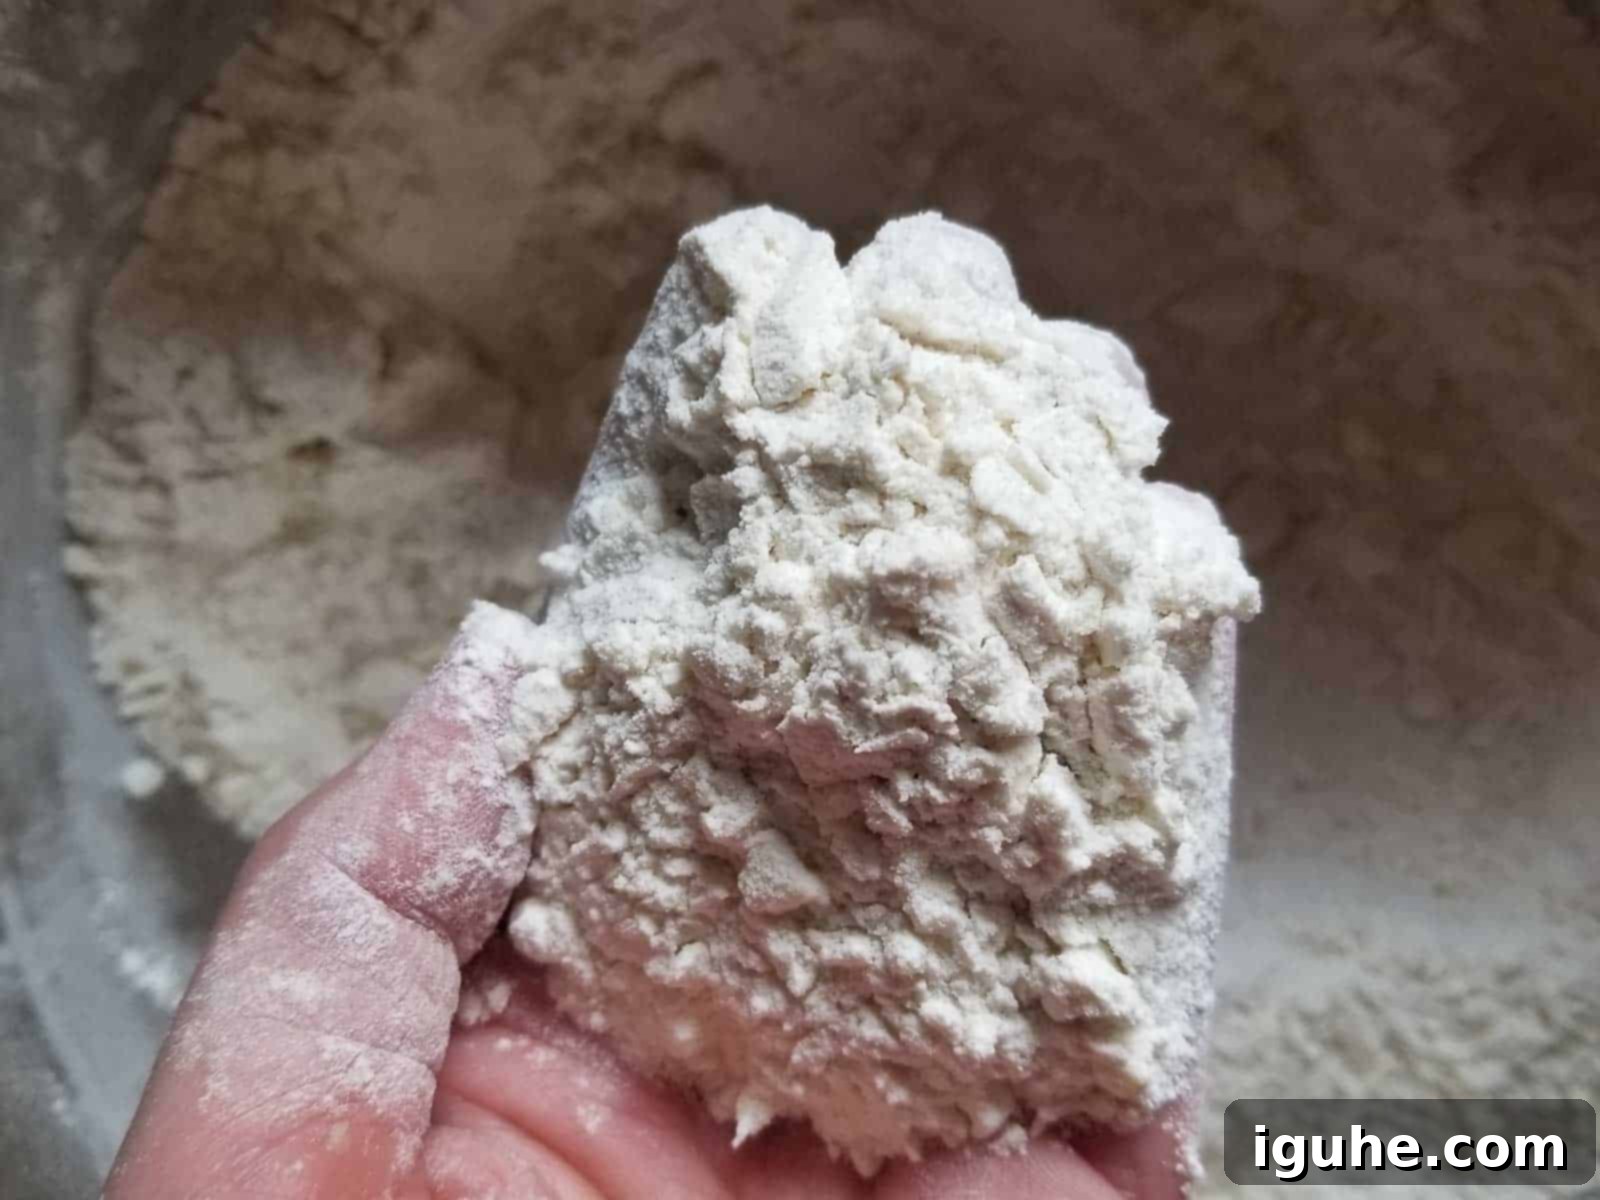
Step 2: Incorporate the Butter. Using a pastry blender (or two forks, or even your fingertips if you work very quickly to avoid warming the butter), cut the butter into the flour mixture. Work until the butter pieces are incorporated and resemble the size of small peas or coarse meal. Some slightly larger pieces are fine; this variation helps create those desired flaky layers.
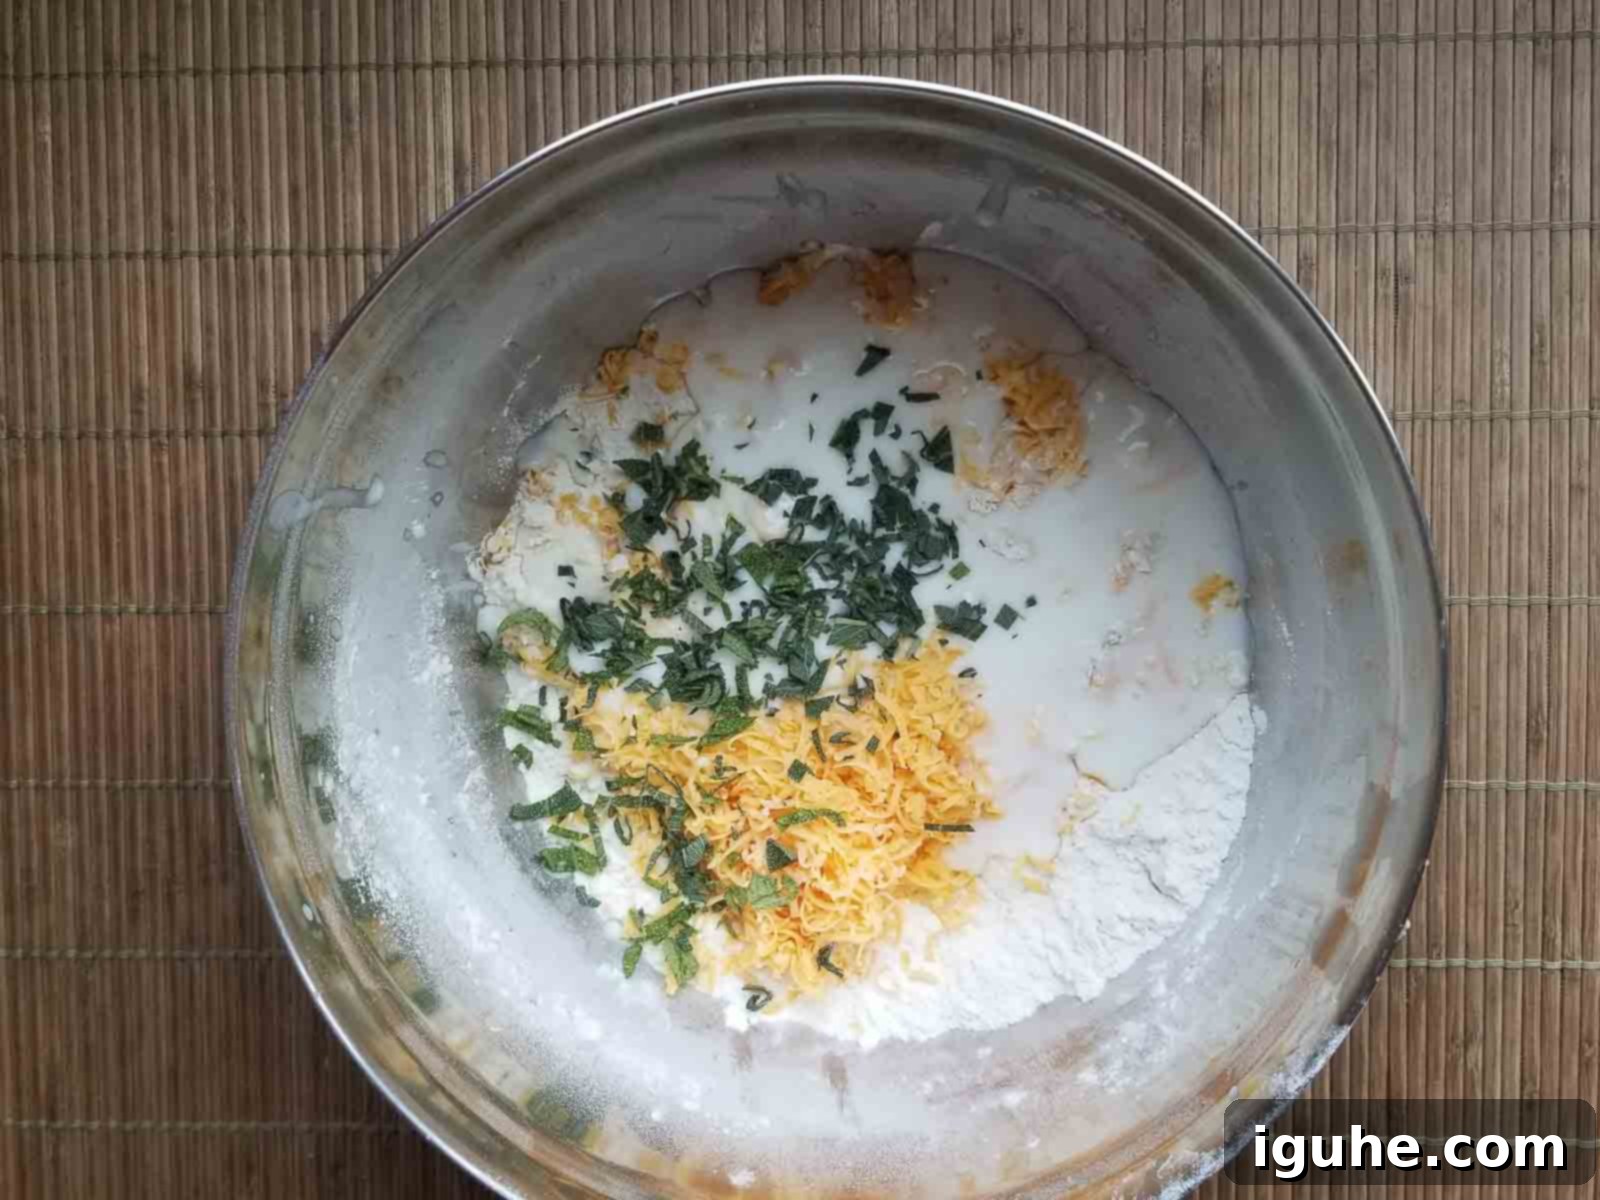
Step 3: Add Wet Ingredients and Mix. Pour in the chilled buttermilk, grated sharp cheddar cheese, and chopped fresh sage into the flour-butter mixture. Using a wooden spoon or a sturdy spatula, gently mix the dough just until all the ingredients are incorporated. The dough will look shaggy and a bit crumbly, but it should mostly hold together when pressed. The absolute key here is to not over-mix, as over-mixing develops gluten and can lead to tough biscuits. Stop as soon as it comes together.
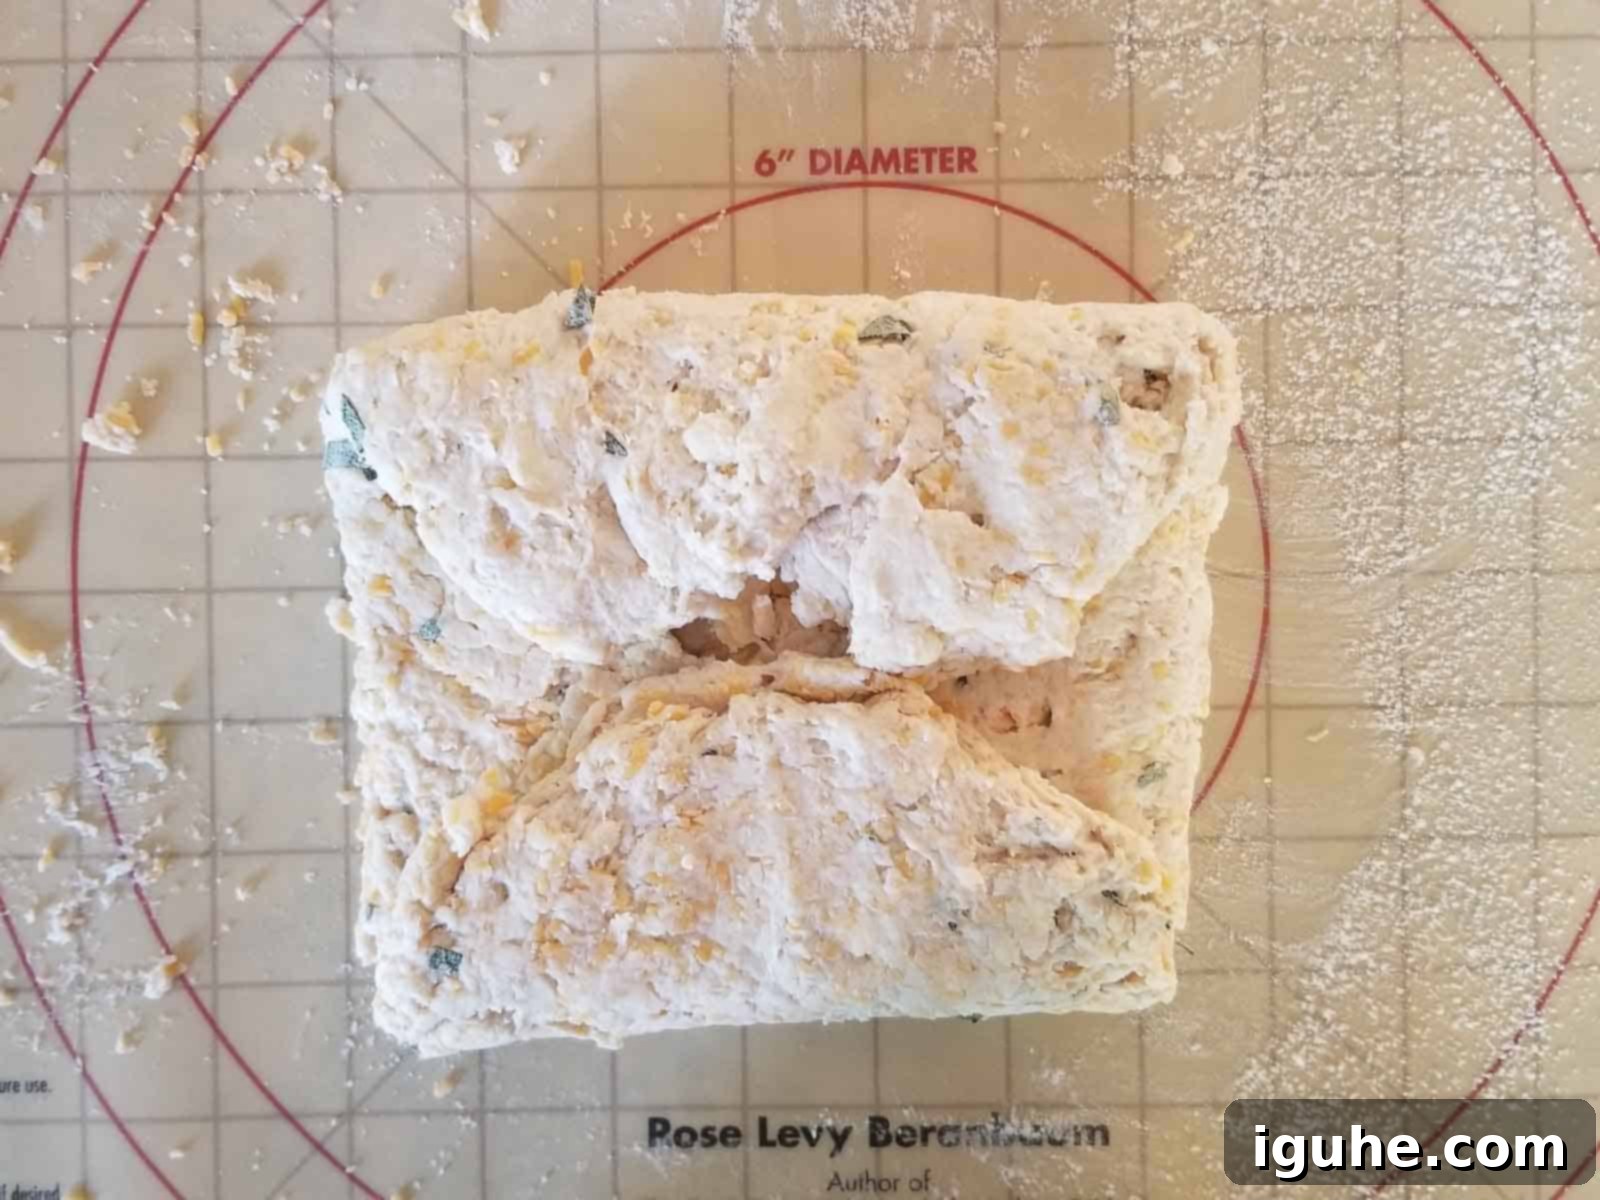
Step 5: Fold and Layer the Dough. Lightly flour your work surface. Gently gather the shaggy dough with your hands and turn it out onto the floured surface. Using your hands, pat the dough into a rough rectangle, about 1 inch thick. Now, for the layering: fold one side of the rectangle inward over the middle, then fold the other side inward to meet it, creating a “book” fold. Rotate the dough 90 degrees, pat it down gently to a rectangle again, and repeat this folding process 2 more times (for a total of 3 folds). This layering technique is crucial for achieving those beautiful, flaky biscuit layers. You should finish with a rough rectangle, still about 1 inch thick.
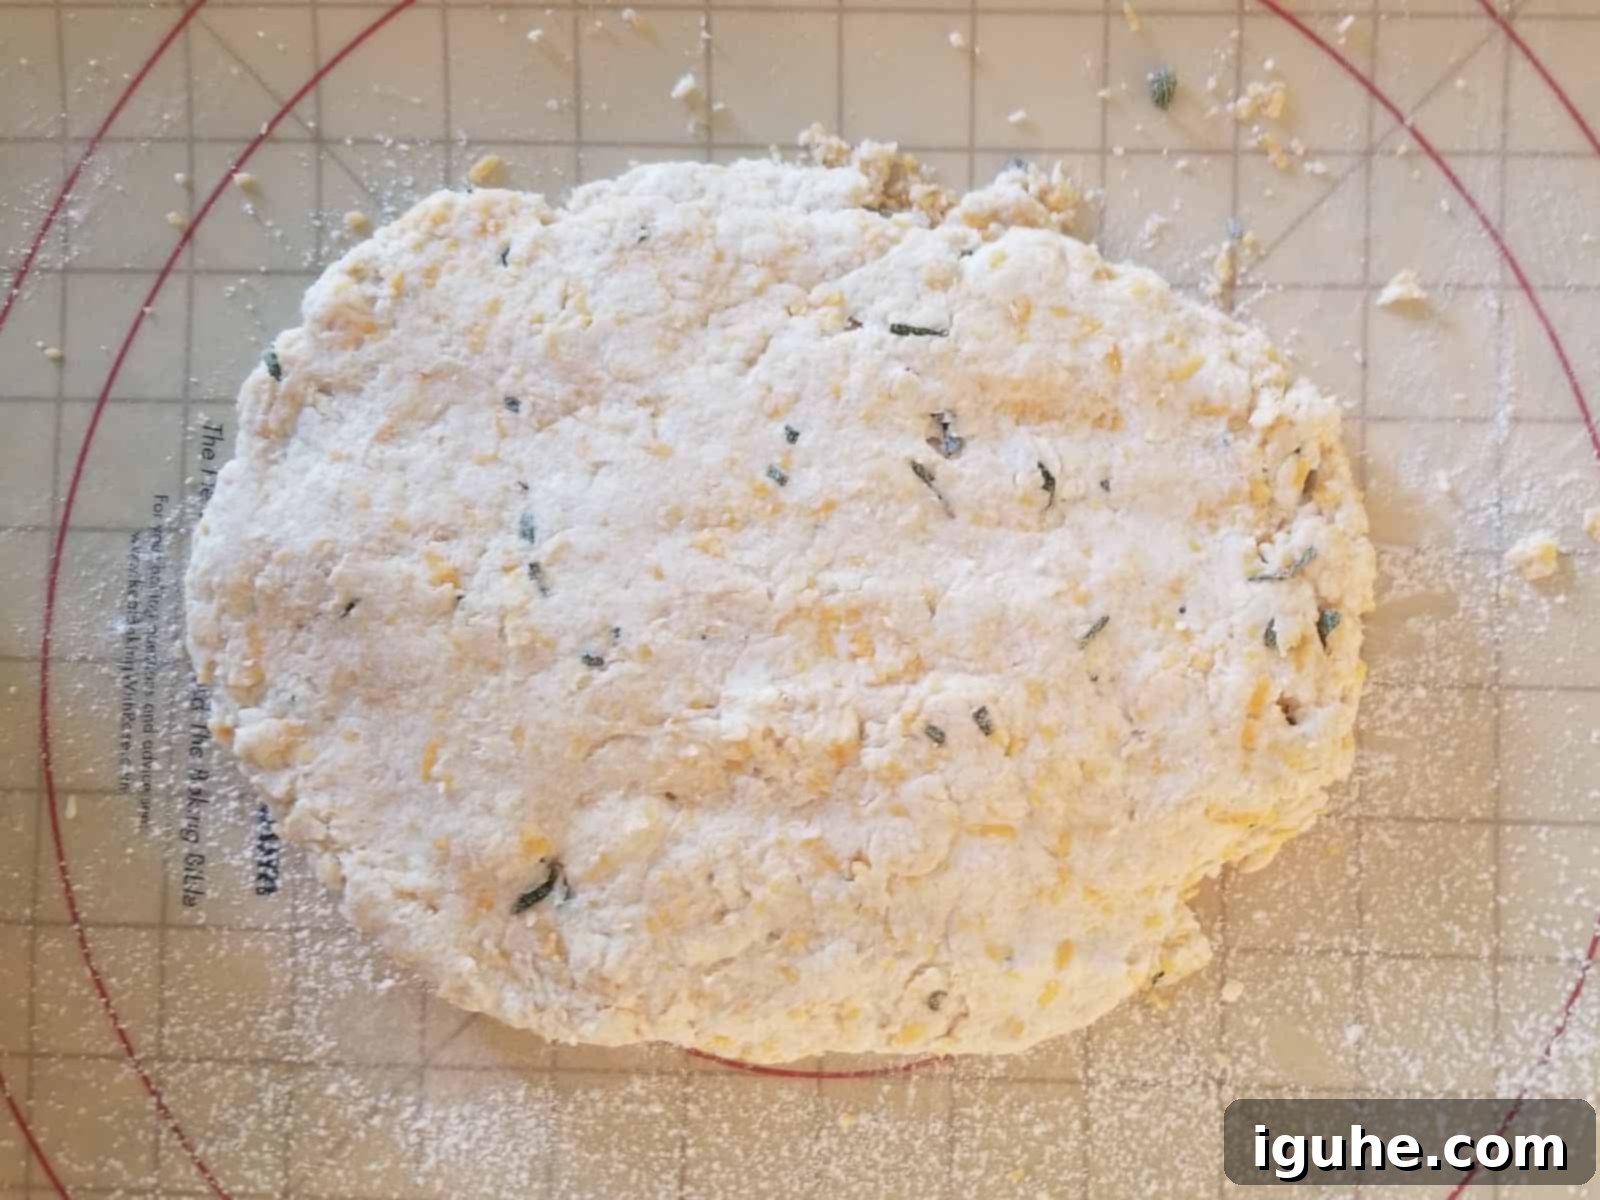
Step 4: Turn Out and Flatten the Dough. (This step is slightly reordered for clarity). Once the dough is mixed but shaggy, gather it with your hands and turn it onto a lightly floured surface. With your hands, gently pat it into a rectangle shape, aiming for about 1 inch thick. Avoid using a rolling pin if possible, as the warmth from your hands is less likely to melt the butter.
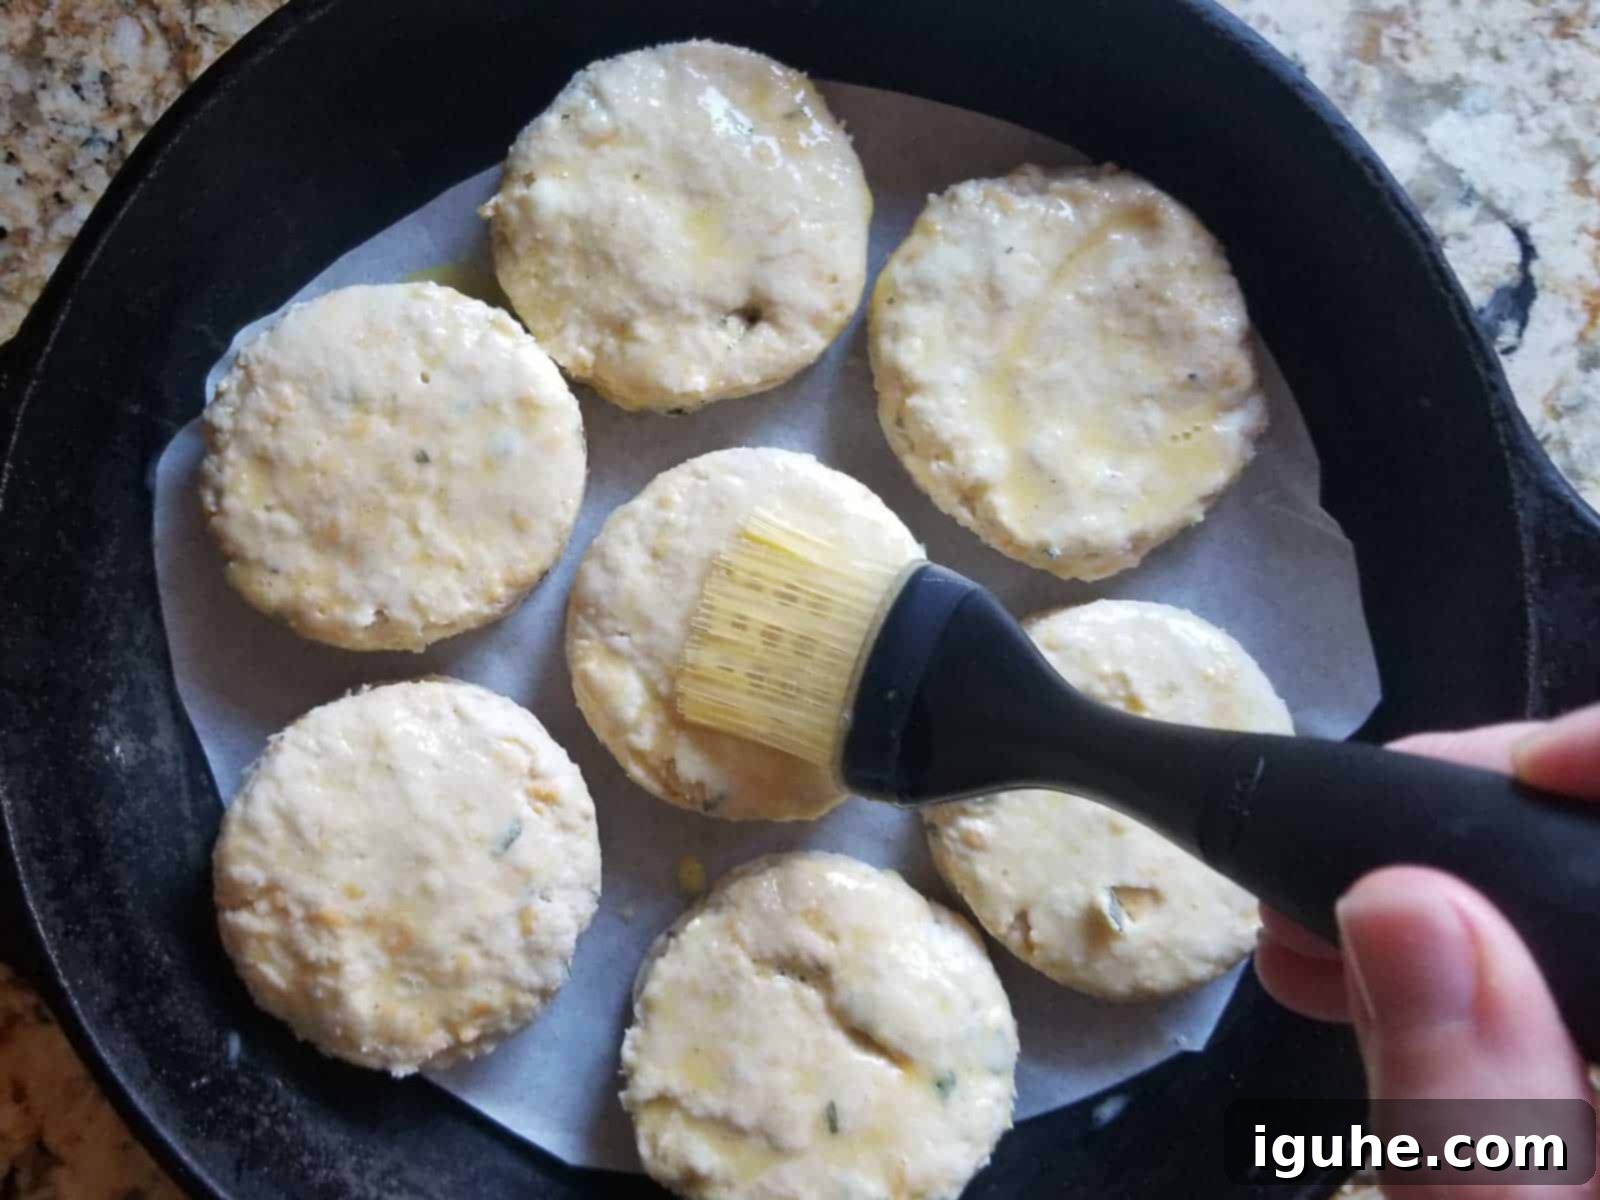
Step 6: Cut the Biscuits. Dip a 3-inch biscuit cutter in a little flour to prevent sticking. Press the cutter straight down into the dough to cut out the biscuit shapes. It is extremely important not to twist the cutter; twisting will seal the edges of the biscuits and prevent them from rising properly and forming flaky layers. Continue cutting biscuits, re-patting any scraps together gently (do not re-knead) to cut out additional biscuits until all the dough is used. You should yield around 7 biscuits. Arrange the cut biscuits in your prepared cast iron skillet or baking pan, leaving a little space between them for even baking. In a small bowl, whisk together the egg and 1 teaspoon of water to create an egg wash, then gently brush the tops of each biscuit with this mixture. This will give them a beautiful golden sheen.
Step 7: Chill and Bake. After brushing on the egg wash, place the pan with the biscuits in the fridge for 5-8 minutes to chill them one last time. This quick chill helps the butter firm up again, promoting an even better rise and flakiness. Then, transfer the pan to your preheated 425°F (218°C) oven and bake for 12-15 minutes, or until the tops are beautifully golden brown and the biscuits have risen high. The exact baking time can vary depending on your oven, so keep an eye on them. Once baked, remove them from the oven and let them cool for a few minutes in the pan before serving warm. These biscuits are absolutely divine served with a generous slather of butter or alongside your favorite savory dishes.
Pro Tips for Perfect Flaky Biscuits Every Time
While the instructions are straightforward, a few expert tips can help ensure your cheddar and sage biscuits turn out perfectly flaky and delicious:
- Keep Everything Cold: This cannot be stressed enough! Cold butter and buttermilk are essential for creating those airy, flaky layers. If your kitchen is warm, you can even chill your flour and mixing bowl for 10-15 minutes before starting.
- Don’t Overwork the Dough: Mix the dough just until combined. Overworking develops gluten, leading to tough biscuits instead of tender ones. A shaggy dough is a happy dough!
- Use a Pastry Blender (or Forks): These tools help incorporate the butter without melting it with the heat from your hands. If using your hands, work very quickly.
- Press Straight Down When Cutting: Resist the urge to twist your biscuit cutter. Twisting seals the edges of the biscuit, preventing them from rising tall and creating distinct layers. Flour your cutter between cuts to prevent sticking.
- Re-pat Scraps Gently: If you’re cutting more biscuits from dough scraps, gently press the scraps together just enough to cut. Don’t knead them, as this will overwork the gluten.
- Bake Hot and Fast: Biscuits love a hot oven. The high heat helps the butter steam rapidly, creating a quick rise and golden crust before the butter fully melts.
- Don’t Forget the Egg Wash: For that beautiful golden sheen, a simple egg wash makes all the difference in presentation.
- Chilling Before Baking: A final short chill (5-8 minutes) before baking can help the butter firm up again if it softened during handling, leading to an even better rise.
Flavorful Variations & Ingredient Swaps
One of the joys of baking is the ability to experiment and personalize recipes. While these cheddar and sage biscuits are fantastic as is, feel free to mix things up or swap ingredients to create new and exciting flavor combinations. Here are a few suggestions to get your culinary creativity flowing:
- Herbs: The fresh sage is wonderful, but you can easily substitute it with other fresh herbs. Try finely chopped fresh thyme for an aromatic, slightly lemony note, or fresh chives for a mild oniony kick. A blend of rosemary and thyme could also be lovely, especially for holiday meals.
- Cheddar Cheese Varieties: Don’t limit yourself to just sharp cheddar! Experiment with different cheeses to find your favorite. Mild cheddar offers a softer cheese flavor, while white cheddar can give a more sophisticated look and a slightly different tang. Swiss cheese would provide a nutty, buttery depth, and Gruyère would lend a rich, complex, and slightly sweet flavor. For a spicier kick, consider adding a touch of pepper jack cheese.
- Spices: Introduce a little warmth or heat with spices. A generous grind of fresh black pepper will add a subtle bite that complements the cheese and sage beautifully. For a smoky depth and a bit of a kick, try adding smoked paprika. A pinch of cayenne pepper could also be used for those who love a bit of heat.
- Add-ins: Consider adding a few other savory elements. Crispy, crumbled bacon bits would be an incredible addition. Sun-dried tomatoes (finely chopped) could add a sweet and tangy element. A small amount of finely minced garlic or garlic powder could also boost the savory profile.
Remember to adjust quantities to your taste and always aim for balance in your flavor combinations.
Kitchen Equipment You’ll Need
You don’t need a professional kitchen setup to make these delicious biscuits. Just a few basic kitchen staples will do the trick. Here’s what you’ll need:
- Mixing Bowl: A large one is best to comfortably whisk ingredients and mix the dough without spills.
- Pastry Blender: This is the ideal tool for cutting cold butter into flour, ensuring even distribution without warming the butter too much.
- Alternative to Pastry Blender: If you don’t have a pastry blender, don’t worry! Two forks can be used to achieve a similar result, or you can use your fingertips, working very quickly to minimize heat transfer to the butter.
- Cast Iron Skillet or Baking Pan: A 10-inch cast iron skillet is excellent for biscuits as it provides even heat, resulting in a beautifully crispy bottom crust. A regular baking sheet or pan lined with parchment paper will also work perfectly.
- Whisk: For combining dry ingredients and making the egg wash.
- Wooden Spoon or Sturdy Spatula: For gently mixing the dough.
- 3-inch Biscuit Cutter: This creates perfectly round biscuits.
- Alternative to Biscuit Cutter: If you don’t have a biscuit cutter, a clean drinking glass with a similar diameter can be used. Just make sure its rim is sharp enough to cut cleanly.
- Small Bowl: For preparing the egg wash.
- Pastry Brush: For applying the egg wash evenly.
Having these tools on hand will make the biscuit-making process smooth and enjoyable.
Delicious Pairings: What to Serve with Sage Biscuits
These savory cheddar and sage biscuits are incredibly versatile and can be enjoyed in so many ways. They’re fantastic on their own, but they truly shine when paired with other dishes. Here are some ideas to inspire you:
- Classic Butter: Fresh out of the oven, with a generous slather of plain or smoked chive butter, they are simply divine. The warmth of the biscuit melts the butter into every flaky layer.
- Brunch Companions: They make an excellent addition to any brunch spread. Serve them alongside scrambled eggs, crispy bacon, breakfast sausage, or even a rich frittata. They’re also perfect for making mini breakfast sandwiches.
- Soups and Stews: These biscuits are a dream for dunking! Their savory profile is a wonderful match for hearty stews, chili, or creamy soups like roasted butternut squash soup with crispy sage. The biscuit soaks up all the delicious broth and adds substance to your meal.
- Main Course Side Dish: Elevate any dinner by serving these biscuits as a side. They pair beautifully with roasted chicken, pork tenderloin, or a pot roast. Their herbaceous and cheesy flavor complements rich meat dishes perfectly.
- Salads: For a more substantial lunch or light dinner, pair these savory biscuits with a fresh, crisp golden beet salad with tarragon vinaigrette or any garden salad. The biscuit adds a satisfying, comforting element to the meal.
- Holiday Meals: Naturally, these sage biscuits are a fantastic side dish for your Thanksgiving, Christmas, or any holiday feast. They offer a homemade touch that feels both traditional and uniquely flavorful, standing out from standard dinner rolls.
- Savory Spreads: Beyond butter, consider serving them with savory jams or chutneys, like a tomato jam or onion relish, for an appetizer-style bite.
No matter how you choose to enjoy them, these cheddar and sage biscuits are sure to be a crowd-pleaser.
Storage and Reheating Tips
To ensure your savory cheddar and sage biscuits stay fresh and delicious, proper storage is key. Here’s how to store them and the best ways to reheat them to enjoy that fresh-baked taste:
- Room Temperature (Short-Term): Freshly baked biscuits are best enjoyed the day they are made, but they can be kept at room temperature for 1-2 days. To do this, allow the baked biscuits to cool completely first. Then, wrap them tightly in aluminum foil or plastic wrap, and place them in an airtight plastic bag or container. This helps prevent them from drying out.
- Refrigeration (Medium-Term): If you won’t be eating them within a couple of days, store them in the refrigerator for 4-5 days. Follow the same procedure: cool completely, wrap tightly in foil or plastic, and then place in an airtight container or bag.
- Freezing (Long-Term): Biscuits freeze exceptionally well, making them perfect for meal prep or having a quick batch on hand. After the biscuits have cooled completely, wrap each biscuit individually in plastic wrap, then wrap them again tightly in aluminum foil. Place the double-wrapped biscuits in a freezer-safe plastic bag. They can be stored in the freezer for up to 3 months.
Reheating Instructions:
- From Room Temperature or Refrigerator: For best results, reheat biscuits in a preheated oven or toaster oven at 300-325°F (150-160°C) for about 5-10 minutes, or until warmed through and the crust is crisp again. Microwaving is possible for speed, but it can make them a bit soft and chewy rather than flaky.
- From Freezer: You can reheat frozen biscuits directly from the freezer. Place them on a baking sheet and heat in a preheated oven at 300-325°F (150-160°C) for 15-20 minutes, or until they are warmed through and tender. If you have time, thawing them at room temperature first will reduce reheating time slightly.
Always bring them back to room temperature or warm them gently to refresh their texture and flavor, ensuring they are just as enjoyable as when they first came out of the oven.
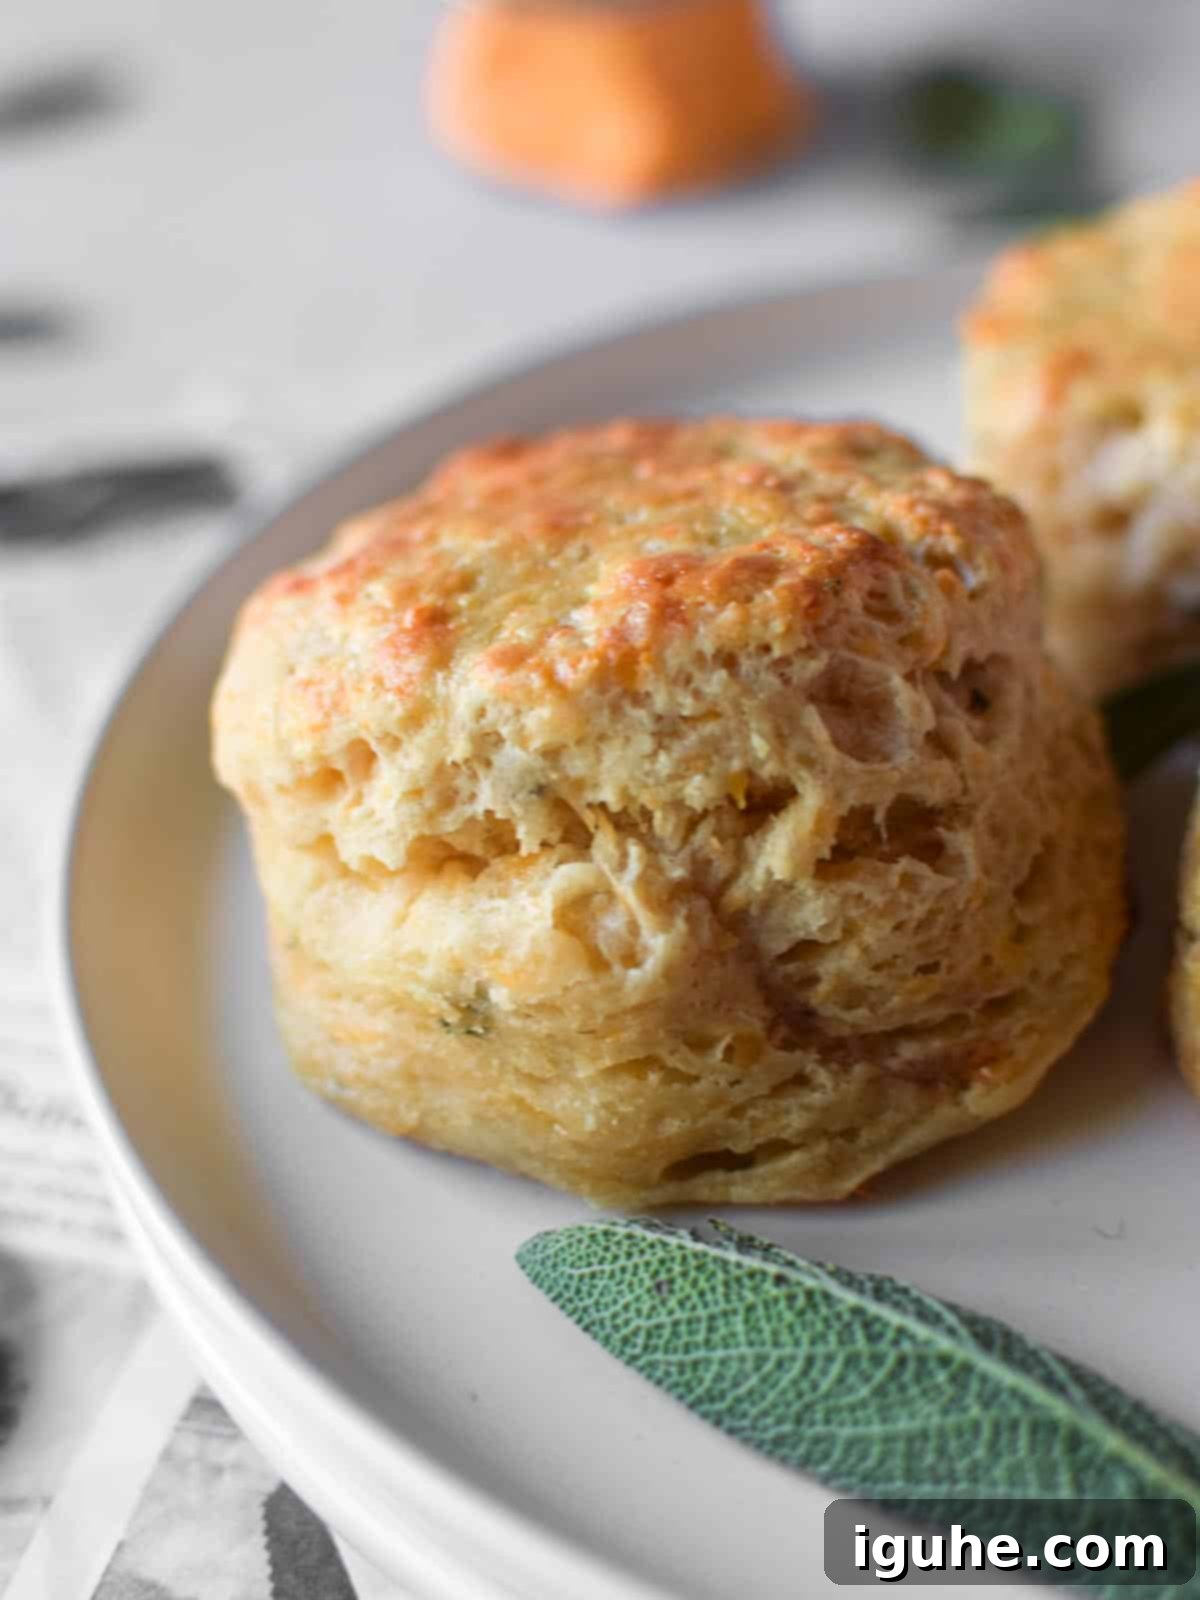
💡Top Tip for Ultimate Flakiness!
The absolute golden rule for achieving incredibly tall, tender, and flaky biscuits is to keep all your ingredients, especially the butter and buttermilk, as cold as possible. For optimal results, ensure that the butter is cut into small cubes and thoroughly chilled, and your buttermilk is straight from the refrigerator. For an extra boost, try popping the cubed butter and even the flour in the freezer for about 10-15 minutes before you begin mixing the dough. This extra chill factor prevents the butter from melting too early, allowing it to create more steam and thus, more luscious layers during baking.
Frequently Asked Questions (FAQ)
The primary secret to a good, fluffy, and flaky biscuit lies in using very cold ingredients, particularly cold butter and cold buttermilk. These cold elements prevent the butter from melting too quickly, allowing it to create steam pockets in the oven that separate the layers of dough, resulting in a light and airy texture. Additionally, avoid overworking the dough to prevent gluten development, which can lead to tough biscuits.
While dried sage can be used in a pinch, fresh sage is highly recommended for this recipe. Dried sage has a much more concentrated and sometimes muted flavor compared to the vibrant, aromatic notes of fresh sage, which are crucial for the distinct taste of these biscuits. If you must use dried, use about 1/3 to 1/2 of the amount of fresh sage specified, as its flavor is more potent.
Flat biscuits are often a result of melted butter, overworking the dough, or twisting the biscuit cutter. Ensure your butter and buttermilk are very cold. Mix the dough just until it comes together, and when cutting, press the biscuit cutter straight down without twisting. Twisting seals the edges, preventing proper rise.
Yes, you can prepare the biscuit dough ahead of time. After you’ve cut out the biscuit shapes, you can place them on a parchment-lined baking sheet and refrigerate them for up to 24 hours before baking. For longer storage, freeze the cut biscuits on a baking sheet until firm, then transfer them to a freezer-safe bag. Bake from frozen, adding a few extra minutes to the baking time.
More Brunch and Batter Recipes You’ll Love
If you enjoyed these savory cheddar and sage biscuits, you’re sure to find more culinary inspiration from our collection. Explore these other delightful recipes perfect for any meal:
- Eggs In Purgatory (Poached Eggs in Tomato Sauce)
- Orange Ricotta Zeppole (Italian Ricotta Doughnuts)
- Apple Toast with Ricotta and Sage Honey
- Mace Spiced Mini Bundt Cakes
Did you make this recipe? We would absolutely love to hear about your experience! Please leave a ⭐⭐⭐⭐⭐ rating with a comment right below the recipe card to share your feedback. If you snap a photo of your delicious creation, don’t forget to tag us on Instagram @brunchandbatter and use the hashtag #brunchandbatter. Your culinary adventures inspire us!
📖 Recipe Card: Savory Cheddar and Sage Biscuits

Savory Cheddar and Sage Biscuits
Pin Recipe
Equipment
-
1 10″ cast iron skillet or baking pan.
-
Large mixing bowl
-
Pastry blender or two forks
-
3-inch biscuit cutter (or a round glass)
-
Pastry brush
Ingredients
- 2 cups self-rising flour
- ½ teaspoon kosher salt
- 1 tablespoon granulated sugar
- ¾ cup + 2 tbsp buttermilk, chilled
- 6 tablespoon unsalted butter, very cold and cut into cubes
- 1 cup sharp cheddar cheese, freshly grated
- 2 tablespoon fresh sage, finely chopped
- 1 large egg + 1 teaspoon water for egg wash
Instructions
-
Preheat your oven to 425°F (218°C). Line a 10-inch cast iron skillet or a baking pan with parchment paper.
-
In a large bowl, whisk together the self-rising flour, kosher salt, and granulated sugar until well combined. Add the very cold, cubed butter.
-
Using a pastry blender (or two forks), cut the butter into the flour mixture until it resembles coarse crumbs with some pea-sized pieces of butter remaining. This texture is key for flaky biscuits.
-
Add the chilled buttermilk, grated cheddar cheese, and chopped fresh sage to the flour mixture. Using a wooden spoon or spatula, gently mix until the dough is just combined and looks shaggy. Be careful not to overmix, as this can make the biscuits tough.
-
Lightly flour your work surface. Turn the dough out onto the surface and gently pat it into a rough rectangle, about 1 inch thick. To create layers, fold one side of the dough over the middle, then fold the other side over to meet it (like a letter). Rotate the dough 90 degrees, pat it down again to 1 inch thick, and repeat this folding process 2 more times (total of 3 folds). After the final fold, reshape the dough into a rectangle about 1 inch thick.
-
Dip a 3-inch biscuit cutter in flour to prevent sticking. Press the cutter straight down into the dough to cut out the biscuit shapes. Do not twist the cutter, as this will seal the edges and inhibit the biscuits from rising. Gently gather any dough scraps, pat them together, and cut out additional biscuits until all the dough is used (you should get around 7 biscuits).
-
Arrange the biscuits in your prepared skillet or baking pan. In a small bowl, whisk together the egg and 1 teaspoon of water to create an egg wash, then brush it over the tops of the biscuits. Place the pan in the fridge for 5-8 minutes to chill the biscuits.
-
Bake in the preheated oven at 425°F (218°C) for 12-15 minutes, or until the biscuits are golden brown on top and cooked through. Remove from the oven and allow to cool slightly in the pan before serving.
-
Serve warm with extra butter, if desired, and enjoy!
Nutrition*
*Nutrition information is provided as a courtesy and is an estimate only. Nutrition information can vary depending on many factors, such as products used, measurements and substitutions, therefore it is recommended that you obtain nutritional calculations based on your own finished recipe.
