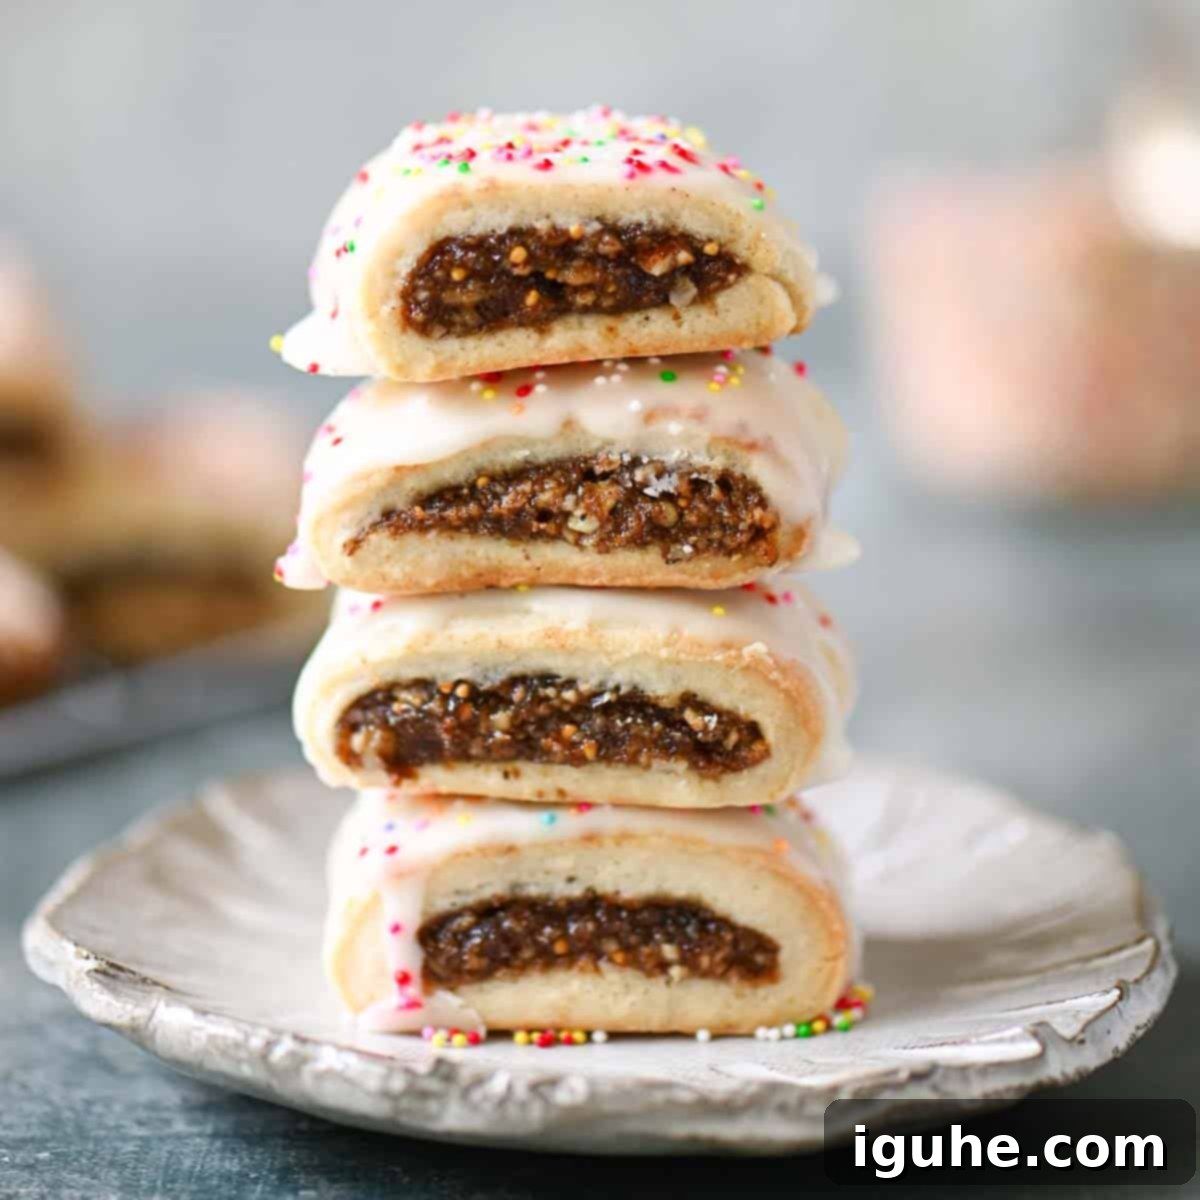
Homemade Italian Fig Cookies (Cuccidati): A Beloved Sicilian Christmas Tradition
Cuccidati (Italian Fig Cookies) are far more than just a sweet treat; they embody a cherished Sicilian tradition, lovingly passed down through generations. These festive pastry-like cookies are especially popular during the Christmas season, becoming a centerpiece on holiday dessert tables. Each cuccidato is a testament to rich flavors, boasting a generous filling crafted from a harmonious blend of dried figs, succulent dates, plump raisins, zesty citrus, and crunchy nuts. To complete this delectable experience, they are elegantly finished with a sweet, delicate glaze and adorned with a cheerful sprinkle of colorful nonpareils.
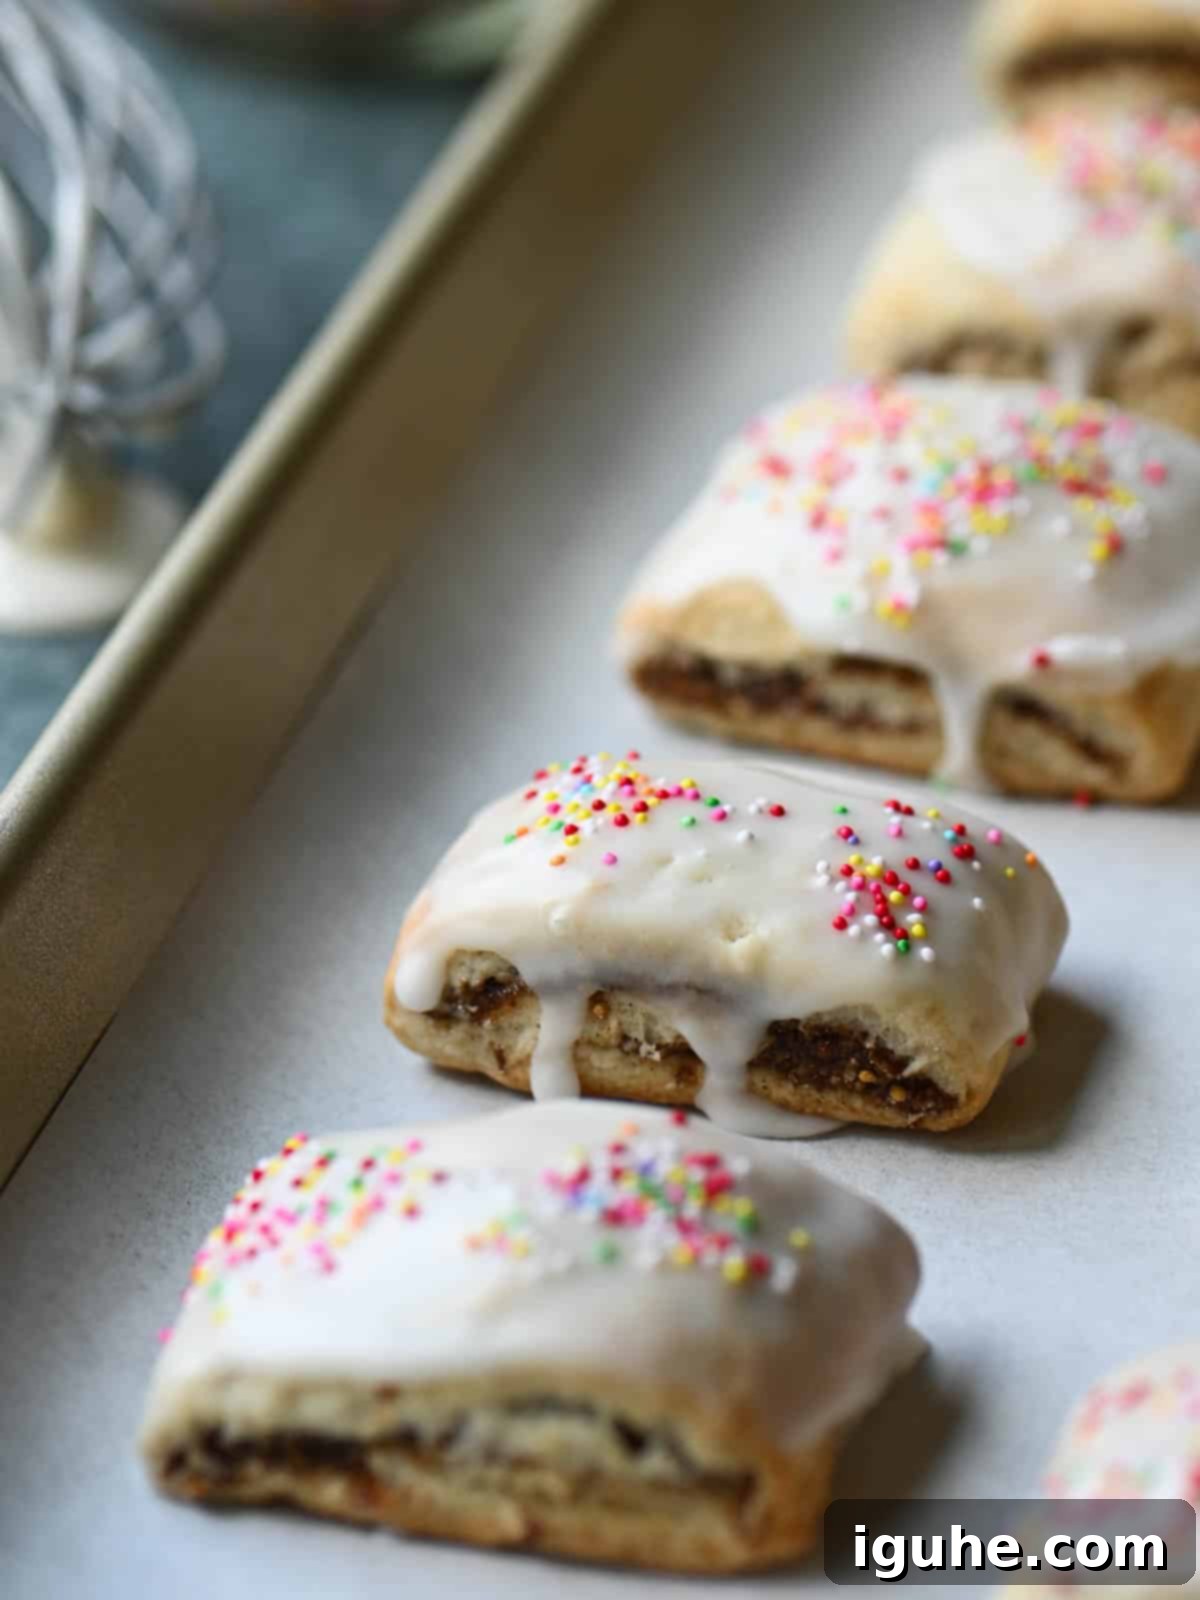
There’s something truly magical about these cookies. For many, including myself, they encapsulate the very essence of Christmas. One bite of a cuccidato instantly transports me back to the bustling, heartwarming Christmas Eve gatherings at my parents’ home. The kitchen was always a hub of activity, packed with family and friends, plates overflowing with savory dishes, and endless card games stretching late into the night. These Italian fig cookies were always there, a sweet reminder of tradition and togetherness, creating memories that last a lifetime.
I will be honest, while making cuccidati isn’t inherently difficult, it is indeed a labor of love that requires dedication and patience. The process involves several thoughtful steps: meticulously mixing the tender pastry dough, preparing the intensely flavorful fig filling, carefully rolling and shaping the cookies, and finally, delicately icing them. This entire journey is best savored, not rushed. My recommendation is to spread the preparation over two days. This allows you to truly enjoy each stage of the baking process, ensuring both a rewarding experience and perfectly crafted Italian fig cookies.
Before you embark on this culinary adventure, take a moment to read through the entire recipe and instructions once or twice. This will give you a clear overview of what to expect, helping you plan your time and approach each step with confidence. Every instruction is intentional, designed to guide you seamlessly through the process, and I assure you, it’s completely achievable for any home baker. With a little foresight and planning, you’ll be rewarded with a batch of cuccidati that are as delightful to make as they are absolutely irresistible to eat. These homemade fig cookies are a tradition worth keeping alive.
Key Ingredients for Authentic Cuccidati and Smart Substitutions
Don’t be daunted by the seemingly long list of ingredients for these traditional Sicilian fig cookies! Each component plays a vital role in building the profound depth of flavor that makes cuccidati so special. This is where all the magic truly happens, resulting in an unforgettable taste experience.
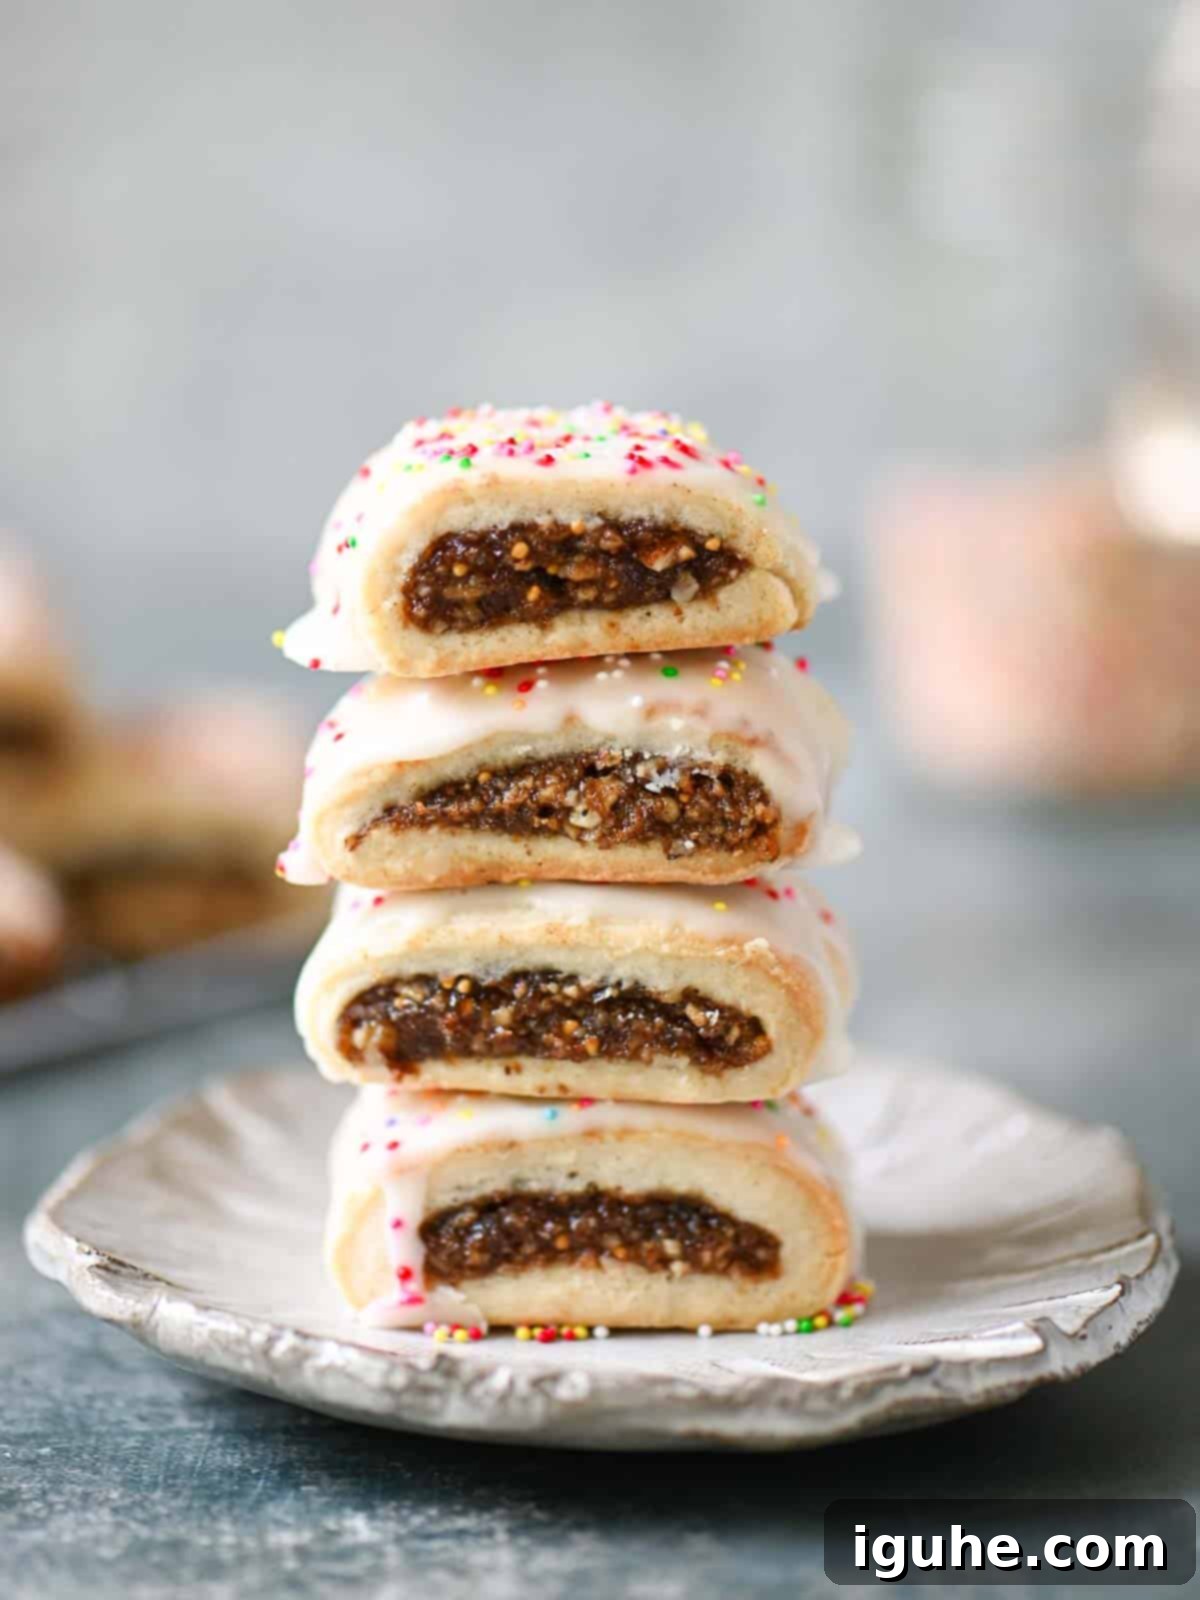
- The Pastry Dough. The foundation of these delicious fig cookies is a tender, pastry-like dough that comes together beautifully with common pantry staples. You’ll need high-quality all-purpose flour to give it structure, fresh eggs for richness and binding, fine granulated sugar for sweetness, a touch of baking powder for a delicate rise, a pinch of salt to balance the flavors, and rich whole milk for moisture and tenderness. We utilize a classic creaming method to incorporate these ingredients, resulting in a soft, pliable, and wonderfully workable dough. This dough is designed to roll out effortlessly and is robust enough to perfectly encase the generous fig filling without tearing.
- The Flavorful Filling. This is truly the heart and soul of the cuccidati, where an explosion of sweet, fruity, and nutty flavors awaits!
- The star of the show is, of course, the dried figs. Their intense, jammy sweetness forms the base. This is beautifully complemented and balanced by the natural, caramel-like sweetness of Medjool dates and the familiar chewiness of raisins. This trifecta of dried fruits creates a rich, complex sweet profile.
- For added texture and a delightful depth of flavor, I incorporate two types of nuts: hearty walnuts and delicate almonds. These are toasted to enhance their nutty aroma and provide a satisfying crunch against the soft fruit. Feel free to experiment with other nuts like earthy hazelnuts, buttery pecans, or vibrant pistachios. Choose what you enjoy or what you have readily available, as nuts can sometimes be a bit pricey.
- While many traditional recipes for Italian fig cookies might call for orange marmalade as a binder and sweetener, I’ve found that pure honey works wonders. It imparts just the right amount of sweetness, beautifully complementing the fruit without ever overpowering its natural goodness. Its sticky texture also helps hold the filling together perfectly.
- To achieve that signature nostalgic citrus flavor, I use Grand Marnier, an exquisite orange liqueur. This provides a sophisticated, warm orange note. Alongside this, a generous amount of fresh orange zest and bright lemon zest brightens the entire filling, adding an irresistible aromatic quality. If Grand Marnier isn’t available or preferred, excellent substitutes include brandy or a sweet Marsala wine, which will also lend a lovely complexity.
- Don’t forget the aromatic spices! Ground cinnamon, cloves, and nutmeg add a warm, festive, and truly “Christmassy” essence to the fig filling, making these cookies truly memorable.
- The Sweet Icing & Festive Sprinkles. The finishing touch on these delightful fig cookies is a simple yet elegant icing. A blend of fine powdered sugar (also known as confectioner’s sugar), pure vanilla extract, and a touch of milk creates a smooth, pourable glaze. This icing sets beautifully, adding an extra layer of sweetness and a lovely sheen. While sprinkles are technically optional, for me, cuccidati simply aren’t complete without them! We typically use tiny, colorful dot sprinkles, known as nonpareils, which add a vibrant pop and a playful texture. However, traditional sprinkles or “jimmies” work just as well if those are what you have on hand.
The full, detailed ingredient list with exact measurements can be found in the recipe card located further down this page.
Crafting Cuccidati: A Visual Guide to Italian Fig Cookies
Below, you’ll discover a comprehensive visual guide designed to help you successfully create these exquisite Italian cuccidati. While I’ve listed the filling preparation as the initial step for organizational clarity, you can certainly prepare it after you’ve started making the dough, depending on your workflow. This detailed guide ensures that every step, from preparing the dough to icing the final cookie, is clear and easy to follow.
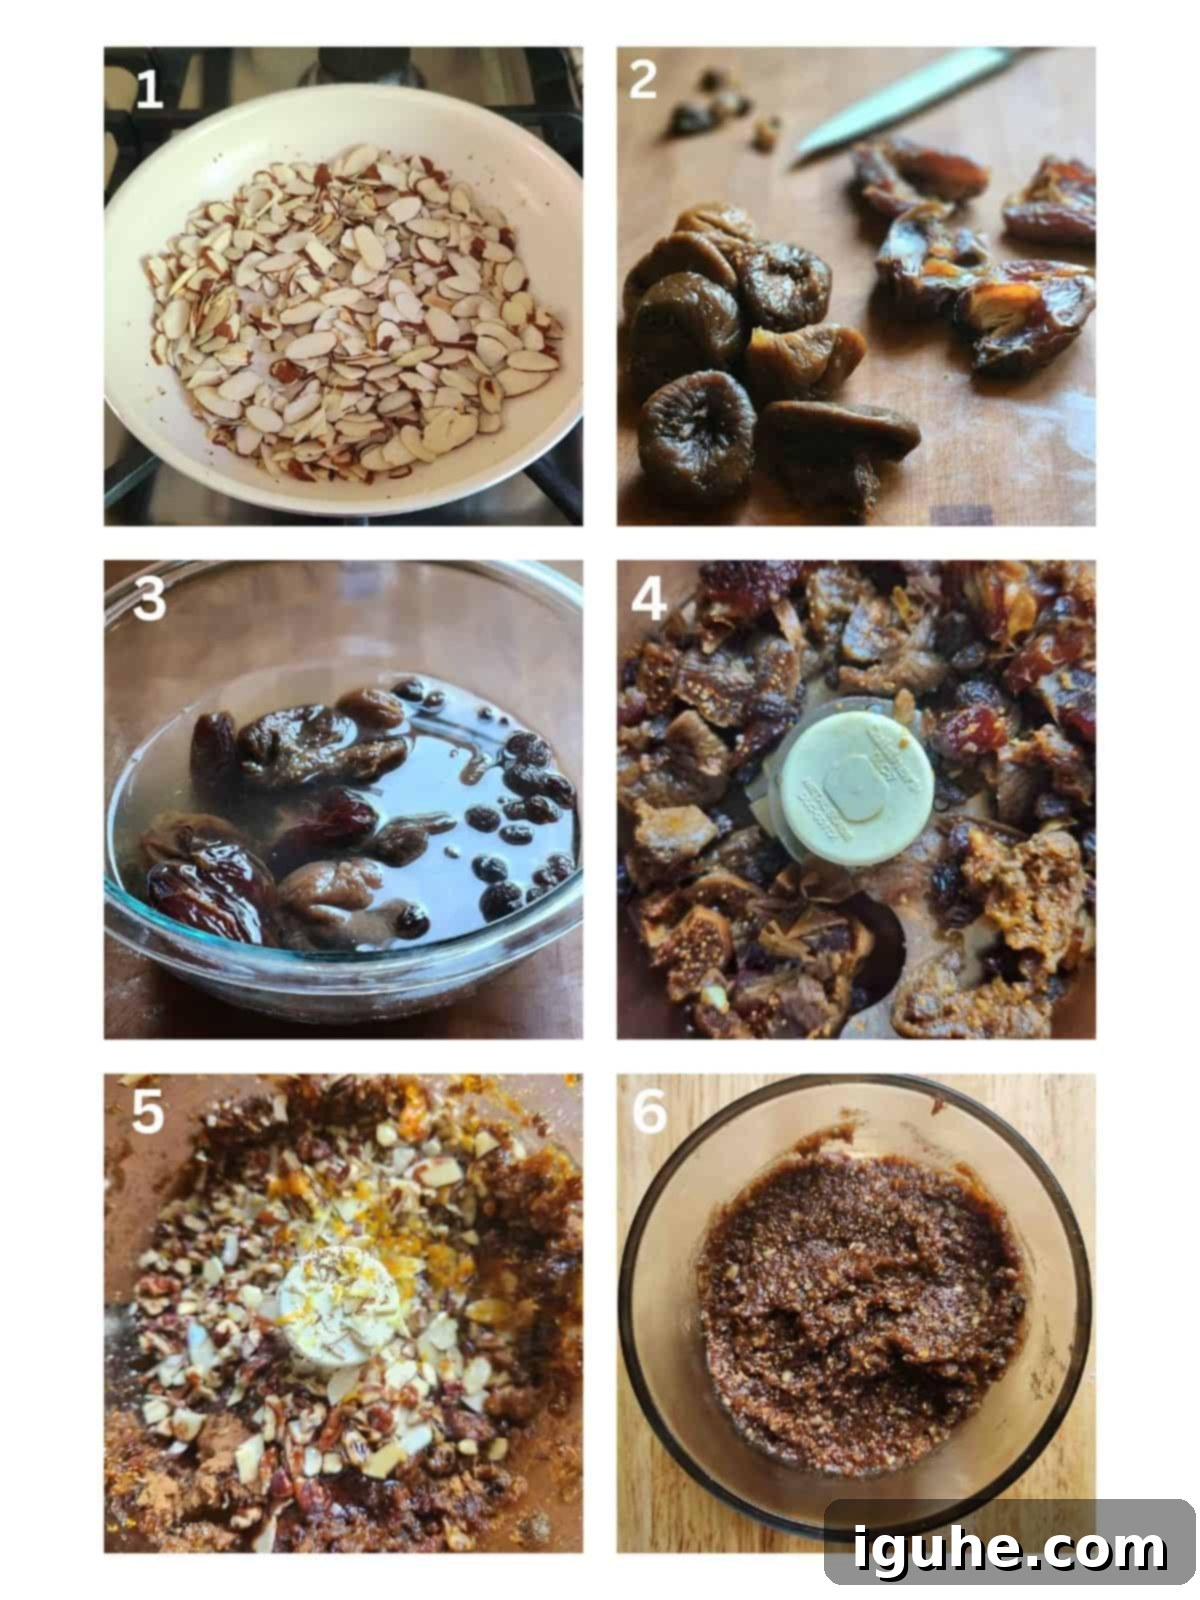
Step 1: Toast the Nuts. Begin by toasting your walnuts and almonds in a dry skillet over medium-low heat for 5-8 minutes until they become fragrant and lightly golden. This enhances their flavor significantly. Step 2: Prepare the Dried Fruit. Remove the tough stems from the dried figs and pit the Medjool dates. Roughly chop both the figs and dates. Step 3: Hydrate the Fruit. Place the chopped figs, dates, and raisins in a heatproof bowl and cover them with hot water. Allow them to soak for about 10 minutes to rehydrate and soften, making them easier to process. Step 4: Drain and Coarsely Chop. Thoroughly drain the soaked dried fruit, squeezing out any excess water. Transfer the fruit to a food processor and pulse a few times until it’s coarsely chopped. Step 5: Add Remaining Filling Ingredients. Into the food processor, add the toasted nuts, warmed honey, Grand Marnier (or substitute), fresh orange and lemon zest, ground cinnamon, cloves, and nutmeg. Step 6: Process to a Smooth Paste. Continue pulsing the mixture until a relatively smooth, cohesive paste forms. It’s okay if there’s still a little texture from the nuts – it adds character. The fig filling is now ready and can be refrigerated until needed.
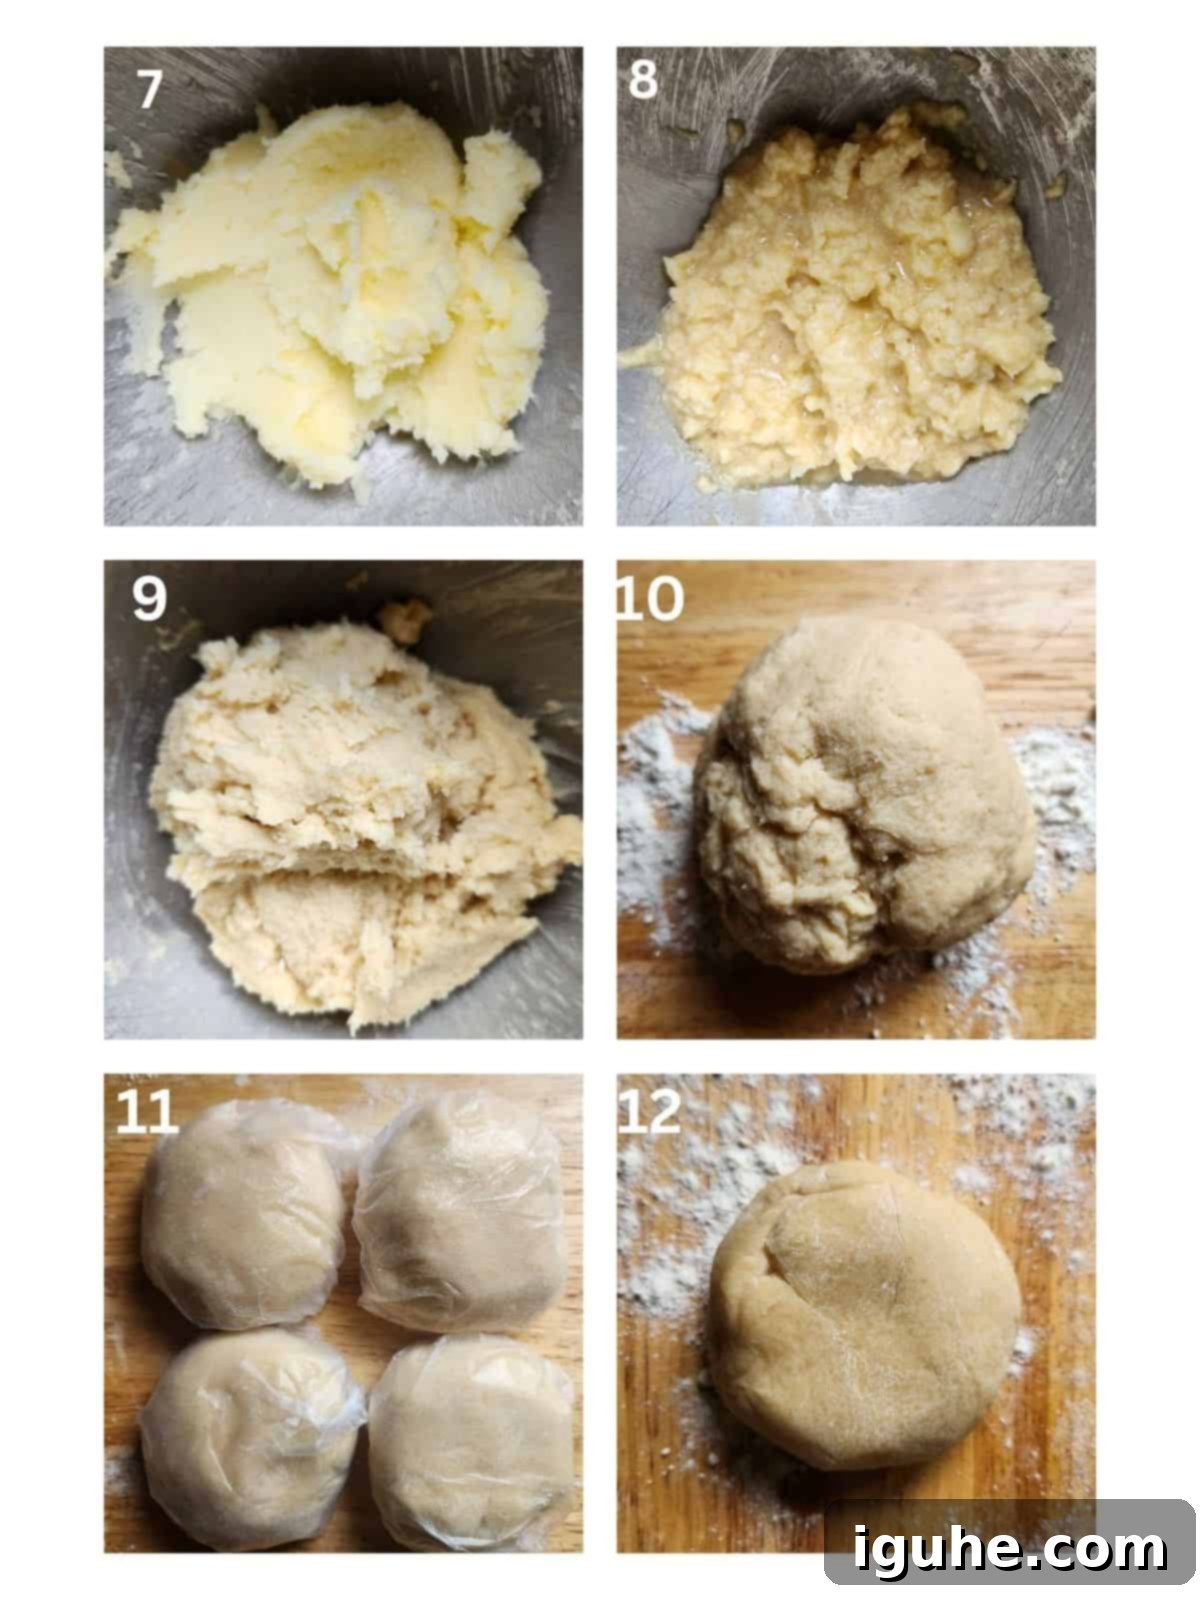
Step 7: Combine Dry Ingredients and Cream Butter. In a large bowl, whisk together the all-purpose flour, baking powder, and salt. Set this mixture aside. In a stand mixer fitted with the paddle attachment, cream the room-temperature unsalted butter and granulated sugar until the mixture is light, fluffy, and pale, typically taking about 3 minutes. Step 8: Incorporate Wet Ingredients. Add the room-temperature, lightly beaten eggs and vanilla extract to the creamed butter and sugar. Mix on low speed just until they are fully combined. Step 9: Alternate Dry and Wet. Reduce the mixer speed to its lowest setting. Gradually add the whisked flour mixture, alternating with the room-temperature whole milk. Mix until a cohesive, soft dough begins to form. Be careful not to overmix. Step 10: Lightly Knead the Dough. Turn the dough out onto a lightly floured surface. Gather it into a loose ball and knead it gently by hand for just a minute or two until it becomes smooth, workable, and less sticky. Step 11: Portion the Dough. Divide the dough ball in half, then cut each half into four equal pieces, yielding a total of eight portions. Step 12: Shape and Chill Dough Disks. Shape each dough portion into a small ball, then gently flatten it into a disk. Wrap each disk tightly in plastic wrap and refrigerate for a minimum of 2 hours, or ideally, overnight. This chilling step is crucial for the dough to become firm and easy to handle.
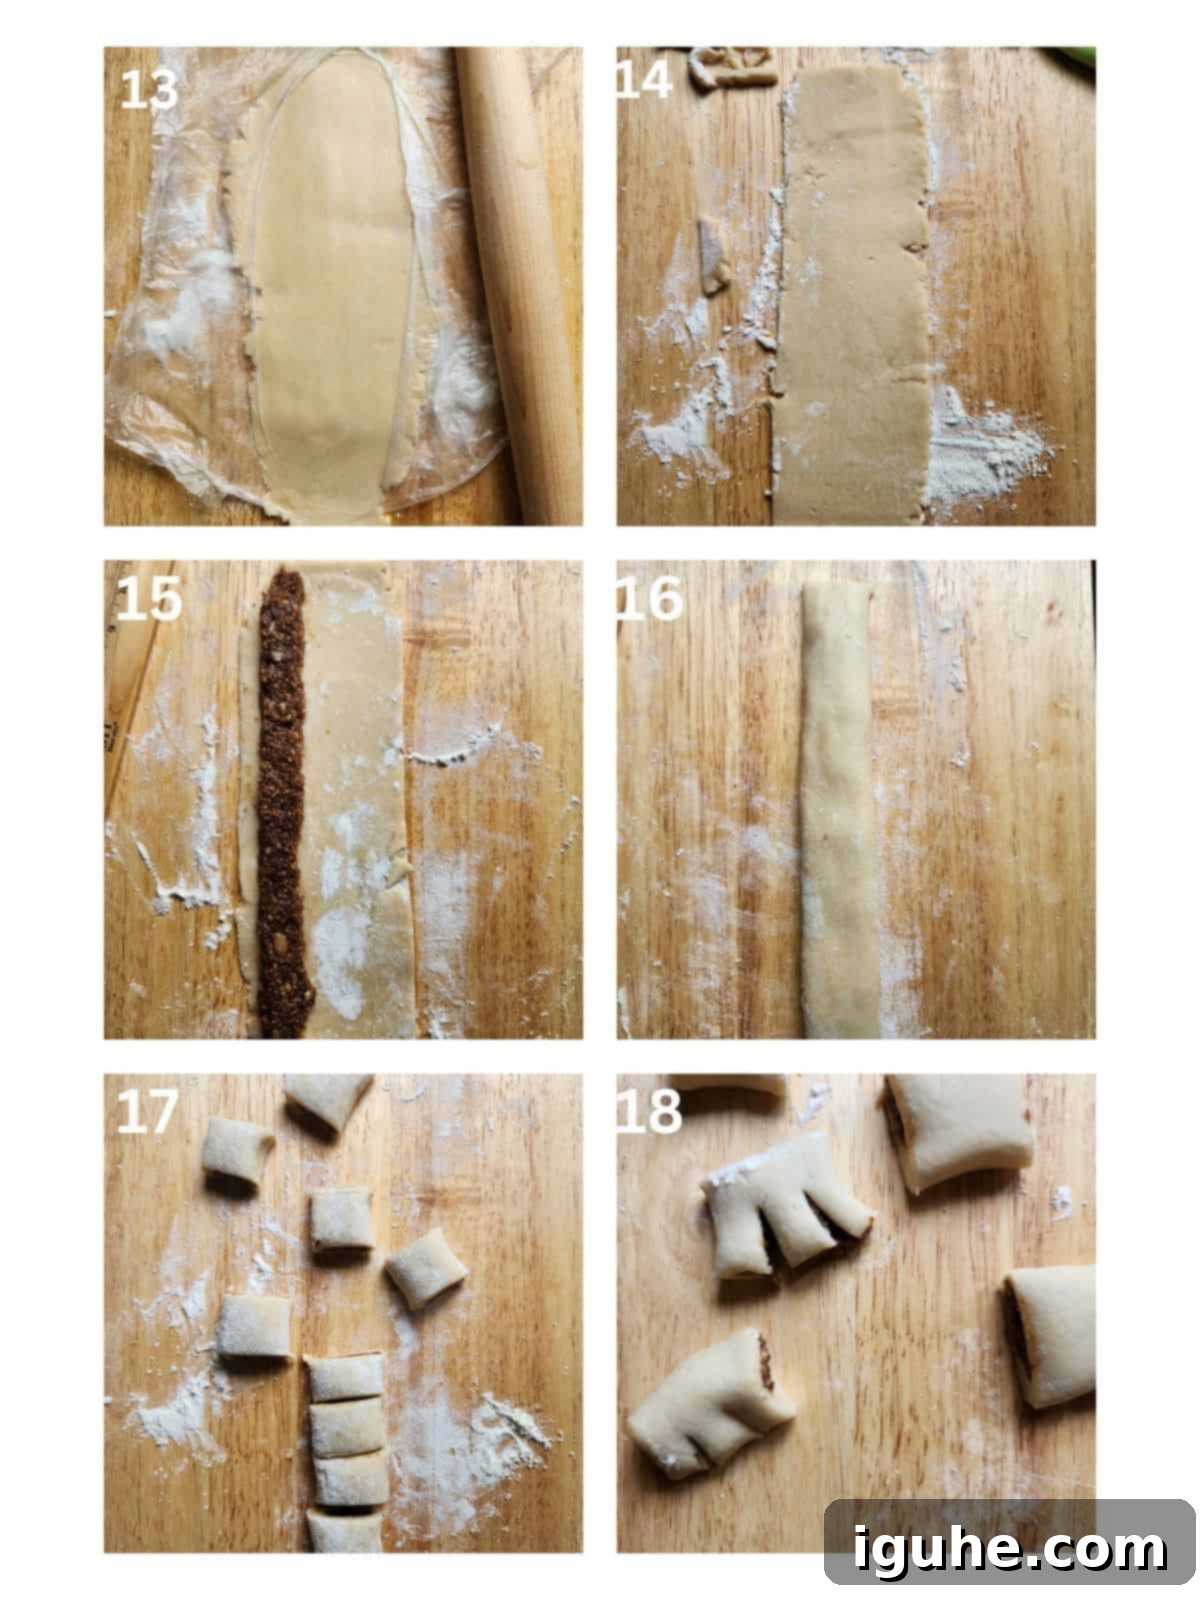
Step 13: Roll Out the Dough. Once chilled, take one dough disk at a time from the fridge. On a well-floured surface, roll it out into a thin rectangle, approximately 12 inches long and 3-4 inches wide. Ensure an even thickness for consistent baking. Step 14: Trim Edges for Neatness. If you desire a more uniform and neat appearance for your cuccidati, use a sharp knife or pastry wheel to lightly trim the edges of the dough rectangle. Step 15: Add the Fig Filling. Divide your prepared fig filling into eight equal portions. Take one portion and carefully spread it along the long edge of the rolled-out dough rectangle, leaving a small border at the top and bottom. Step 16: Roll and Reshape. Carefully roll the dough up lengthwise, enclosing the filling completely. Ensure the seam is facing downwards to keep it sealed. Gently flatten and reshape the log with your hands to create an even, consistent thickness. Step 17: Slice the Cookies. Using a sharp, floured knife, cut the filled dough log into individual cookies, each approximately 1¼ inches wide. You should yield about 8-9 cookies from each roll, depending on your slicing width. Step 18: Create Traditional Cuts (Optional). For a more traditional cuccidati appearance, take each sliced cookie and make two small, parallel slits on one side. This not only adds to the aesthetic but can also help the cookie bake more evenly. Continue this process with the remaining dough disks and filling.
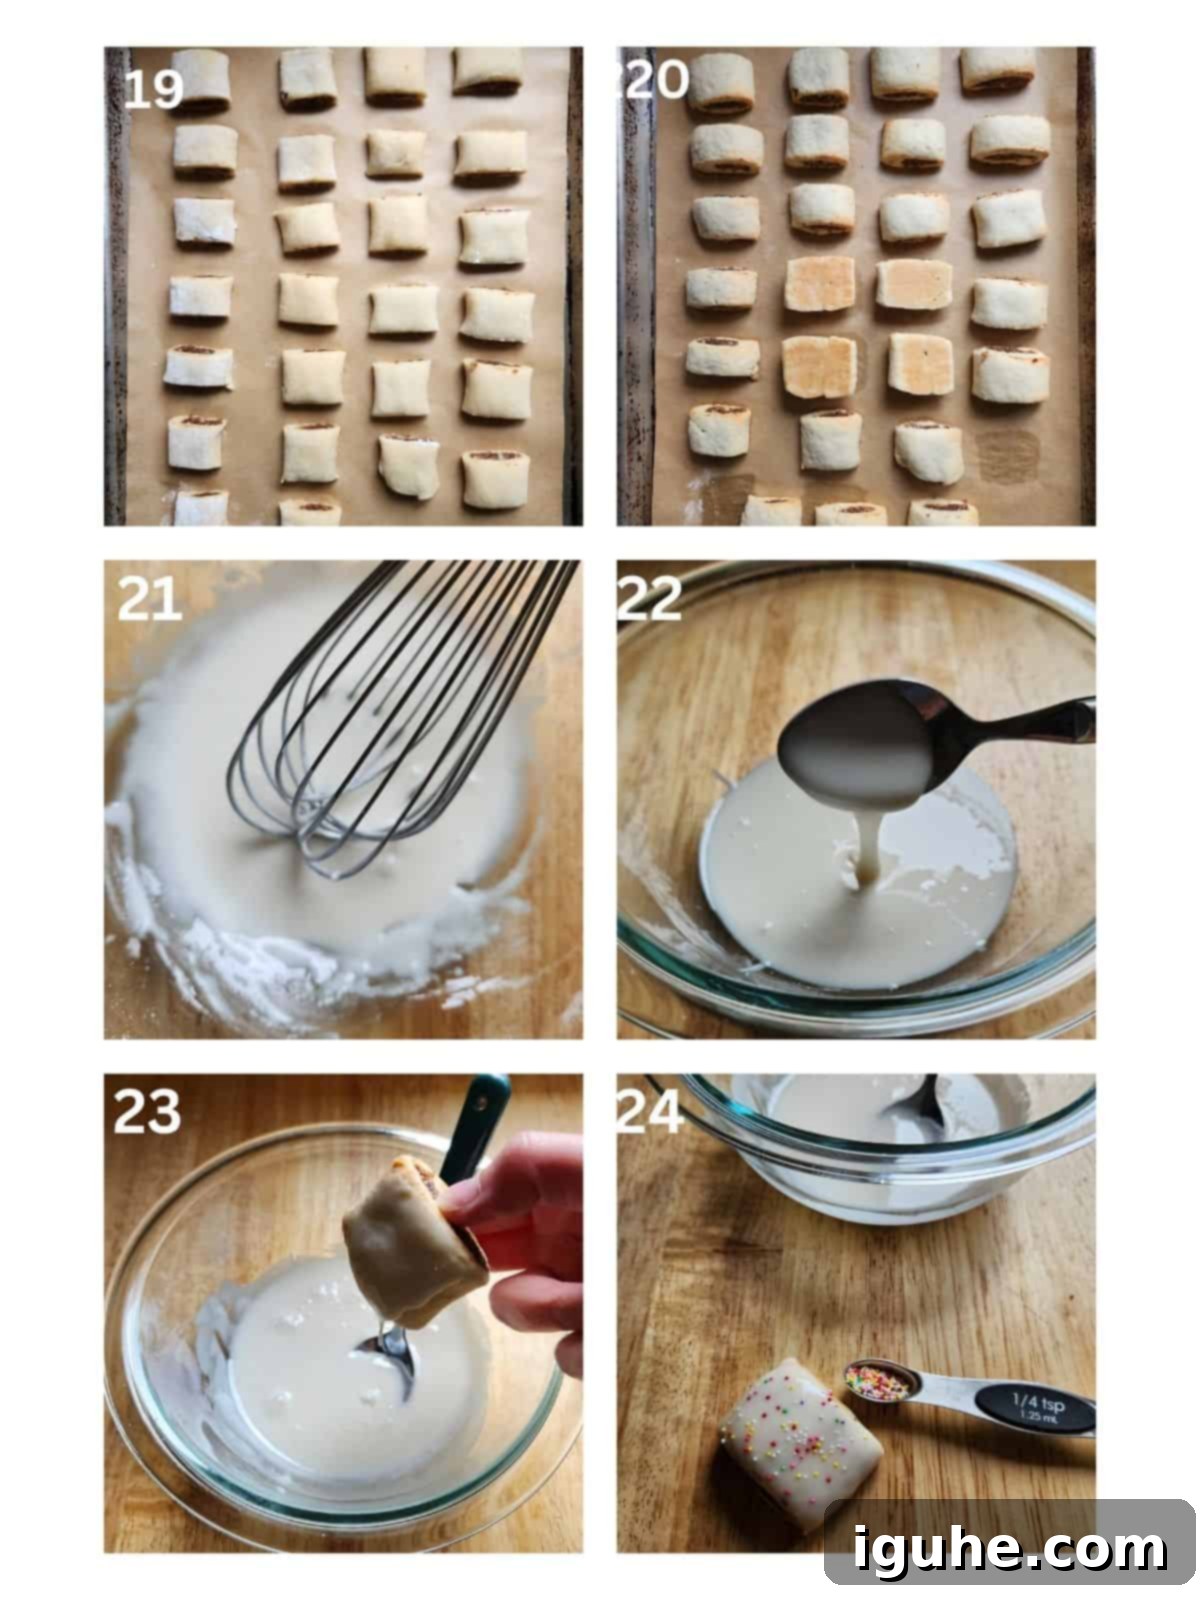
Step 19: Arrange for Baking. Line your baking trays with parchment paper. Carefully place the cut cuccidati cookies on the prepared trays, ensuring a 1-inch space between each cookie to allow for even baking and slight expansion. Step 20: Bake until Golden. Preheat your oven to 375℉ (190℃). Bake the cookies for 12-15 minutes, or until their edges are lightly golden brown. Rotate the pans halfway through baking to ensure uniform browning. Once baked, remove them from the oven and allow them to cool completely on the baking sheet before proceeding to the icing stage. Step 21: Prepare the Icing. In a medium-sized bowl, combine the sifted powdered sugar, vanilla extract, and 4-5 tablespoons of milk. Step 22: Whisk to Perfect Consistency. Whisk the icing ingredients vigorously until you achieve a smooth, thick yet pourable consistency. The glaze should be substantial enough to coat the cookies effectively but still thin enough to drip off any excess easily. If it’s too thick, add more milk a teaspoon at a time; if too thin, incorporate a little more powdered sugar. Step 23: Dip and Glaze. Dip the tops of the fully cooled cuccidati into the prepared icing, allowing any excess to drip back into the bowl. Place the glazed cookies onto a wire rack set over a sheet of parchment paper or aluminum foil (for easier cleanup) to allow the icing to set. Step 24: Add Sprinkles. Immediately after icing a few cookies, generously sprinkle them with nonpareils or your chosen colorful sprinkles while the glaze is still wet. This ensures the sprinkles adhere properly. Continue this process until all cookies are glazed and sprinkled. Let the icing harden completely before serving or storing your beautiful homemade Italian fig cookies.
*These are abbreviated instructions. For the complete and detailed list of directions, please refer to the recipe card provided below.
👩🍳 Expert Tips for Perfect Cuccidati
- Read the Directions Thoroughly. This might seem obvious, but it’s the most crucial first step for any baking project, especially one with multiple components like cuccidati. By understanding the entire process beforehand, you can anticipate steps, gather all necessary ingredients and equipment, and allocate sufficient time for chilling, baking, cooling, and icing. Planning ahead prevents stress and ensures a smoother baking experience.
- Prepare Dough and Filling in Advance. To truly make the process enjoyable and less rushed, consider preparing both the cookie dough and the fig filling 24 hours before you plan to bake. Chilling the dough overnight allows the gluten to relax, making it much easier to roll out evenly without snapping back, and it prevents stickiness. Similarly, preparing the filling in advance allows the flavors of the figs, dates, nuts, and spices to meld and deepen, resulting in an even more intensely flavorful Italian fig cookie. The filling actually keeps very well in the fridge for up to a week!
- Have Your Workstation Prepped. A well-organized kitchen is a happy kitchen. Before you start rolling and shaping, ensure your workstation is fully equipped. This includes having extra all-purpose flour readily available for dusting your surface and rolling pin, a sharp knife at hand for trimming dough and slicing cookies, and your baking sheets already lined with parchment paper. For the icing stage, setting up an “icing station” with a wire rack placed over a sheet of parchment paper or aluminum foil will catch any drips, making cleanup a breeze.
- Toast Your Nuts for Enhanced Flavor. While it might be tempting to skip this step to save time, toasting the walnuts and almonds is a game-changer for the fig filling. The heat brings out the oils in the nuts, intensifying their natural flavor and adding a depth that raw nuts simply cannot offer. To toast, simply spread the nuts in a single layer in a dry skillet over medium-low heat. Cook for 5-8 minutes, stirring occasionally, until they are fragrant and lightly golden brown. Keep a close eye on them, as nuts can burn quickly.
- Prevent Sticking with Parchment Paper. When rolling out the dough, especially if it feels a bit sticky after chilling, a smart trick is to roll it between two sheets of parchment paper or plastic wrap. This not only makes handling the dough much easier and cleaner but also significantly reduces the need for excess flour, which can toughen the cookies.

Creative Variations for Your Italian Fig Cookies
While the traditional cuccidati recipe is undeniably perfect, don’t hesitate to personalize these Italian fig cookies to better suit your palate or explore new flavor combinations. Here are a few delightful variations you might consider:
- Experiment with Spices. The beauty of the fig filling is how well it takes to different warming spices. Feel free to adjust the ratios of cinnamon, cloves, and nutmeg to your liking. Perhaps you prefer less cinnamon and a more prominent clove note, or vice versa. For a seasonal twist, try incorporating a blend like pumpkin pie spice or chai spice if you have them on hand. You could also venture into adding a hint of ground ginger, aromatic cardamom, or even a touch of mace for a truly unique and sophisticated flavor profile in your cuccidati.
- Customize the Nuts. The recipe calls for a combination of walnuts and almonds, which provide a lovely balance of texture and flavor. However, you have complete freedom to use different nuts, or even omit them entirely if you have allergies or preferences. Hazelnuts offer a rich, buttery taste, pecans lend a deeper, almost caramel-like note, and pistachios add a vibrant color and distinct flavor. You don’t necessarily need to use two types; a single variety of your favorite toasted nut will work wonderfully.
- Elevate Your Icing Flavor. Our recipe features a simple, classic glaze enhanced with a hint of pure vanilla extract. But why stop there? For a brighter, tangier finish, consider substituting some of the milk in the icing with fresh citrus juice, such as lemon juice, to create a zesty lemon icing, much like the one found in these delightful Italian lemon drop cookies. Alternatively, for an extra layer of warmth, whisk a tiny pinch of a warm spice, like ground cinnamon or a speck of nutmeg, directly into the powdered sugar icing. This subtle addition can beautifully echo the spices in the fig filling.

Delightful Serving Suggestions for Cuccidati
Traditionally, cuccidati are a staple during the joyous Christmas season in Italy, particularly in Sicily, gracing festive tables with their irresistible charm. However, their deliciousness knows no bounds, and they can certainly be enjoyed any time of the year! You’ll most frequently encounter these Italian fig cookies as part of an elaborate Italian holiday dessert spread, nestled amongst other beloved festive favorites. Imagine them alongside delicate pizzelles, bright and airy lemon drop cookies, or the rich and nutty pignoli cookies. And, of course, no Italian cookie assortment is complete without generous quantities of freshly brewed espresso – lots and lots of it! The bold, rich flavor of espresso perfectly complements the sweet and spiced notes of the fig filling.
These homemade fig cookies are also an absolute showstopper if you have a cookie swap or holiday party scheduled on your calendar. They’re guaranteed to impress and demonstrate your impressive baking skills, making you the star of any festive gathering! Serve them on a beautiful platter, and watch them disappear.
Make-Ahead and Storage Tips for Cuccidati
One of the best aspects of baking cuccidati is how well they lend themselves to make-ahead preparation, significantly easing the holiday baking rush. To simplify the process, I highly recommend preparing the cookie dough the day before you plan to bake. This allows ample time for the dough to chill thoroughly, which is crucial for achieving the perfect texture and making it easier to handle. Even better, you can prepare the flavorful fig filling a whole week in advance! Yes, you read that right – your Christmas baking just got a lot less stressful. The filling stores exceptionally well in an airtight container in the refrigerator, allowing its complex flavors to deepen even further.
Once baked and fully cooled, store your cuccidati in an airtight container at room temperature. They will remain fresh and delicious for up to five days. In fact, these cookies often taste even better on the second day, as the various flavors within the fig filling have more time to meld and harmonize, creating a richer, more profound taste experience. For longer storage, cuccidati freeze beautifully. Simply layer them with sheets of parchment paper in an airtight freezer-safe container to prevent them from sticking together, and they will keep perfectly for up to 3 months. Thaw them at room temperature before serving for a taste of Sicilian tradition any time you desire.

Frequently Asked Questions About Italian Fig Cookies (Cuccidati)
Many people who try cuccidati for the first time might describe them as a vastly superior version of a Fig Newton. However, I’ve always found Fig Newtons to be a bit dry and lacking in robust flavor. Cuccidati are a world apart! Their filling genuinely “tastes like Christmas” – you’ll first experience warm notes of sweet cinnamon and bright orange, followed by the rich, jammy sweetness of figs, dates, and raisins. The texture is wonderfully moist and delightfully chewy, never dry or crumbly. The simple yet sweet icing on top adds another layer of indulgence. Interestingly, some of my coworkers remarked that they tasted like the best Pop-Tart they’d ever had! I never considered it that way, but now I can definitely see the resemblance in that sweet, glazed comfort.
Unfortunately, no, fresh figs are not suitable for cuccidati. While fresh figs are incredibly delicious and have their own culinary charm, they contain far too much moisture for this particular recipe. Using them would result in a soggy filling and a dough that struggles to bake properly. Cuccidati specifically rely on the concentrated sweetness and chewy texture of dried figs. If you happen to have an abundance of fresh figs, I highly recommend using them for other delightful recipes like my savory roasted balsamic fig toast or the impressive roasted fig and rosemary butter board instead.
While you can certainly make cuccidati without sprinkles, I personally feel they are an integral part of what makes these Italian fig cookies so festive and fun! Think about it: if you’ve already invested the time and love into rolling the dough, shaping the cookies, baking them to perfection, and carefully icing them, adding sprinkles is truly the easiest and most rewarding final step. They provide a delightful pop of color and a touch of whimsy, instantly making these traditional cookies look ready for any holiday celebration. So, while not strictly “essential” for taste, they absolutely elevate the visual appeal and joyful spirit of cuccidati.
Adapting traditional recipes to be gluten-free can be tricky, especially with pastry doughs that rely on gluten for structure and elasticity. While it might be possible to use a high-quality 1:1 gluten-free all-purpose flour blend, the texture might differ. Gluten-free doughs tend to be more crumbly and less pliable, which could make rolling and shaping the fig-filled logs challenging. If you attempt it, look for a blend that specifically states it’s good for pastries or rolling, and be extra gentle during handling. You might also need to increase the chilling time to make the dough more manageable.
More Cozy Recipes to Enjoy
Discover more warm and inviting recipes, perfect for cooler weather or whenever you crave a comforting treat. These dishes are designed to bring warmth and joy to your kitchen.
- Cherry Tomato Confit with Garlic and Thyme
- Baked Brioche French Toast
- Honeycrisp Applesauce with Brown Sugar and Cinnamon
- Blackberry Boursin Grilled Cheese
Did you make this recipe? I would love to hear about it! Please leave a ⭐⭐⭐⭐⭐ rating with a comment right below the recipe card. If you snap a photo of your creation, don’t forget to tag me on Instagram @brunchandbatter.
📖 Recipe: Classic Italian Fig Cookies (Cuccidati)

Italian Fig Cookies (Cuccidati)
Pin Recipe
Equipment
-
Food processor
-
Stand mixer fitted with the paddle attachment
-
Rolling pin
-
2-3 Baking/cookie sheets
-
Parchment paper
Ingredients
For the Dough
- 4 cups all-purpose flour, plus more for dusting/rolling
- 1 tablespoon baking powder
- ½ teaspoon Kosher or fine sea salt
- 1 cup (2 sticks) unsalted butter, room temperature, cut into large cubes
- 1 cup white granulated sugar
- 2 large eggs, room temperature, lightly beaten
- 1 tablespoon vanilla extract
- ½ cup whole milk, room temperature
For the Fig Filling
- 1 cup dried figs, stems removed, roughly chopped
- ½ cup Medjool dates, pitted and roughly chopped
- ½ cup raisins
- ¾ cup walnuts, toasted and coarsely chopped
- ¾ cup almonds, toasted and coarsely chopped
- ¾ cup honey, slightly warmed for easier mixing
- ¼ cup Grand Marnier (orange liqueur), or brandy/Marsala wine
- 1½ teaspoon orange zest, freshly grated
- 1½ teaspoon lemon zest, freshly grated
- 1 tablespoon ground cinnamon
- ½ teaspoon ground cloves
- ¼ teaspoon ground nutmeg
For the Icing
- 1¾ cups powdered (confectioner’s) sugar, sifted
- ½ tsp vanilla extract
- 4-5 tablespoon milk, whole or 2%, plus more if needed
- nonpareils, or other small multicolored sprinkles for topping
Instructions
For the Dough
-
In a large bowl, whisk together the all-purpose flour, Kosher salt, and baking powder until well combined; set this dry mixture aside.4 cups all-purpose flour, plus more for dusting/rolling, 1 tablespoon baking powder, ½ teaspoon Kosher or fine sea salt
-
In the bowl of a stand mixer fitted with the paddle attachment, cream together the room-temperature unsalted butter and granulated sugar on medium speed until the mixture is light, pale, and fluffy, which usually takes about 3 minutes. Add the lightly beaten eggs and vanilla extract, mixing on low speed just until they are fully incorporated into the butter mixture. Reduce the mixer speed to its lowest setting. Gradually add the reserved flour mixture, alternating with the room-temperature whole milk, mixing until a cohesive and soft dough forms. Be careful not to overmix, as this can lead to tough cookies.1 cup (2 sticks) unsalted butter, room temperature, cut into large cubes, 1 cup white granulated sugar, 2 large eggs, room temperature, lightly beaten, 1 tablespoon vanilla extract, ½ cup whole milk, room temperature
-
Gently gather the dough from the mixer bowl into a loose ball, and turn it out onto a generously floured surface. Knead the dough by hand just until it feels smooth, is pliable, and is no longer excessively sticky. This brief kneading helps bring it together without developing too much gluten.
-
Divide the dough in half, then cut each half into four equal pieces, resulting in eight total portions. Shape each piece into a neat ball, then gently flatten it slightly into a disk. Tightly wrap each dough disk in plastic wrap and refrigerate for a minimum of 2 hours, or ideally, overnight. This chilling step is essential for firming the dough and making it easier to roll and shape.
For the Fig Filling
-
Begin by toasting your walnuts and almonds in a dry skillet over medium-low heat until fragrant and lightly golden. Remove the stems from the dried figs and carefully pit the Medjool dates, then roughly chop both. Place the chopped figs, dates, and raisins in a heatproof bowl and cover them completely with hot water; let them soak for about 10 minutes to rehydrate and soften. Drain the fruit very well, squeezing out any excess water. Transfer the rehydrated fruit to a food processor. Pulse a few times to coarsely chop the fruit, then add the remaining filling ingredients: the toasted walnuts and almonds, slightly warmed honey, Grand Marnier (or chosen substitute), fresh orange zest, fresh lemon zest, ground cinnamon, ground cloves, and ground nutmeg. Continue to process the mixture until it forms a mostly smooth, thick paste with some lingering texture from the nuts. The filling can be refrigerated in an airtight container until you are ready to assemble the cookies.1 cup dried figs, stems removed, roughly chopped, ½ cup Medjool dates, pitted and roughly chopped, ½ cup raisins, ¾ cup walnuts, toasted and coarsely chopped, ¾ cup almonds, toasted and coarsely chopped, ¾ cup honey, slightly warmed for easier mixing, ¼ cup Grand Marnier (orange liqueur), or brandy/Marsala wine, 1½ teaspoon orange zest, freshly grated, 1½ teaspoon lemon zest, freshly grated, 1 tablespoon ground cinnamon, ½ teaspoon ground cloves, ¼ teaspoon ground nutmeg
Roll, Fill, and Slice the Cuccidati
-
Preheat your oven to 375℉ (190℃). Remove the chilled dough disks (and the filling if it was stored) from the refrigerator. Working with one piece of dough at a time, roll it out on a well-floured surface (or between two sheets of parchment paper) into a thin rectangle, approximately 12 inches long and 3-4 inches wide. For a neater, more uniform appearance, you may lightly trim the edges of the rectangle. Divide the fig filling into 8 equal portions. Take one portion of the filling and carefully place it along one of the long edges of the rolled dough rectangle, creating a log shape. Then, carefully roll the dough up lengthwise, completely enclosing the filling. Ensure the seam is facing down to prevent it from opening during baking. Gently flatten and shape the log with your hands to create an even, consistent thickness. Using a sharp, floured knife, cut the filled dough log into individual cookies, each approximately 1¼ inches wide. You should yield about 7-9 cookies per log, depending on your slicing width. For a more traditional appearance, make two small, parallel slits on the side of each cookie. Repeat this process with the remaining dough disks and fig filling.
Bake the Cuccidati
-
Place the cut cookies on a baking sheet lined with parchment paper, leaving approximately a 1-inch space between each cookie to allow for proper air circulation during baking. Bake for 12-15 minutes, or until the edges of the cookies are lightly golden brown. For even baking, rotate the pans halfway through the baking time. Once baked, remove the cookies from the oven and allow them to cool completely on the baking sheet before you proceed to the icing step.
Ice the Cuccidati
-
In a medium bowl, whisk together the sifted powdered sugar, vanilla extract, and 4-5 tablespoons of milk until the mixture is completely smooth and has a pourable consistency. The glaze should be thick enough to beautifully coat the cookies but thin enough that any excess can easily drip off. If the icing is too thick, add a little more milk, a teaspoon at a time, until the desired consistency is reached. Conversely, if the icing becomes too liquid, add a little more sifted powdered sugar to thicken it.1¾ cups powdered (confectioner’s) sugar, sifted, ½ teaspoon vanilla extract, 4-5 tablespoon milk, whole or 2%, plus more if needed
-
Dip the tops of the completely cooled cookies into the prepared glaze, allowing any excess icing to drip back into the bowl for a clean finish. After glazing a few cookies, immediately add a generous sprinkle of nonpareils or other small multicolored sprinkles to the top of the cookies while the icing is still wet. This ensures the sprinkles adhere securely. Place the glazed and sprinkled cookies on a wire rack to allow the glaze to harden completely before serving or storing.nonpareils, or other small multicolored sprinkles for topping
Notes
- Read the directions thoroughly. Always take the time to read through all the directions before you begin, so you can plan your baking process accordingly. Ensure you allow sufficient time for dough chilling, baking, cooling, and icing, as these steps are crucial for the best results. Refer to the main blog post for additional picture instructions and substitution ideas.
- Prepare the dough and filling 24 hours in advance. This is a highly recommended tip to streamline your baking and enhance the flavors. Preparing both components a day ahead makes the dough much easier to handle after it’s sufficiently chilled, and it allows the rich flavors of the fig filling to meld and deepen beautifully.
- Prevent sticking. For effortless rolling and to minimize the amount of extra flour needed, which can toughen your cookies, roll the dough between two sheets of parchment paper or plastic wrap. This also makes cleanup easier.
- Have your workstation prepped. An organized baking space makes all the difference. Before starting, ensure you have extra flour ready for dusting, a sharp knife prepared for trimming and slicing, and all your baking sheets already lined with parchment paper. When it’s time to ice, set up an “icing station” with a wire rack placed over parchment paper or aluminum foil to catch drips, simplifying cleanup.
- Toast your nuts. Do not skip this step! Toasting the walnuts and almonds adds an incredible depth of flavor and a rich aroma to the fig filling. To toast them, simply spread the nuts in a dry skillet over medium-low heat and cook for 5-8 minutes, stirring frequently, until they are fragrant and lightly golden brown. Watch them carefully to prevent burning.
Nutrition*
*Nutrition information is provided as a courtesy and is an estimate only. Nutrition information can vary depending on many factors, such as products used, measurements and substitutions, therefore it is recommended that you obtain nutritional calculations based on your own finished recipe.
