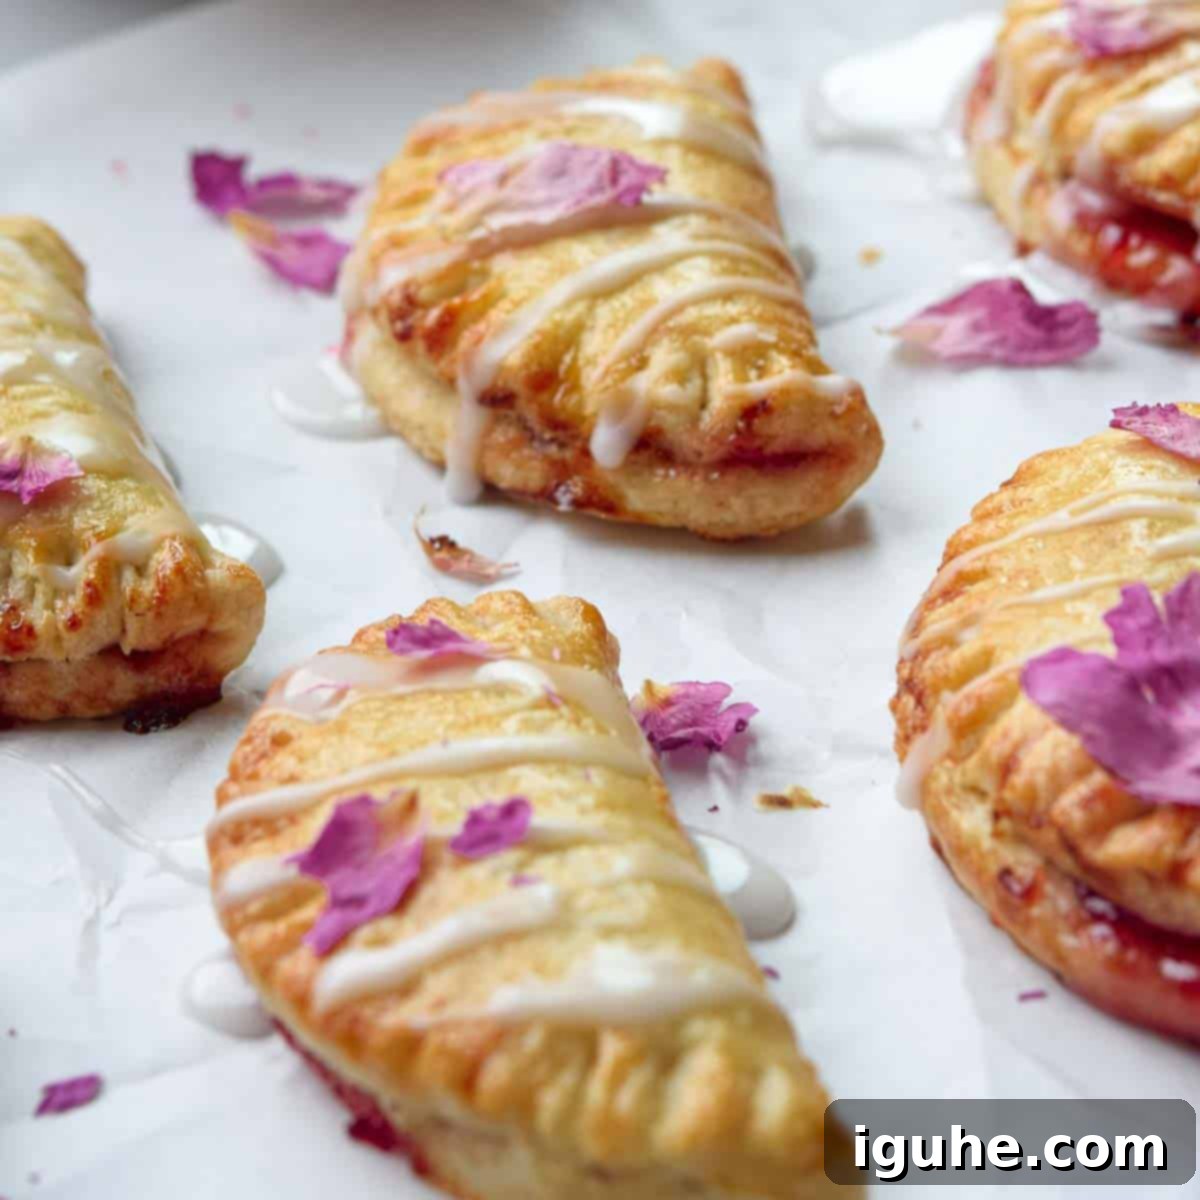
Irresistible Strawberry Mini Pies with Delicate Rose Glaze: Your Perfect Bite-Sized Treat!
Imagine a world where you can savor an entire pie, all by yourself, without any guilt or the need to share. With these adorable Strawberry Mini Pies with Rose Glaze, that dream becomes a delicious reality! Each miniature delight features a pocket of perfectly flaky, golden homemade pie crust, generously stuffed with a sweet and tangy strawberry jam, then lovingly drizzled with a delicate, aromatic rose-flavored icing. These individual treats are not just incredibly cute; they’re a burst of flavor and texture that’s absolutely perfect for any occasion. Whether you’re hosting an elegant garden party, packing a picnic basket for a sunny afternoon, or simply indulging in a delightful brunch, these mini pies are guaranteed to be the star of the show and leave a lasting impression on every palate.
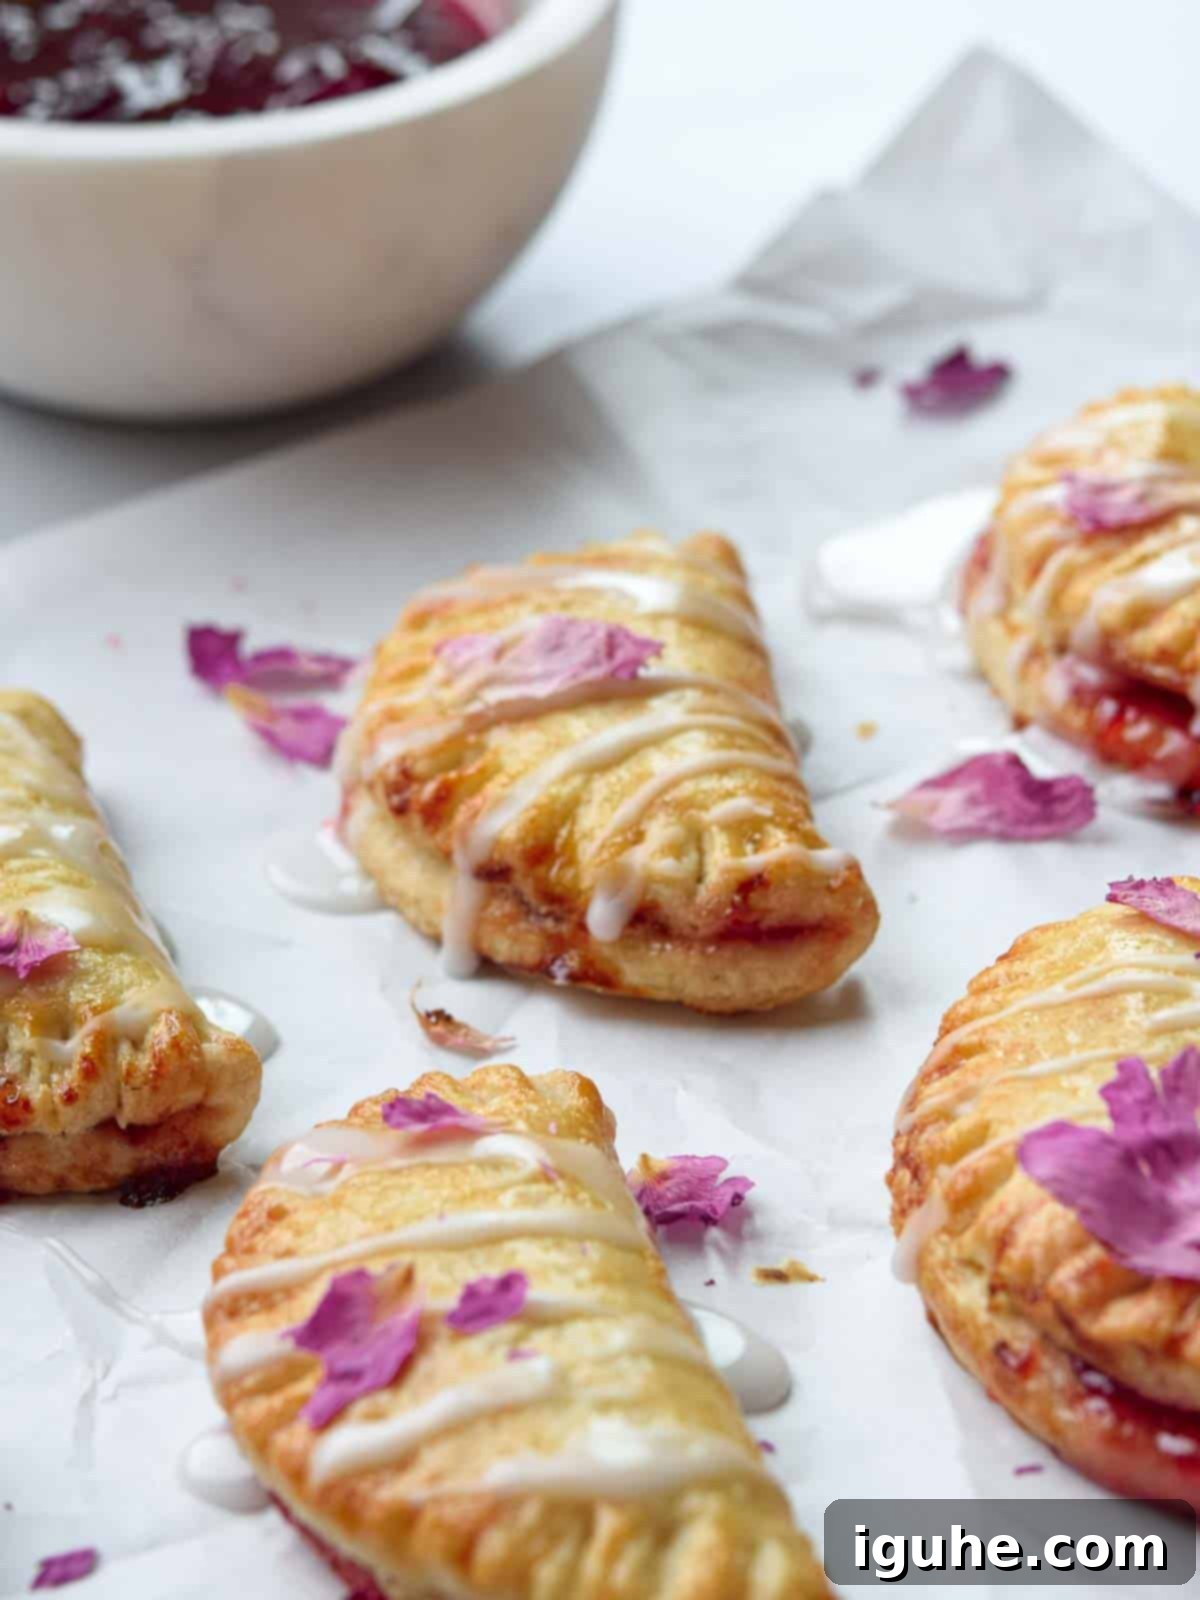
As spring gently approaches and fills the air with its fresh, vibrant energy, I’ve found myself captivated by the enchanting world of floral flavors in my baking. This culinary journey often leads to delightful experiments, much like my recent lavender tea latte creation. Incorporating delicate floral notes can truly transform a dish, adding an undeniable hint of elegance and sophistication that elevates the entire tasting experience. The best part? You get all the beautiful aroma and subtle taste of flowers without any of the pesky pollen that makes you sneeze!
Rose, in particular, is a flavor that truly shines when handled with care. It’s an acquired taste for some, and the key to its success lies in subtlety. The goal is to infuse just enough of that unique floral essence to complement and enhance, rather than overpower. Too much, and you risk it tasting like perfume – a culinary faux pas we definitely want to avoid! That’s precisely why these bite-sized strawberry pies are a triumph in balance. They boast the perfect ratio of sweet, fruity strawberry to the delicate, nuanced hint of rose, ensuring a harmonious and utterly delightful flavor profile that will pleasantly surprise and impress your guests.
So, the next time you’re searching for a truly special treat – something beyond the ordinary cookie or cake – we wholeheartedly encourage you to give these charming little strawberry rose pies a try. They are simple to make, yet elegant enough for any gathering, and incredibly satisfying. Trust us, your discerning taste buds will undoubtedly thank you for this exquisite flavor adventure.
Why You Will Absolutely Love These Mini Strawberry Rose Pies
These adorable and delectable mini pies aren’t just a dessert; they’re a delightful experience packed into a perfect individual serving. Here’s why they’ll become your new favorite:
- Perfectly Portable: Their individual size makes them ideal for on-the-go snacking, lunchboxes, picnics, or potlucks. No need for plates and forks; just grab and enjoy!
- Kid-Friendly & Fun: Kids adore these hand-held pies. They’re much more exciting than a regular slice, and the mini format makes them easy for little hands to manage.
- Surprisingly Easy to Make: Don’t let their elegant appearance fool you! With simple steps and readily available ingredients, even novice bakers can achieve impressive results.
- Mess-Free Snacking: Say goodbye to crumbly slices and sticky fingers. These self-contained pies mean less mess for you and your guests.
- Individual-Sized Perfection: Everyone gets their own personal pie, eliminating any arguments over who gets the biggest slice. It’s a thoughtful touch that guests appreciate.
- Versatile for Any Occasion: Their charming appearance and delightful flavor make them a hit for special celebrations like Valentine’s Day, Mother’s Day brunch, baby showers, or simply as a lovely treat with your afternoon tea.
Essential Ingredients for Strawberry Mini Pies with Rose Glaze
Crafting these delicious mini pies requires just a handful of simple, high-quality ingredients. Most of these are likely already in your pantry, making it easy to whip up a batch whenever a craving strikes. Focus on fresh, good-quality components to ensure the best possible flavor and texture in your finished pies. You’re only a few ingredients away from creating these delightful treats!
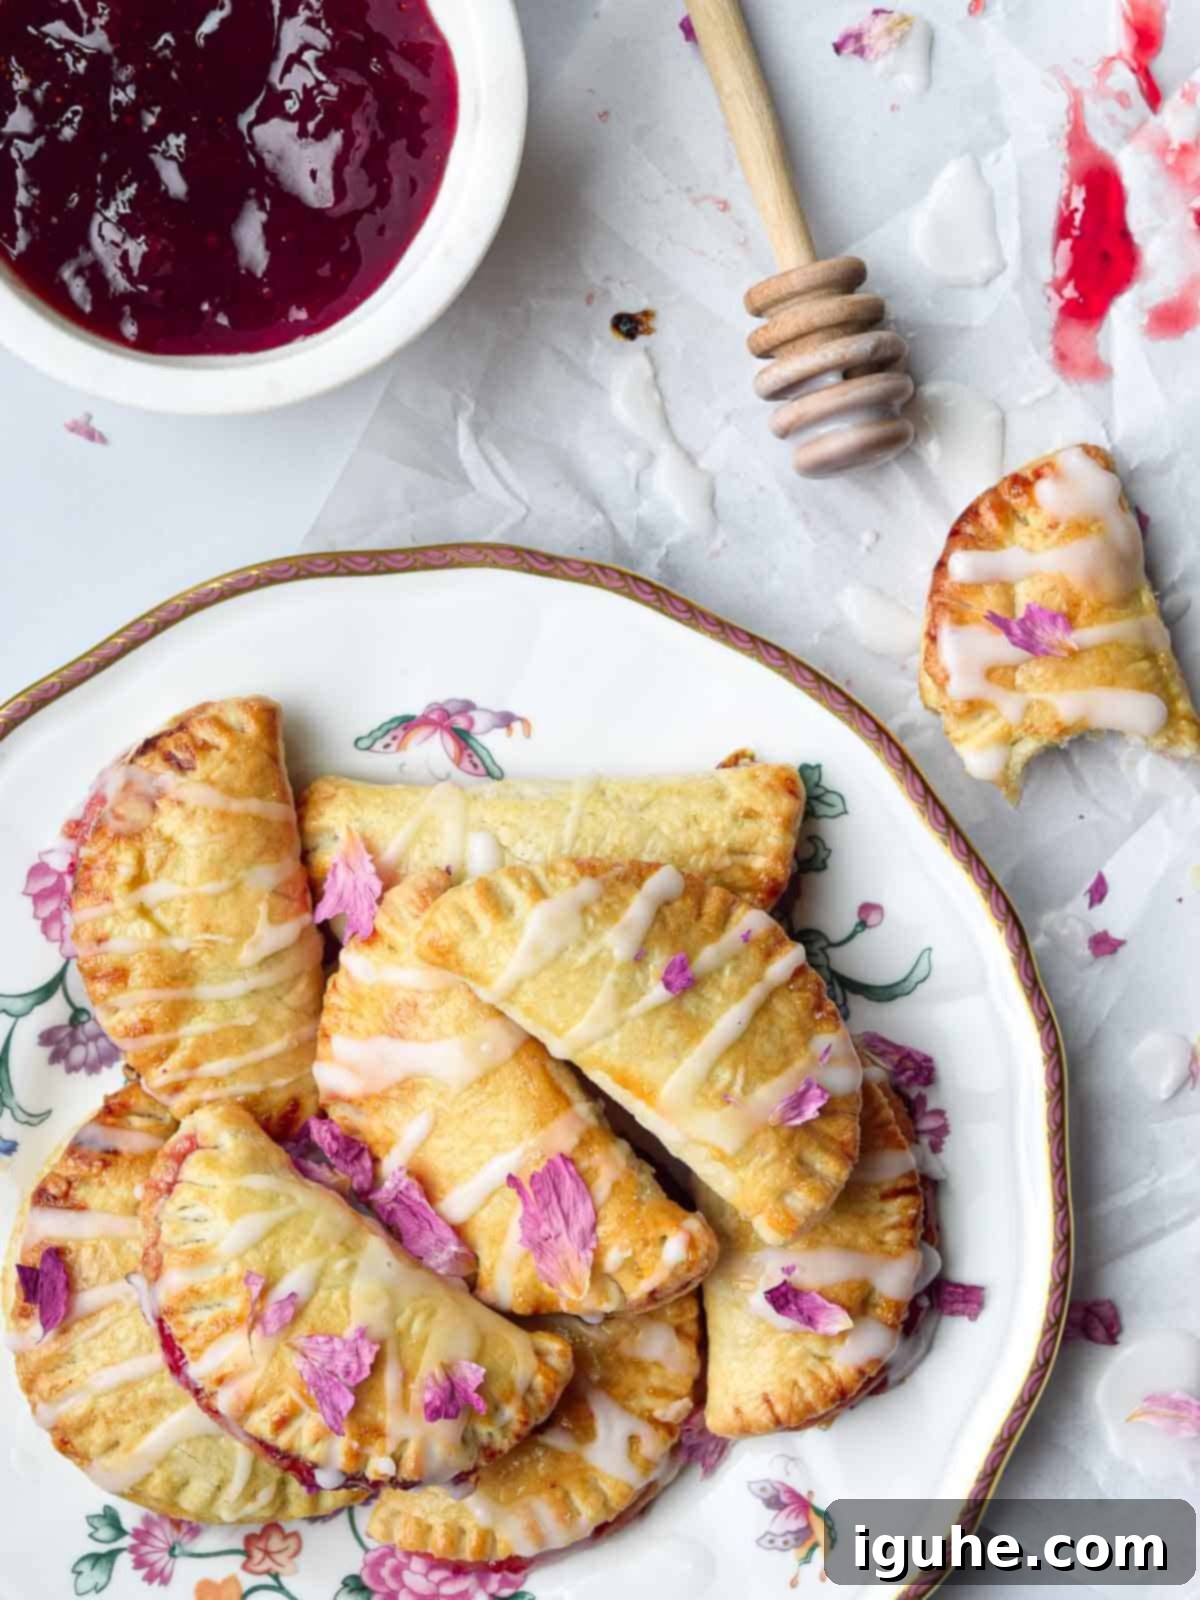
- All-purpose flour: The foundation of our flaky pie crust. Using standard all-purpose flour ensures a tender yet sturdy base for your mini pies.
- Butter: Crucial for that rich flavor and incredible flakiness. Always use unsalted butter, and make sure it’s kept very cold and cut into small cubes. This is key to achieving those desirable layers in your pie crust.
- Salt: A pinch of kosher or fine sea salt brings out all the flavors in the crust and filling, balancing the sweetness.
- Sugar: You’ll need both white granulated sugar for the pie crust (adding sweetness and helping with browning) and confectioner’s (powdered) sugar for the silky-smooth rose glaze.
- Strawberry jam: The sweet heart of our pies! Store-bought jam is perfectly fine for convenience, but if you have a favorite homemade strawberry jam, it will truly elevate the flavor. Ensure it’s not too watery.
- Egg: Mixed with a little water, this creates an egg wash that gives the pies a beautiful golden sheen and a slightly crispier finish.
- Rose water or extract: The secret ingredient for that delicate floral note. I highly recommend using a high-quality product like this one. Remember, a little goes a long way to avoid a “perfumey” taste.
- Rose petals: Optional, but highly recommended for a stunning visual garnish. These add an extra touch of elegance. Make sure you purchase food-grade rose petals, which can often be found online or at specialty food stores.
For precise measurements and a detailed breakdown, please refer to the complete recipe card below.
Essential Equipment for Perfect Mini Pies
While baking these delightful mini pies doesn’t require a professional kitchen setup, having the right tools can make the process significantly smoother and more enjoyable. You don’t necessarily need every gadget, but some items will definitely help you achieve the best results.
First and foremost, a food processor is a game-changer for pie crust. While not strictly mandatory – you can certainly make a fantastic crust by hand – it streamlines the process immensely. It quickly combines the cold butter and flour, creating a perfectly crumbly texture without overworking the dough, which is crucial for a flaky crust. If you have one, I highly suggest you use it to save time and effort.
In addition, you will need a 3.5 to 4-inch cookie cutter or biscuit cutter to create the perfectly sized circles for your mini pies. This ensures uniformity and makes assembly a breeze. If you don’t have a dedicated cookie cutter, don’t fret! A drinking glass or a round bowl of a similar size can work just as well to cut the dough into neat circles. Precision in size will help with even baking and a beautiful presentation.
Other useful items include a large baking sheet (lined with parchment paper for easy cleanup), a rolling pin for an even crust, and a fork for crimping the edges of your pies. Gather your tools before you begin, and you’ll be well on your way to baking success!
Step-by-Step Instructions for Strawberry Mini Pies
Creating these charming strawberry mini pies is a rewarding baking project that yields delicious results. The key to a truly exceptional pie is starting with a perfect crust – flaky, buttery, and utterly irresistible. Here’s a detailed guide to help you every step of the way:
First things first, let’s talk about that incredible crust. It’s what makes these mini pies truly special, with its flaky layers and rich, buttery flavor that literally melts in your mouth. You’ll start by combining the all-purpose flour, granulated sugar, salt, and your very cold, cubed butter in a food processor. Pulse the mixture in short bursts until it resembles coarse crumbs, similar to small peas. Then, gradually add 3 tablespoons of ice-cold water, pulsing after each addition. Continue adding a little more water, a tablespoon at a time (up to 2 more tablespoons), just until the dough starts to come together and forms fine, moist crumbs that stick together when pinched. Be careful not to overmix; you want to maintain those distinct butter pieces for flakiness.
Once your dough has formed, gently turn it out onto a lightly floured work surface. Knead the dough just a few times, enough to bring it into a cohesive, smooth ball. Avoid excessive kneading, as this can develop the gluten too much and result in a tough crust. Flatten the dough into a disk shape, then lightly flour your work surface once more, ready for rolling.
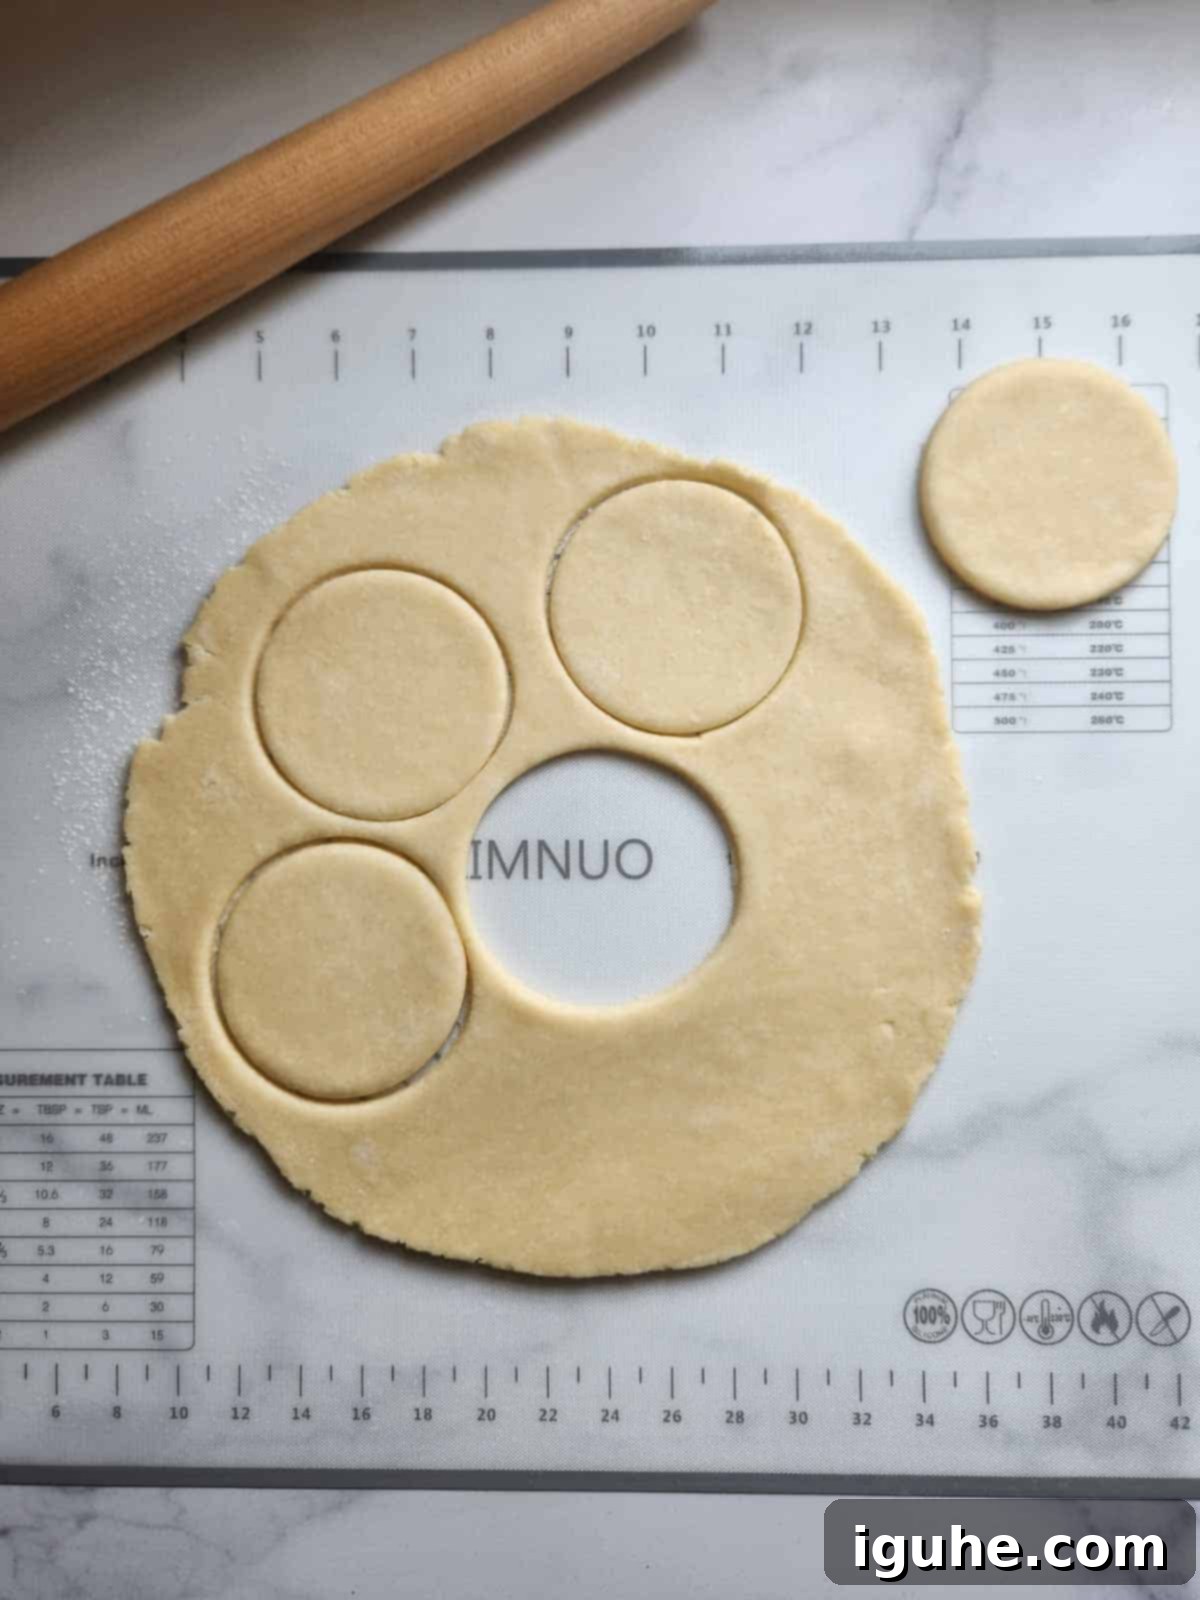
Using a rolling pin, carefully roll the pie dough into a large circle, approximately 10-12 inches in diameter and about ⅛th of an inch thick. The key is to achieve an even thickness to ensure consistent baking. Then, take your 3.5 or 4-inch cookie cutter and begin cutting out circles from the rolled-out dough. Dip your cookie cutter in flour between each cut to prevent sticking. Gather the dough scraps, gently re-roll them, and cut out more circles until you’ve used all the dough. You should end up with about 12 perfectly uniform dough circles.
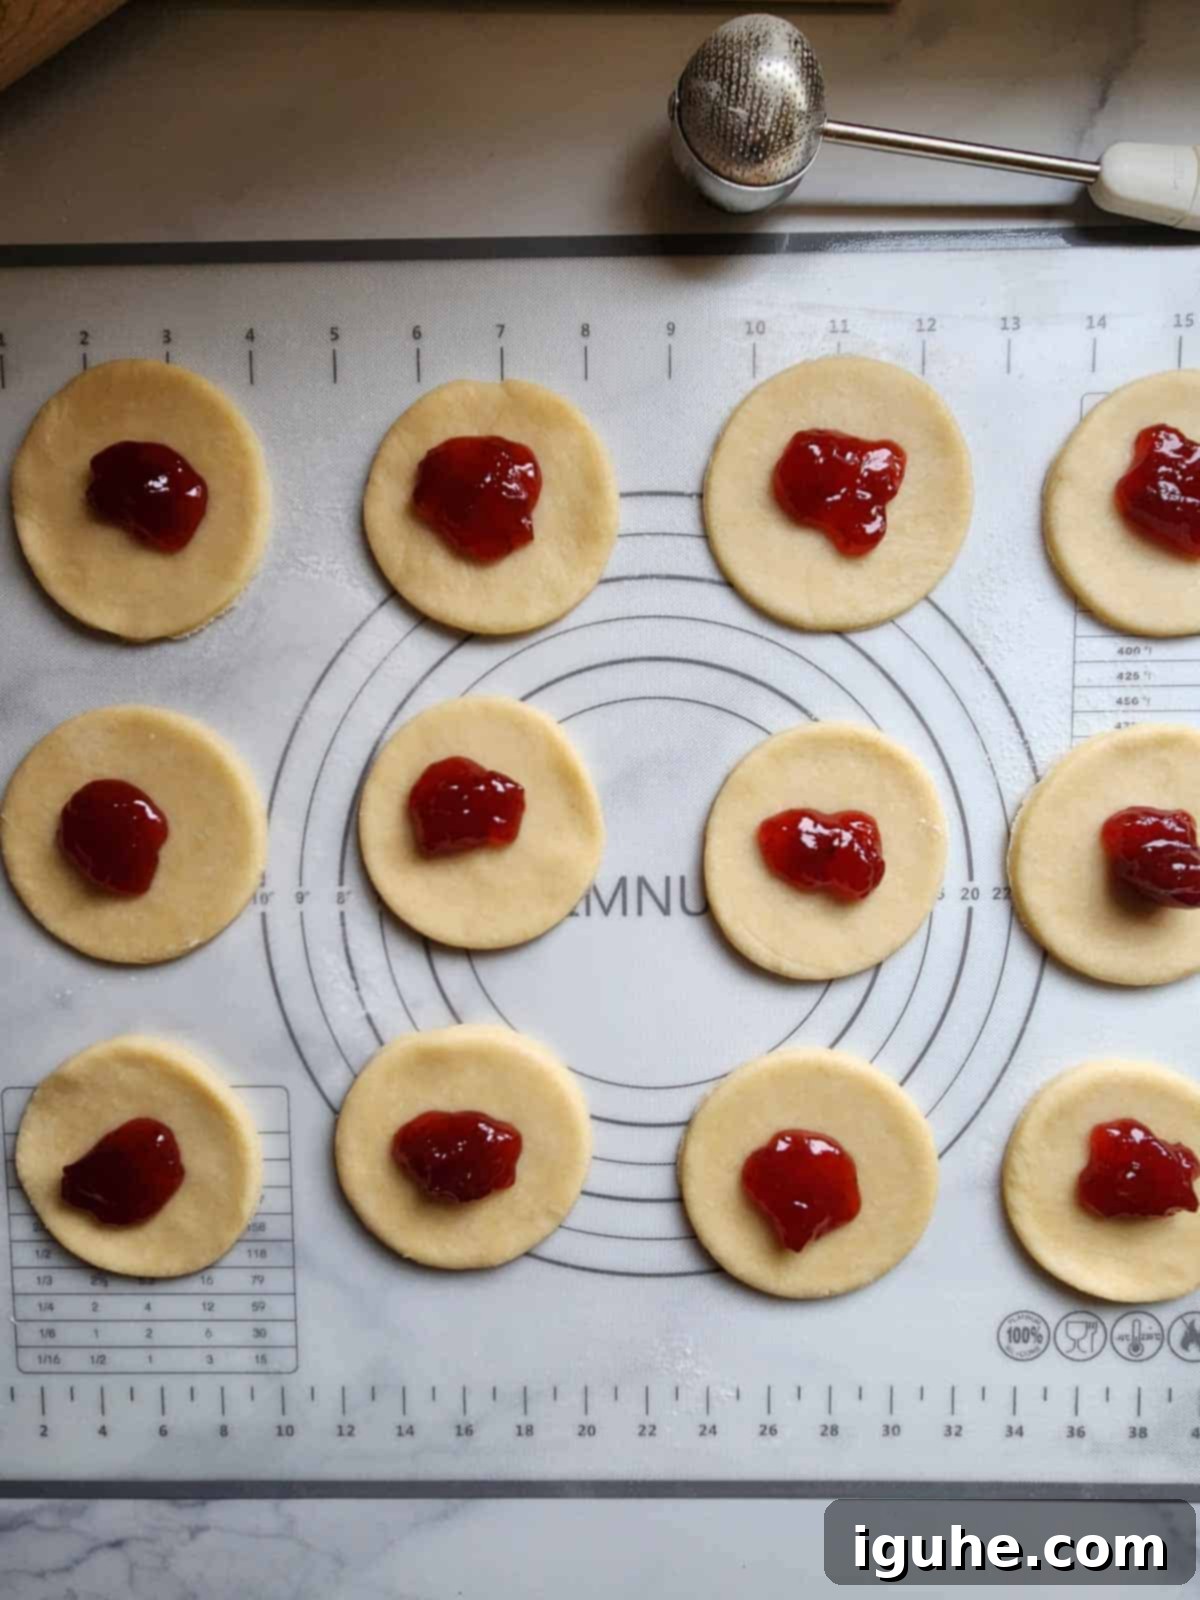
Once all your dough circles are ready, lay them out on your parchment-lined baking sheet. Now it’s time for the delicious filling! Place exactly ½ tablespoon of your chosen strawberry jam directly in the center of each dough circle. It’s crucial not to overstuff these mini pies. While tempting to add more jam, too much filling can cause it to leak out during baking, leading to a sticky mess and less-than-perfect pies.
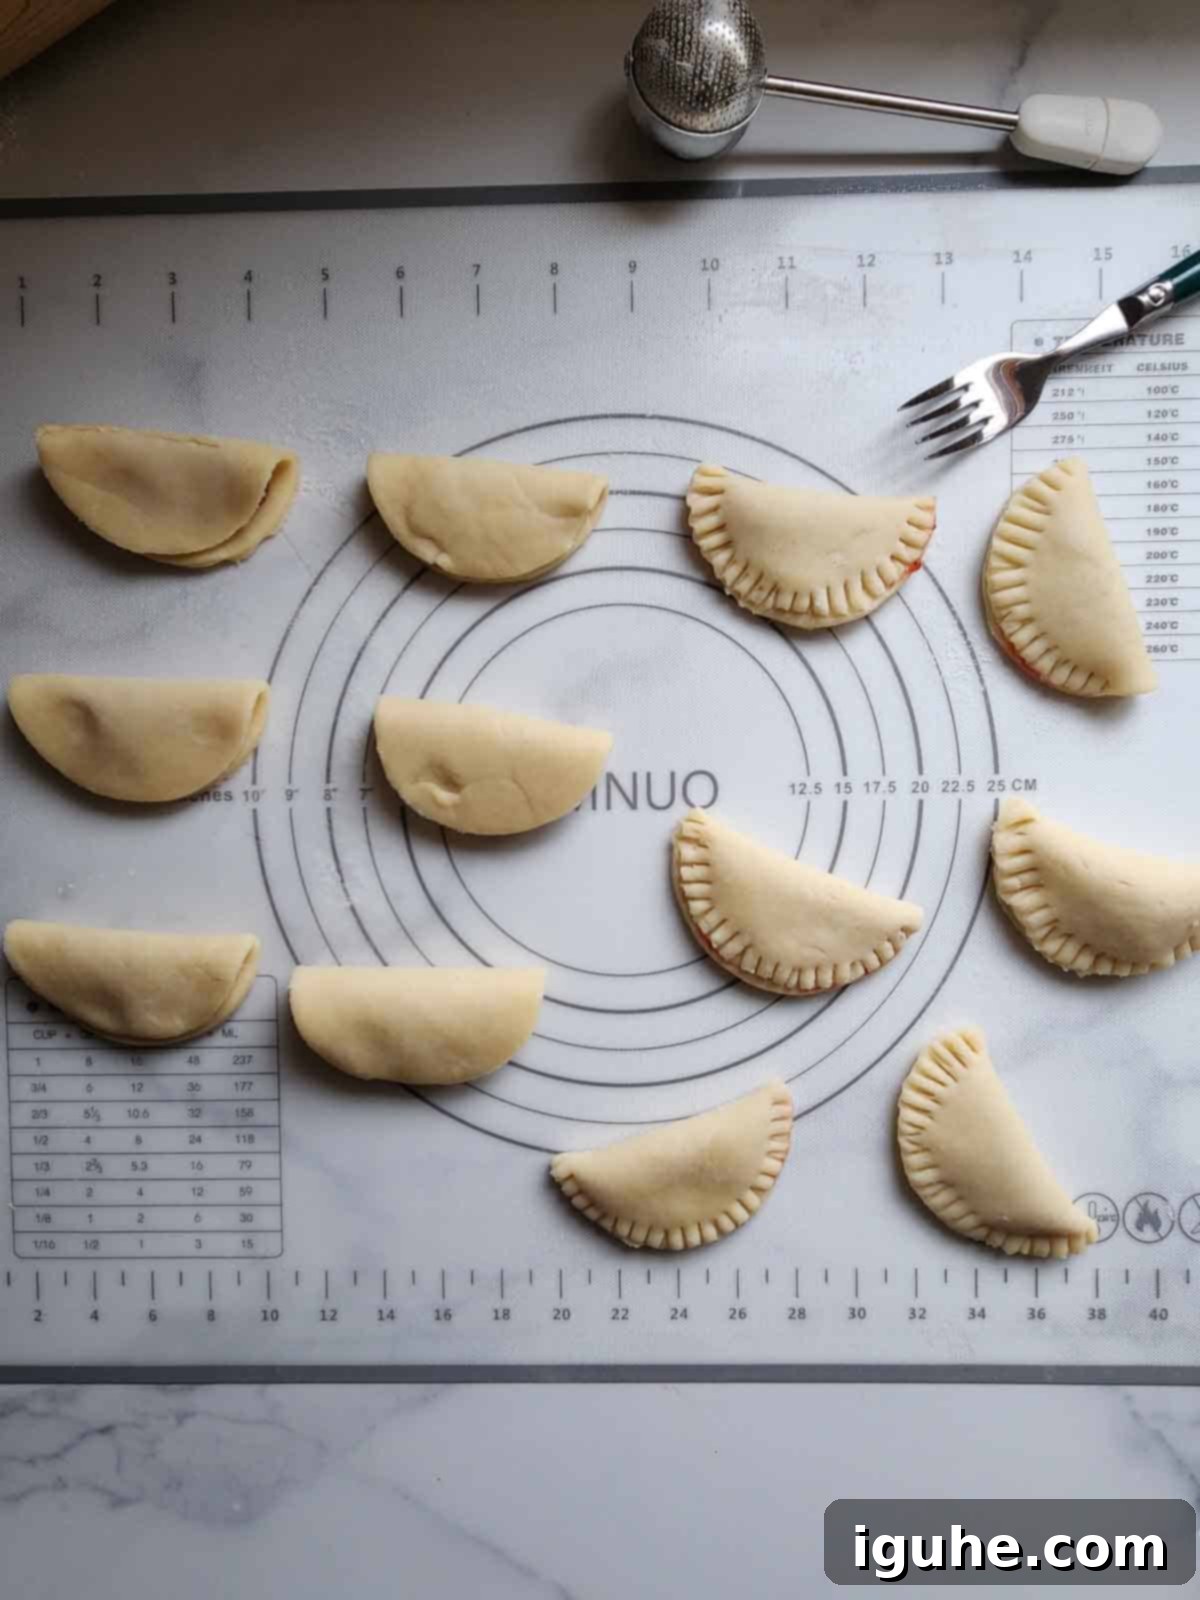
Now for the assembly! Carefully fold each dough circle in half, creating a semi-circle that encloses the strawberry jam. Gently press the edges together with your fingers to seal. Then, using the tines of a fork, crimp the edges firmly. This not only creates a pretty pattern but also ensures a tight seal, preventing any precious jam from escaping during baking. Once all pies are crimped, place the entire baking sheet, with the pies, into the fridge for about 15 minutes. This chilling step is essential as it helps the butter in the crust firm up, contributing to a flakier texture and preventing the pies from spreading too much in the oven. After chilling, whisk your egg and water together to create an egg wash, and lightly brush the tops of each pie for a beautiful golden finish.
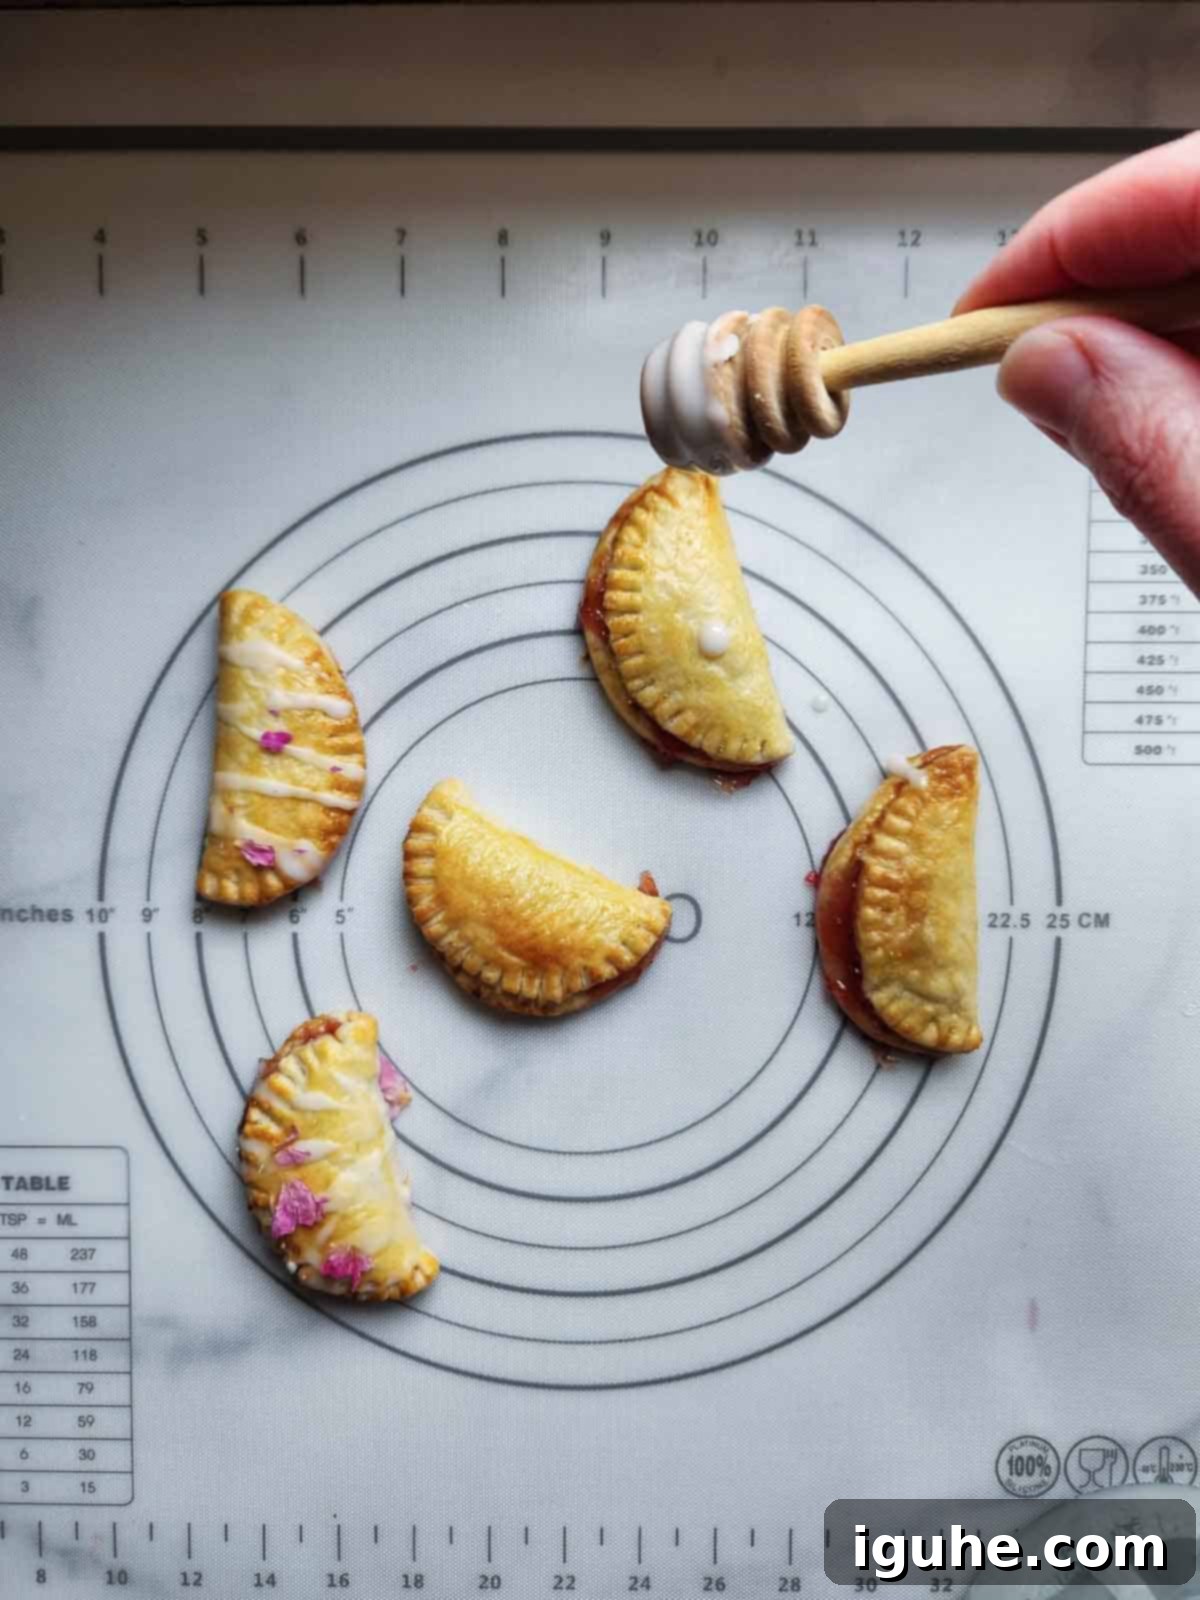
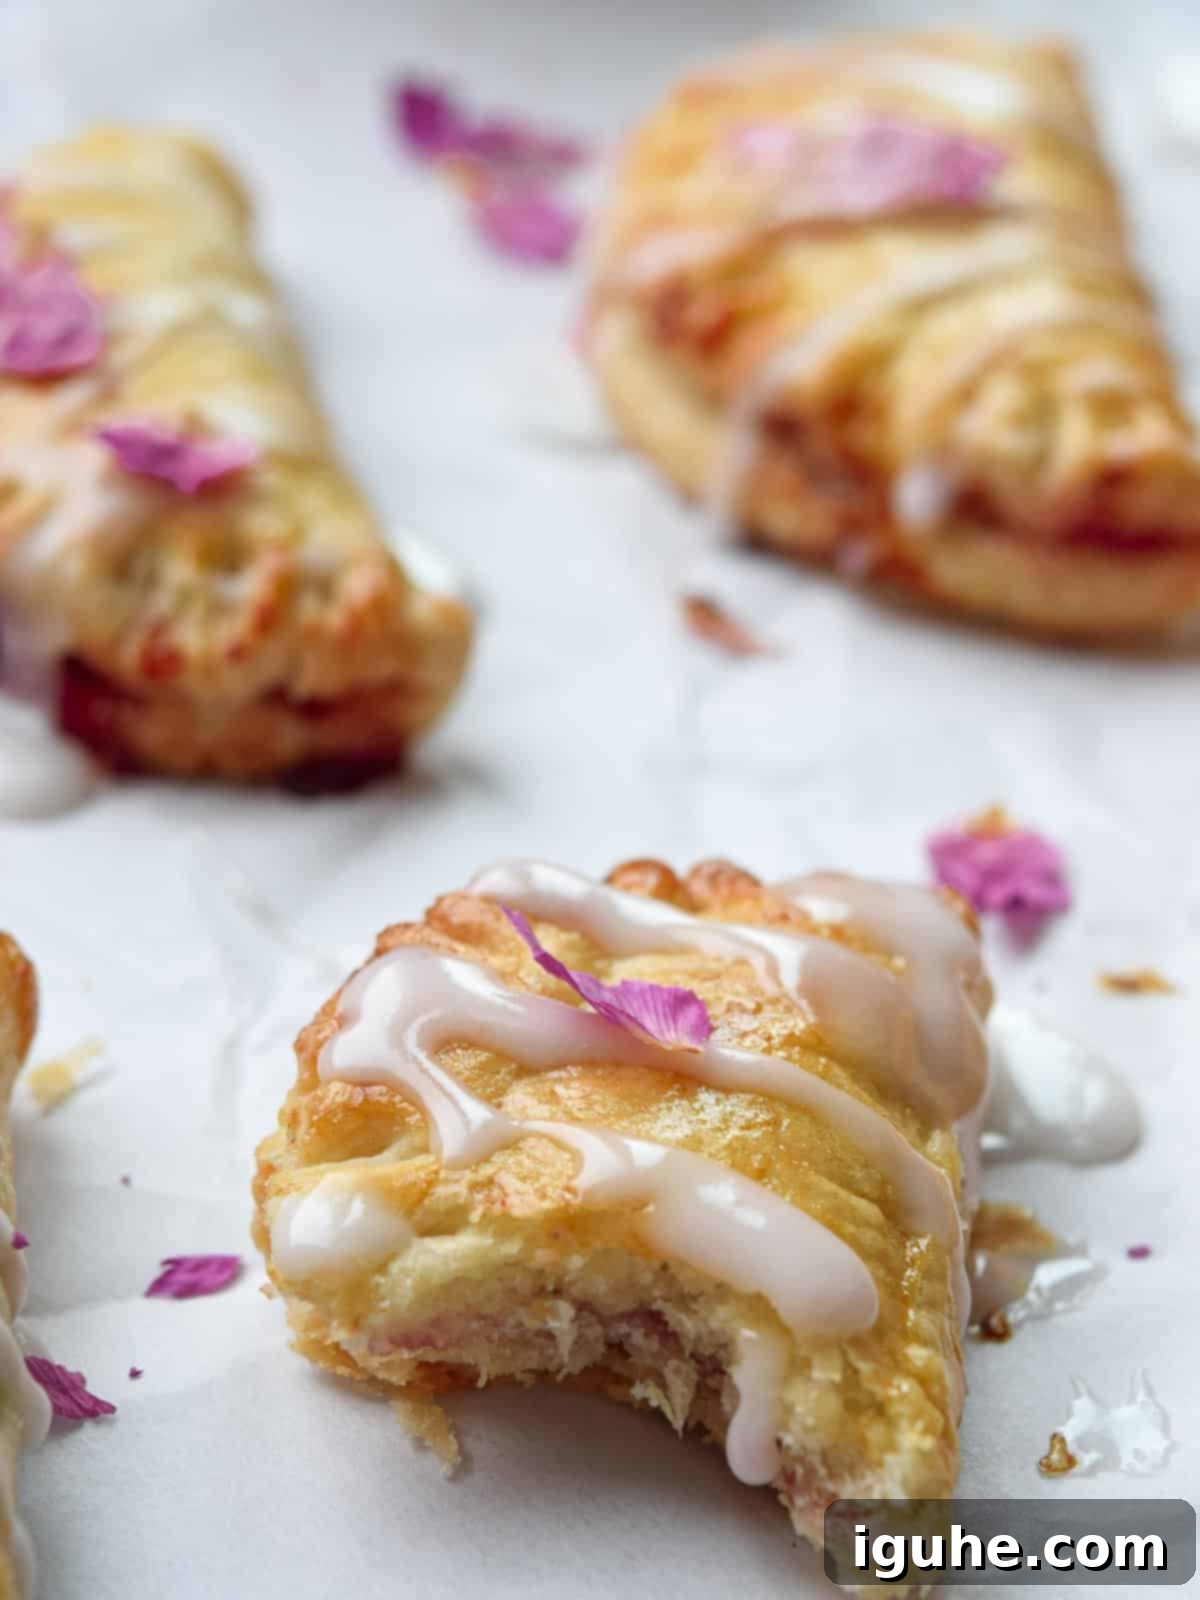
Bake your mini pies in a preheated oven for approximately 15-22 minutes, or until they turn a beautiful golden brown on top and the filling is bubbly. Keep an eye on them, as oven temperatures can vary. Once baked, transfer the pies to a wire rack to cool completely. This is an important step; rushing the cooling process can make the glaze melt prematurely. While the pies are cooling, prepare your delicate rose glaze by whisking together confectioner’s sugar, milk, and a tiny hint of rose water or extract until smooth. Once the pies are completely cool, drizzle them generously with the rose glaze. For an extra touch of visual appeal and aroma, sprinkle with culinary rose petals if you’re using them. Serve these exquisite treats immediately or store them for later enjoyment.
Make These Mini Pies Your Own: Creative Variations
While the classic Strawberry Mini Pies with Rose Glaze are undeniably delicious, this recipe offers a fantastic foundation for culinary creativity. Feel free to use the base recipe as a springboard for your own unique flavor combinations and personal touches. Here’s a list of ideas to get your creative juices flowing and inspire you to customize your batch of mini pies:
- Vary the Jam: Don’t limit yourself to just strawberry! Experiment with different fruit preserves such as vibrant raspberry, sweet blueberry, tart cherry, or even a seasonal rhubarb jam. You can even create a mixed batch with a variety of different jam fillings for an exciting assortment.
- Add a Pop of Color to the Glaze: For a visually stunning presentation, try adding a tiny drop of red food coloring or a small amount of fruit jam (like raspberry or strawberry) to your rose glaze. This will give it a beautiful pink hue that perfectly complements the strawberry filling.
- Intensify the Rose Flavor: If you’re a true fan of rose, you can enhance its presence in your pies. In addition to the rose-flavored icing, add a tiny drop of rosewater or extract directly to your strawberry jam mixture before filling the pies. Remember to taste as you go to avoid overpowering the fruit.
- Skip the Glaze for a Rustic Touch: For those who prefer a less sweet or simpler finish, you can omit the rose glaze entirely. Instead, sprinkle the tops of your mini pies with coarse demerara sugar just before baking. This will create a delightful, crunchy, and sparkly sweet top.
- Infuse with Warm Spices: Introduce an extra layer of flavor by adding a pinch of warm spice to your jam filling. A touch of cinnamon pairs beautifully with strawberries, or for something more exotic, a hint of cardamom can add a wonderfully fragrant dimension.
Storage and Make-Ahead Tips for Convenience
These delightful mini pies are not only delicious but also incredibly convenient, offering flexibility for both immediate enjoyment and future indulgence. Proper storage ensures they remain fresh and flavorful.
To store your baked and glazed mini pies, simply place them in an airtight lidded container. For best results and to prevent them from sticking together, separate layers with a sheet of wax paper. They will keep beautifully on your kitchen counter at room temperature for up to 3 days, perfect for grab-and-go treats. If you want to prolong their freshness, or if you live in a particularly warm climate, storing them in the refrigerator is an excellent option. This will also help to preserve the delicate rose glaze from melting or becoming too soft, keeping its elegant finish intact.
For those who love to plan ahead, the pie dough is your best friend! You can prepare the pie dough in advance and store it in the freezer for up to 3 months. To do this, flatten the prepared dough into a disk, wrap it tightly in several layers of plastic wrap, and then place it in a freezer-proof plastic bag. When you’re ready to bake, simply transfer the frozen dough to the refrigerator to thaw overnight. If you’re planning to use the dough within a few days, you can simply wrap it well in plastic wrap and store it in the refrigerator for up to 3 days. This make-ahead option makes whipping up a batch of fresh mini pies incredibly quick and easy on short notice!
📝 Expert Tip for Flaky Pie Crust Success
When preparing your homemade pie crust, the absolute golden rule for achieving those irresistible, light, and flaky layers is to ensure both your butter and water are as cold as possible. Using cold butter prevents it from fully incorporating into the flour, creating pockets that release steam during baking, which results in flakiness. Similarly, ice-cold water keeps the butter firm and helps prevent gluten development, ensuring a tender crust. Do not skip the chilling steps for the dough, both before rolling and after assembly; keeping everything cold is paramount for pie crust perfection before it hits the oven.
Frequently Asked Questions About Mini Pies
Here are some common questions to help you master these delicious mini strawberry rose pies:
That’s totally up to you! While homemade pie crust is easy to make and will undoubtedly yield the flakiest, most tender crust with the best flavor, using a good quality store-bought pie crust is a fantastic shortcut if you’re short on time. Just ensure it’s a brand you trust for quality and taste. The instructions for cutting and filling will remain the same.
While fresh strawberries offer a lovely burst of flavor, they can release a lot of liquid when baked, potentially making the pies soggy or causing the filling to run out. If you wish to use fresh strawberries, you would need to cook them down slightly with a bit of sugar and cornstarch or flour to create a thicker, more stable filling before baking. For ease and consistent results, jam is recommended, as it already has the right consistency. Alternatively, you could try a mix of very finely diced fresh strawberries stirred into the jam for extra texture.
More Delicious Strawberry Recipes to Love
If you’re a fan of fresh strawberries, you’re in luck! This versatile fruit shines in a variety of dishes, from sweet breakfasts to savory salads. Here are a few more of our favorite strawberry-infused recipes that we think you’ll adore, perfect for enjoying the vibrant flavors of the season:
- Mixed Berry Granola
- Strawberry Salad with Goat Cheese
- Strawberry Balsamic BLT
- Small Batch Strawberry Rhubarb Jam
Did you make this delightful recipe? We would absolutely love to hear about your experience! Please take a moment to leave a ⭐⭐⭐⭐⭐ rating with a comment right below the recipe card. Your feedback is invaluable. If you snap a photo of your beautiful creation, don’t forget to tag me on Instagram @brunchandbatter. Happy baking!
📖 Recipe Card: Strawberry Mini Pies with Rose Glaze

Strawberry Mini Pies with Rose Glaze
Prevent your screen from going dark
Pin Recipe
30 minutes
20 minutes
50 minutes
Dessert, Snack
American
6
321
kcal
Equipment
-
3½ or 4-inch cookie or biscuit cutter or drinking glass of the same size
-
large baking sheet
-
food processor
-
rolling pin
Ingredients
Pie Crust
-
1¼
cup
all-purpose flour -
1
tablespoon
white granulated sugar -
¼
teaspoon
kosher salt -
½
cup
cold unsalted butter, cut into cubes
8 oz or 1 stick -
3-5
tablespoon
ice water
Strawberry Filling
-
6
tablespoon
strawberry jam
Egg Wash
-
1
large
egg -
1
teaspoon
water
Rose Glaze
-
⅓
cup
confectioner’s (powdered sugar) -
2
teaspoon
milk -
⅛
teaspoon
rose water or rose extract -
culinary rose petals for decorating
optional
Instructions
-
Preheat the oven to 400°F. Line a large baking sheet with parchment paper and set aside.
-
In a food processor, pulse the flour, sugar, and salt to blend. Add the cold butter and pulse 5-6 more times until the mixture resembles coarse crumbs. (If you don’t have a food processor, place the ingredients in a large bowl and use a pastry cutter or 2 forks to mix in the butter and form the dough).1¼ cup all-purpose flour,
1 tablespoon white granulated sugar,
¼ teaspoon kosher salt,
½ cup cold unsalted butter, cut into cubes -
Add 3 tablespoon ice water and pulse after each addition. Add up to 2 more tablespoon of ice water, just enough to make fine crumbs that start to pull away from the sides and form a crumbly dough. The dough should stick together when pinched.3-5 tablespoon ice water
-
On a lightly floured surface, turn out the dough and knead a few times, until the dough comes together. Flatten to a disk, and roll the dough roughly 12 inches in diameter and ⅛ inches thick.
-
Using a 3.5 or 4-inch cookie cutter, cut circles from the dough and set aside, dipping the cutter in flour after each pass. Re-roll the scraps of pie dough and continue cutting circles until you have about 12 circles.
-
Lay out your circles and place ½ tablespoon strawberry jam in the center of each. Fold them over in half, and using the ends of a fork, crimp the edges together.6 tablespoon strawberry jam
-
Place the pies on the prepared baking sheet and place in the refrigerator for 15 minutes. After 15 minutes, remove from the fridge and brush the tops with the egg wash (just beat the egg and water together).1 large egg,
1 teaspoon water -
Bake for 15-22 minutes until golden brown on top. Let cool completely before icing. While the pies are baking, make the rose glaze (see below).
-
When completely cooled, drizzle each of the mini pies with rose icing. Decorate with rose petals (if using). Serve immediately or store for later.culinary rose petals for decorating
Rose Glaze
-
In a small bowl, add the confectioner’s sugar, milk, and rose. Whisk until thick, but still runny enough to be drizzled.⅓ cup confectioner’s (powdered sugar),
2 teaspoon milk,
⅛ teaspoon rose water or rose extract
Notes
The pie dough can be made in advance and stored in the freezer for up to 3 months. Flatten the dough to disk, and wrap it well in plastic wrap, and store it in a freezer-proof plastic bag. If using soon, you can make ahead and store the dough in the fridge for up to 3 days.
Nutrition*
Serving:
2
pies
Calories:
321
kcal
Carbohydrates:
42.2
g
Protein:
2.9
g
Fat:
15.6
g
Saturated Fat:
9.7
g
Cholesterol:
41
mg
Sodium:
207
mg
Potassium:
33
mg
Fiber:
0.7
g
Sugar:
3.8
g
Calcium:
11
mg
Iron:
1
mg
*Nutrition information is provided as a courtesy and is an estimate only. Nutrition information can vary depending on many factors, such as products used, measurements and substitutions, therefore it is recommended that you obtain nutritional calculations based on your own finished recipe.
Have you tried this recipe?
Leave a comment below and share a photo on Instagram. Tag @brunchandbatter or hashtag it with #brunchandbatter
