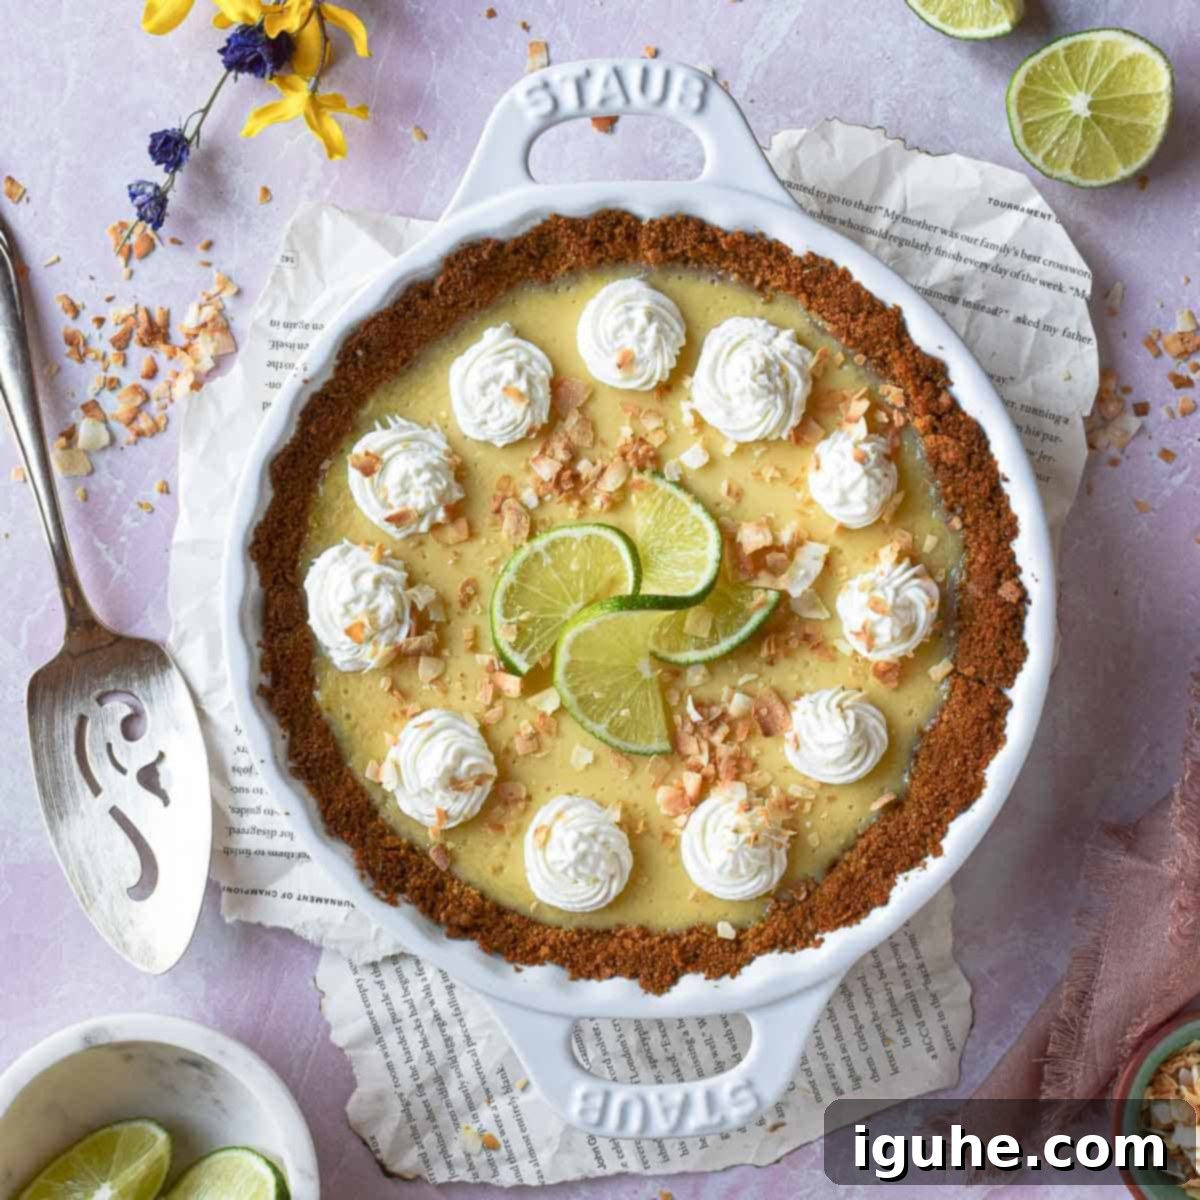
The Ultimate Tropical Escape: Irresistibly Creamy Coconut Key Lime Pie Recipe
Prepare to be whisked away to a sun-drenched beach with every bite of this easy and absolutely divine Coconut Key Lime Pie. This recipe delivers an explosion of vibrant, tropical flavor that’s both refreshingly tangy and lusciously sweet, all without the hassle of hunting down elusive key limes! We’re making it accessible and delicious with readily available Persian limes (the standard green ones you find in any grocery store), though traditional key limes work perfectly if they’re within reach.
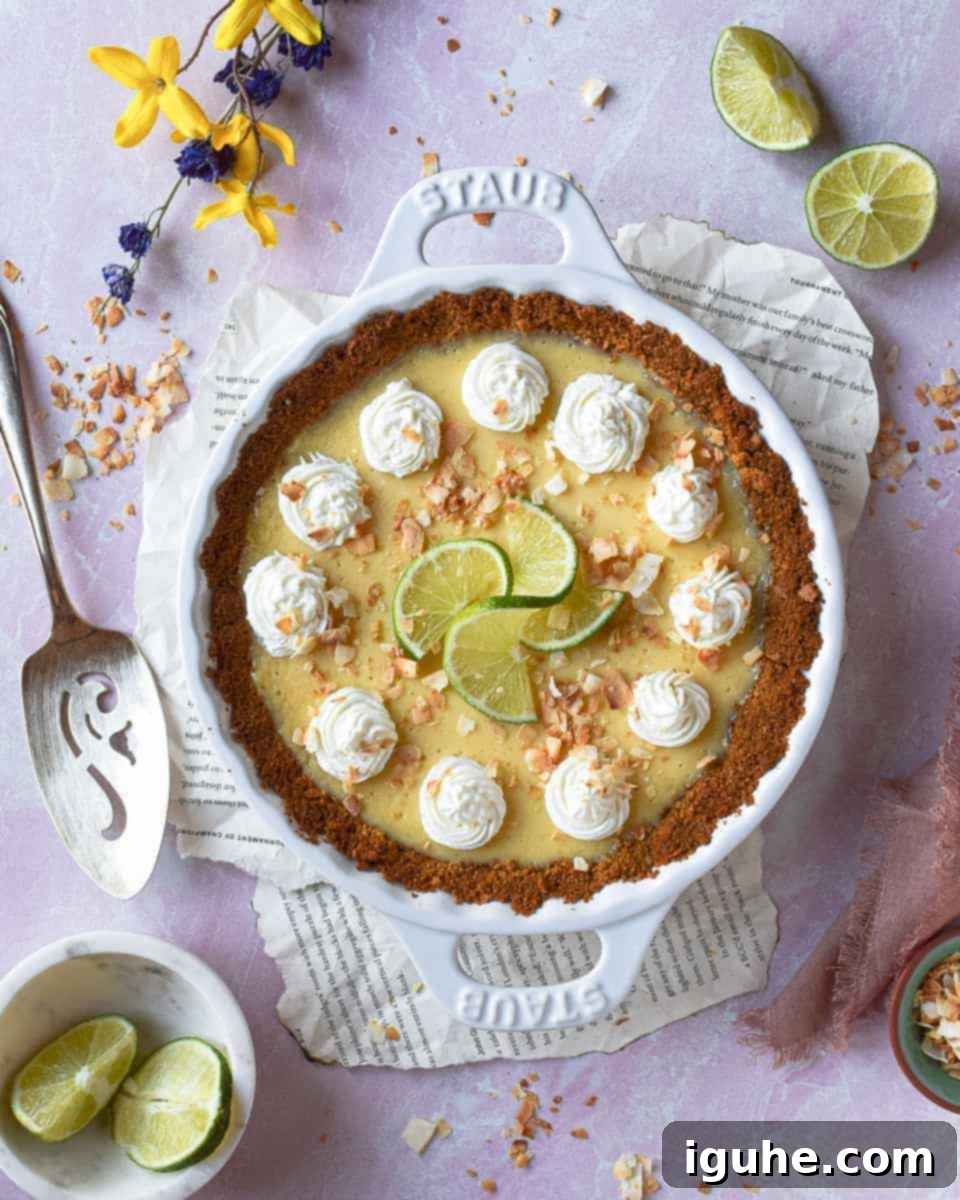
This pie is a celebration of contrasting textures and harmonious flavors: a buttery, golden graham cracker crust, a silken, tart-sweet lime filling, and a generous topping of billowy, sweet coconut whipped cream. A final flourish of perfectly toasted coconut flakes adds an irresistible crunch and depth of flavor, transforming this dessert into a dreamy, unforgettable experience. It’s perfect for summer gatherings, holiday meals, or simply as a special treat to brighten any day.
Key Limes vs. Persian Limes: Your Zesty Solution
Key limes are legendary for their intensely aromatic, floral, and distinctively tart juice, which gives traditional Key Lime Pie its signature zing. However, these small, yellowish-green citrus fruits can be notoriously difficult to find outside of specific regions or seasons. In many parts of the world, fresh key limes are a rare sight in local grocery stores, making them a challenge for home bakers.
That’s where the versatile Persian lime comes in as an excellent, readily available alternative. While Persian limes (the larger, greener limes commonly sold) have a slightly less intense tartness and a more mellow, brighter flavor compared to their smaller cousins, they still provide a wonderfully zesty base for this pie. Their juice is easier to extract and just as refreshing, ensuring that you can enjoy this tropical treat no matter where you live. Don’t let the absence of key limes deter you – this recipe proves that a fantastic lime pie is absolutely achievable with everyday ingredients.
Of course, if you happen upon a bounty of fresh key limes, by all means, use them! Their unique flavor will only elevate this pie further. But rest assured, the beauty of this recipe lies in its adaptability and the incredible results you’ll achieve with either variety.
The Irresistible Coconut Whipped Cream Topping
While the zesty lime filling is the heart of this pie, the coconut whipped cream topping is truly its crown jewel. This light, airy, and delicately sweet topping transforms the pie into a truly tropical delight. The natural sweetness and creamy texture of the coconut complement the tart lime filling beautifully, creating a perfect balance that dances on your palate. It’s an essential element that elevates the pie from merely delicious to utterly sublime.
And if you’re like me and can’t get enough of those island vibes, once you’ve devoured this pie, you absolutely have to try my pineapple banana smoothie next! It’s another simple way to bring a taste of paradise into your home.
Ingredients for Your Tropical Pie Adventure
This recipe relies on a straightforward list of ingredients, most of which are pantry staples or easily found at your local grocery store. Quality ingredients will make a noticeable difference in the final flavor, so choose wisely!
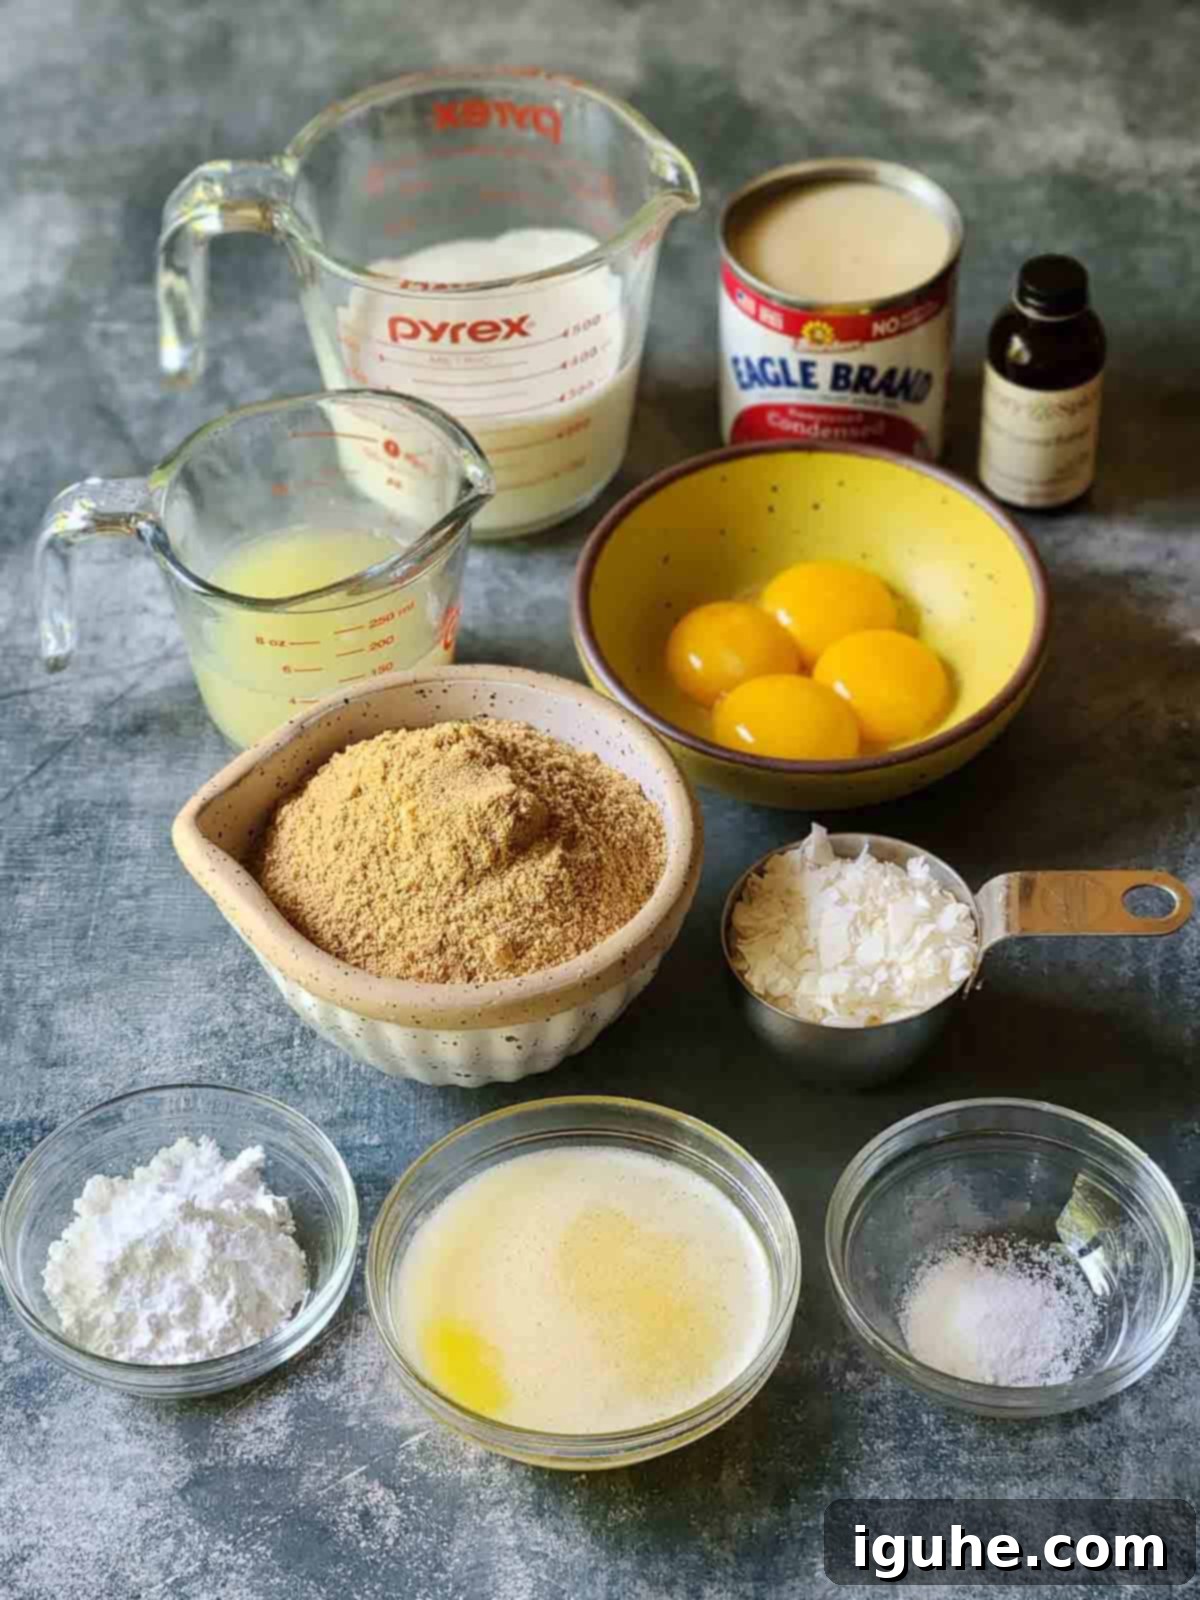
- Limes: Freshly squeezed lime juice is paramount for that bright, zesty flavor. While Key limes offer a unique aroma, accessible Persian limes are a fantastic substitute. For convenience, high-quality bottled key lime juice can also be used, but fresh is always best for optimal flavor.
- Egg Yolks: These are crucial for the pie’s rich, creamy texture and act as a natural thickener when baked with the condensed milk. Remember to separate your yolks from the whites carefully. Don’t discard the whites! They can be saved for an egg white omelet, added to scrambled eggs, or incorporated into frittatas.
- Sweetened Condensed Milk: This is the magic ingredient that gives the filling its signature smooth, sweet, and custardy consistency without the need for additional sugar. Be sure to use sweetened condensed milk, not evaporated milk, as they are not interchangeable in this recipe.
- Heavy Cream: Also known as whipping cream, this is the base for our luxurious coconut topping. Ensure it’s very cold before whipping for the best results. The high-fat content allows it to whip up into stiff, stable peaks.
- Confectioner’s Sugar: Also known as powdered sugar, this fine sugar is used to sweeten the whipped cream, ensuring a silky-smooth texture without any graininess. Granulated sugar can leave a gritty texture in whipped cream.
- Coconut Extract: This gives the whipped cream its delightful tropical coconut flavor. A little goes a long way to infuse that distinct taste without overpowering the lime.
- Flaked Coconut: Used for toasting and garnishing, flaked coconut adds texture and an extra layer of coconut flavor. I typically opt for unsweetened coconut flakes to balance the sweetness of the pie, but sweetened flakes can be used if you prefer a sweeter crunch.
- Graham Crackers: The foundation of our delicious crust. Plain graham crackers work best – my go-to is Nabisco. You can buy whole sheets and crush them yourself for a fresher taste, or use pre-made graham cracker crumbs if available for a quicker process.
- Butter: Unsalted butter is preferred for the crust as it gives you more control over the salt content. If salted butter is all you have, simply omit the additional salt when preparing the crust.
- Salt: A touch of Kosher or fine sea salt in the graham cracker crust enhances the overall flavor and provides a subtle contrast to the sweet filling.
For precise quantities, please refer to the comprehensive recipe card located at the end of this article.
Step-by-Step Guide to Baking Your Perfect Coconut Key Lime Pie
Creating this stunning Coconut Key Lime Pie is a straightforward process when you follow these clear, step-by-step instructions. Pay attention to each detail, and your pie will turn out perfectly photogenic and utterly delicious every single time!
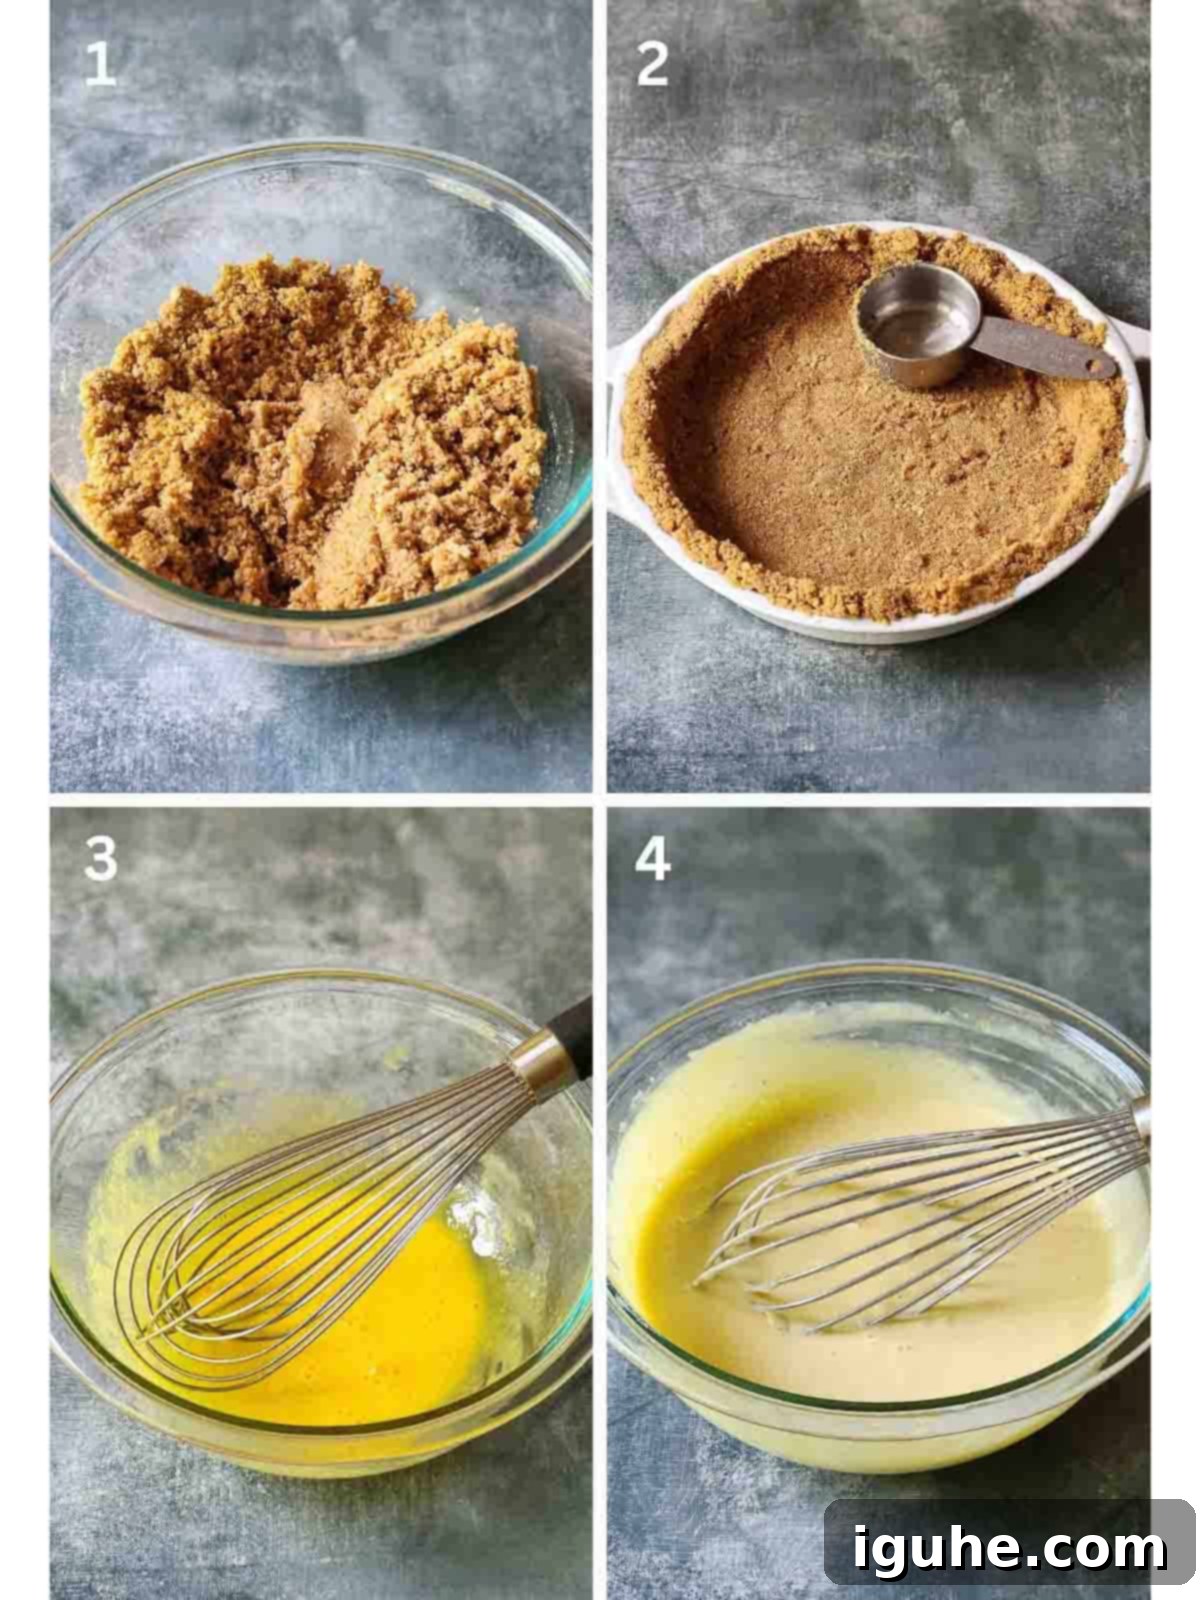
Step 1: Prepare the Crust Mixture. In a spacious mixing bowl, thoroughly combine your finely crushed graham cracker crumbs, the melted unsalted butter, and the pinch of salt. Mix until the crumbs are evenly moistened and the mixture holds together when pressed lightly between your fingers.
Step 2: Form and Bake the Crust. Transfer the crumb mixture into a 9-inch pie pan. Using your fingers, the back of a spoon, or the flat bottom of a measuring cup, press the crumbs firmly and evenly across the bottom and up the sides of the pan. This firm pressing is crucial for a stable crust that won’t crumble. Bake the crust at 350℉ (175°C) for approximately 8 minutes, just until it’s lightly golden and fragrant. Remove from the oven and allow it to cool completely while you prepare the filling.
Step 3: Whisk the Egg Yolks. In a separate medium-sized bowl, vigorously whisk the four large egg yolks until they are slightly thickened and pale yellow. This incorporates air and helps create a smoother, richer filling. You can use a hand whisk or an electric hand mixer for this step.
Step 4: Combine Filling Ingredients. Gradually whisk in the sweetened condensed milk with the egg yolks until the mixture is smooth and fully combined. Finally, pour in the freshly squeezed lime juice and continue whisking until all ingredients are thoroughly mixed and the filling is uniform. This is where the magic happens as the lime juice reacts slightly with the condensed milk.
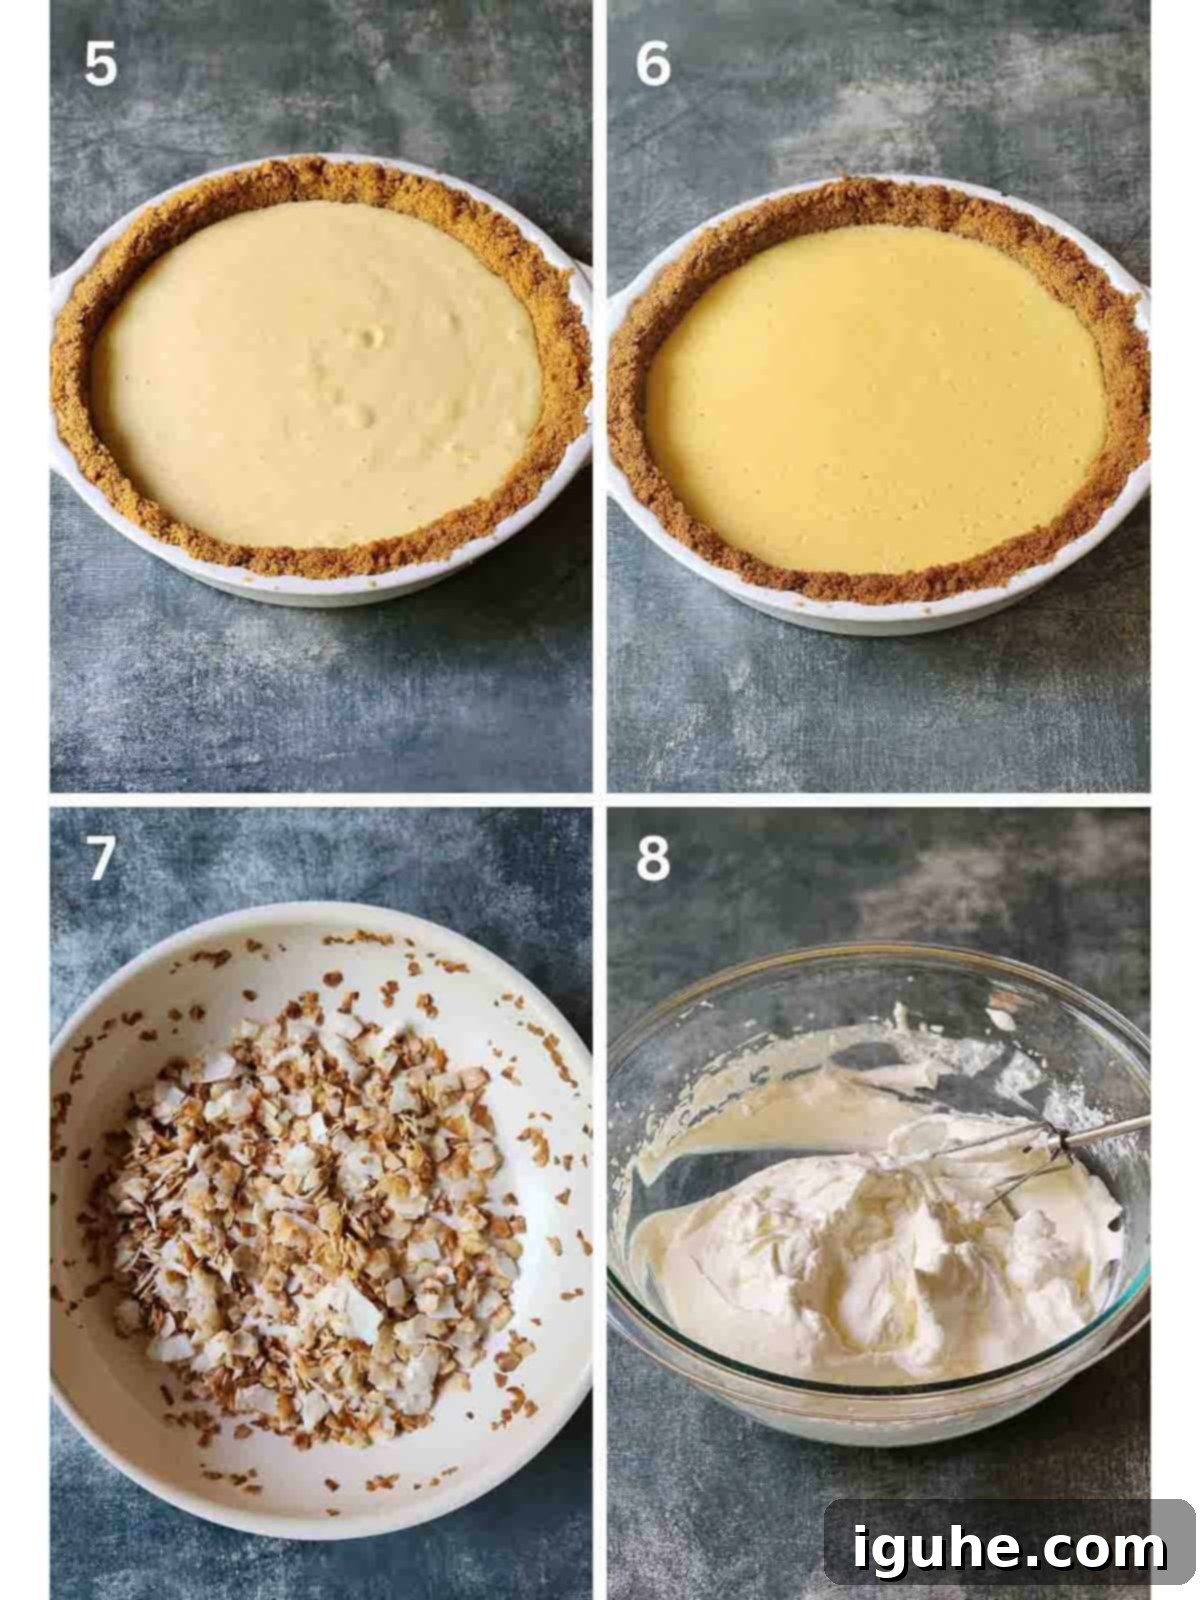
Step 5: Pour and Bake the Pie. Carefully pour the prepared egg and lime mixture into the cooled graham cracker crust, spreading it gently to create an even layer. Place the pie pan on a baking sheet to catch any potential drips and ensure even baking.
Step 6: Bake and Chill. Bake the pie for 18-22 minutes at 350℉ (175°C). The filling should be mostly set around the edges but still have a slight “wiggle” in the very center when gently shaken. This indicates it’s perfectly cooked. Remove from the oven and allow the pie to cool completely to room temperature on a wire rack. Once cool, transfer the pie to the refrigerator and chill for at least 4 hours, or preferably overnight, to allow the filling to fully set and firm up before adding the topping.
Step 7: Toast the Coconut Flakes. While your pie is chilling, prepare the toasted coconut flakes for garnish. Place the flaked coconut in a dry, small pan over medium heat. Cook, stirring frequently with a spatula, until the coconut turns a beautiful golden brown. Keep a close eye on it, as coconut can burn quickly! Once toasted, immediately remove from the pan and spread on a plate to cool completely. This prevents residual heat from over-browning them.
Step 8: Prepare the Coconut Whipped Cream. In a large, chilled mixing bowl, add the very cold heavy cream. Using a hand mixer (or a stand mixer with the whisk attachment), beat the cream on medium-high speed until it starts to form soft peaks. Then, gradually add the confectioner’s sugar and coconut extract. Continue beating on high speed until stiff peaks form – the whipped cream should hold its shape firmly. Be careful not to overbeat, or it will become grainy.
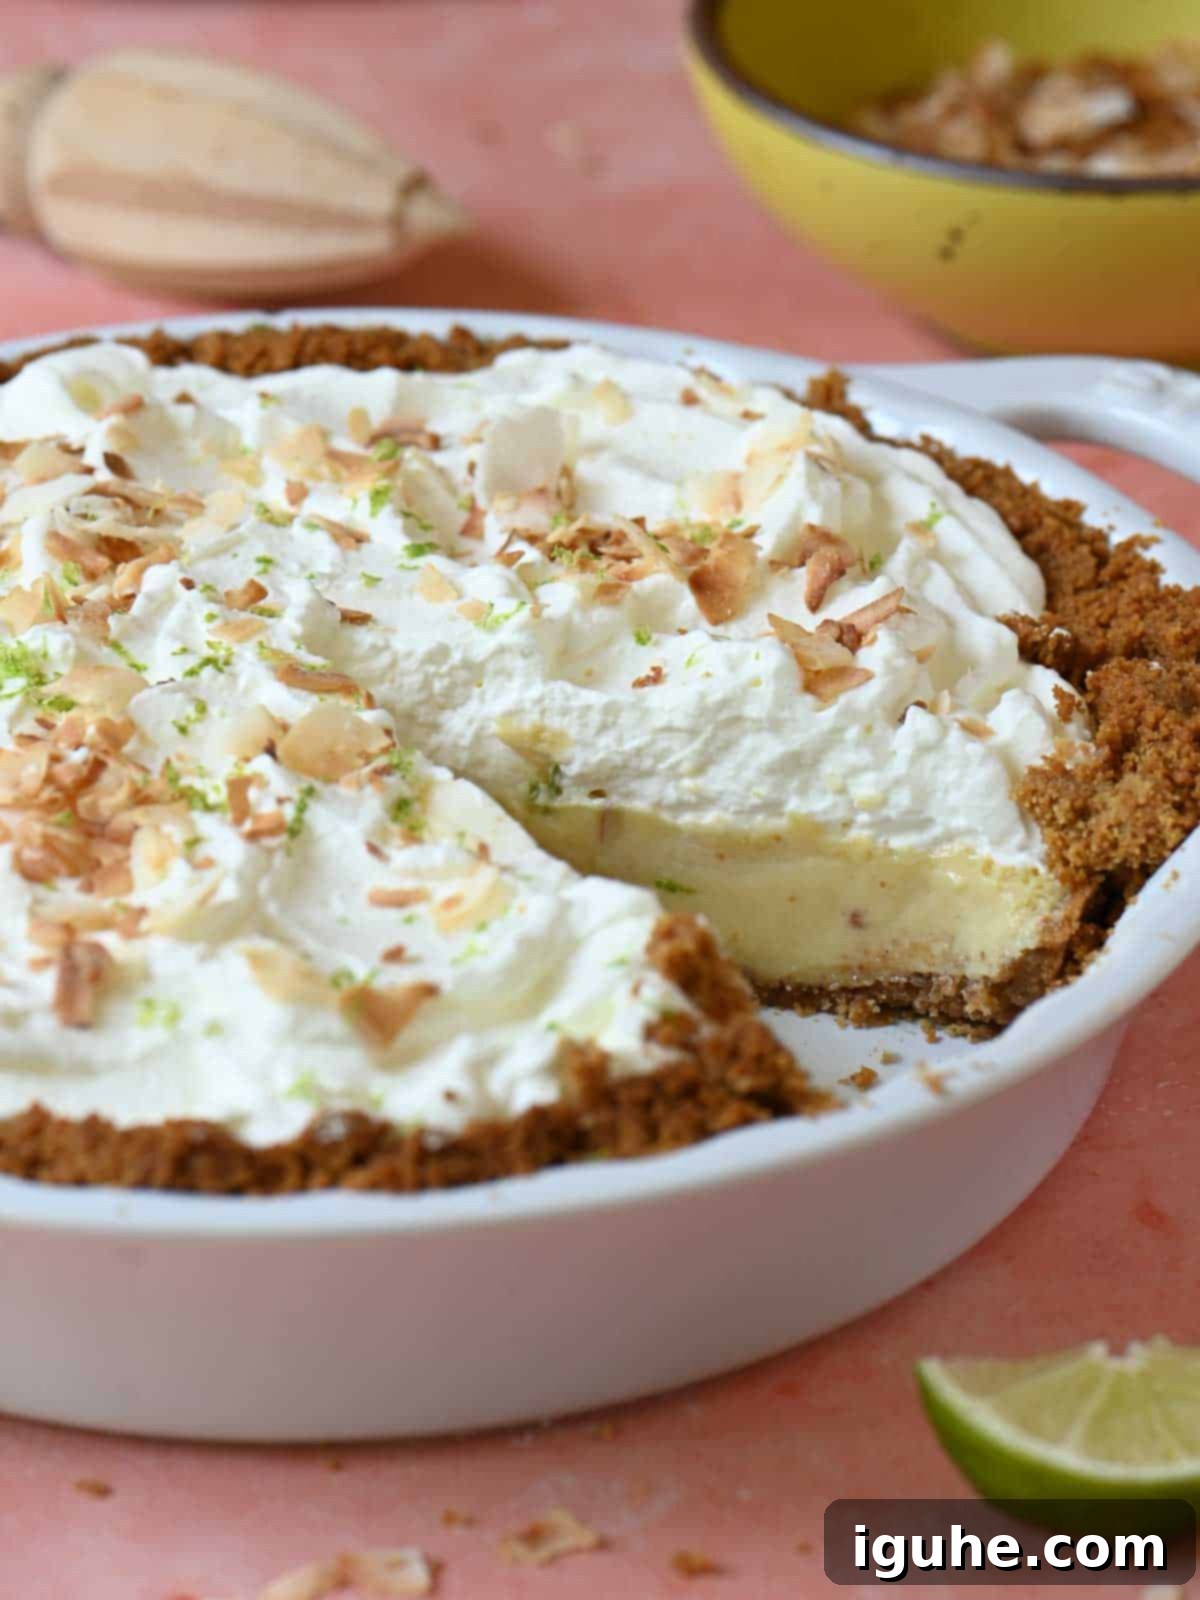
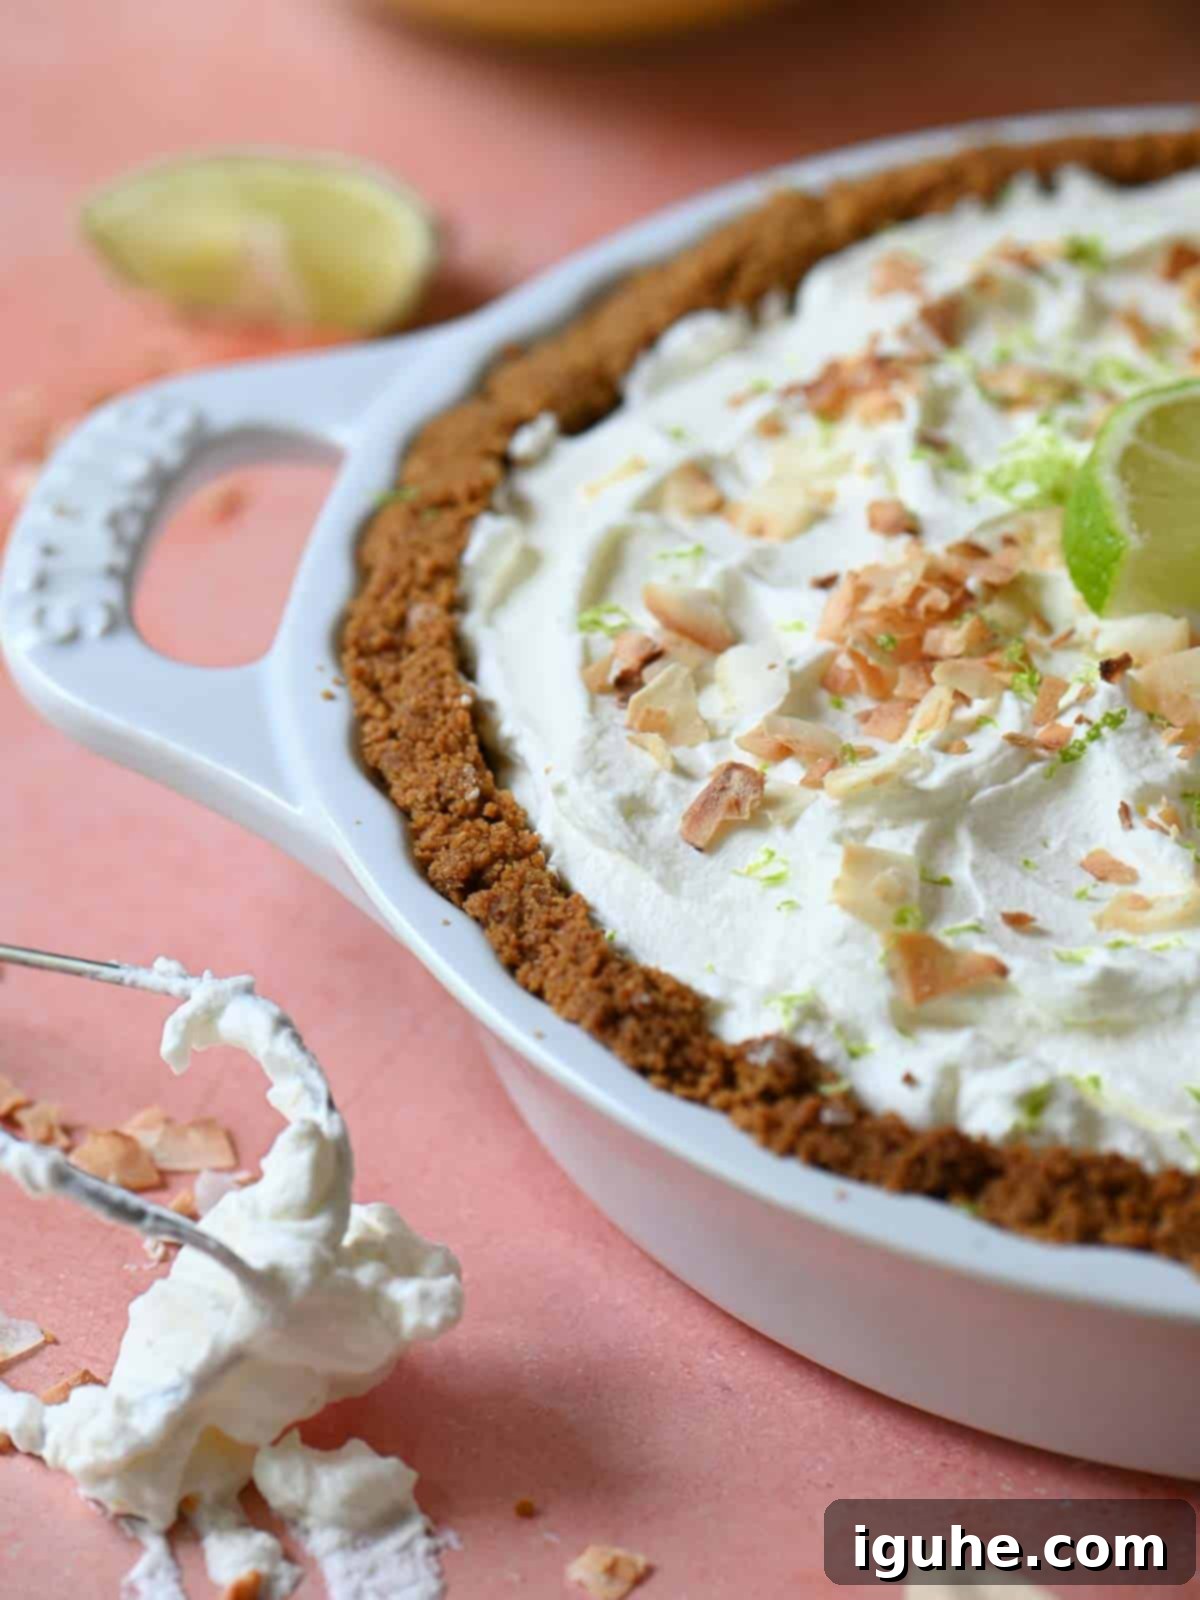
To assemble the finished pie, take the thoroughly chilled pie from the fridge. Spoon the luxurious coconut whipped topping over the surface, spreading it evenly. You can create rustic swirls with the back of a spoon for a charming homemade look – no need for absolute perfection here! Finally, generously sprinkle the toasted coconut flakes over the whipped cream. For an extra pop of color and freshness, garnish with fresh lime zest or thin lime wedges if desired. Slice, serve, and savor this tropical masterpiece!
You can find the full, detailed instructions and ingredient measurements in the recipe card provided below.
👩🍳Expert Tips for a Flawless Coconut Key Lime Pie
- Achieve Perfect Graham Cracker Crumbs: If you’re crushing graham crackers by hand, place them in a sturdy, sealed Ziploc bag. Use a rolling pin or another heavy, blunt object to gently but firmly smash them until they reach a fine, even crumb consistency. Uniform crumbs ensure a cohesive and well-formed crust. Alternatively, a food processor makes this task incredibly quick and easy.
- Ensure a Silky-Smooth Filling: For a perfectly smooth and luxurious key lime filling, it’s highly recommended to strain your freshly squeezed lime juice through a fine-mesh sieve. This step removes any pulp or seeds, guaranteeing an unblemished, velvety texture for your pie.
- Patience is Key for Chilling: Do not skip or rush the crucial chilling step! This coconut key lime pie needs ample time in the refrigerator (at least 4-5 hours, preferably overnight) for the filling to properly set and firm up. Attempting to slice or top the pie too early will result in a runny, messy filling. The cold also allows the flavors to meld beautifully, creating a more harmonious taste.
- Toast Coconut with Care: When toasting coconut flakes, always use a dry pan over medium heat and stir constantly. Coconut can go from perfectly golden to burnt in a matter of seconds. As soon as it reaches your desired color, remove it from the heat and transfer it to a plate to cool to stop the cooking process.
- Cold Cream for Stiff Peaks: For the best whipped cream, ensure your heavy cream is very cold. You can even chill your mixing bowl and whisk attachment in the freezer for 10-15 minutes beforehand. This helps the cream whip up faster and hold its stiff peaks longer.
Delicious Variations to Customize Your Key Lime Pie
While this Coconut Key Lime Pie is perfect as is, don’t hesitate to get creative and experiment with flavors to make it uniquely yours. Here are some delightful variations to inspire your next baking adventure:
- Lemon Love: For a delightful twist, try swapping out the limes for fresh lemons. This will result in a wonderfully zesty and bright lemon pie, equally refreshing and perfect for citrus lovers. You can even use lemon zest for garnish instead of lime.
- Warm Spice in the Crust: Infuse your graham cracker crust with a hint of warmth by adding about ½ teaspoon of ground cinnamon or a pinch of nutmeg to the crumb mixture before pressing and baking. This adds a subtle, comforting layer of flavor that complements the tart filling beautifully.
- Classic Vanilla Whipped Cream: If coconut isn’t your preference for the topping, simply swap out the coconut extract for classic vanilla extract in the whipped cream. You’ll still get a fluffy, sweet topping that’s a perfect match for the tangy lime filling. You can also add a touch of vanilla extract to the pie filling itself for an extra layer of sweetness.
- Ginger Snap Crust: For a more adventurous and spicy crust, replace the graham crackers with crushed ginger snap cookies. This adds a fantastic peppery kick that pairs surprisingly well with the lime.
- Chocolate Drizzle: For those who love a chocolate-citrus combination, consider a light drizzle of melted dark chocolate over the top of the finished pie before serving. It adds a sophisticated touch and an extra layer of indulgence.
How to Store Your Tropical Delight: Coconut Key Lime Pie
Proper storage is essential to keep your Coconut Key Lime Pie fresh, firm, and delicious. Once the pie has been fully assembled and chilled, it needs to be protected to maintain its quality.
For short-term storage, cover the pie tightly with plastic wrap or aluminum foil. This prevents it from absorbing odors from other foods in the refrigerator and keeps the whipped cream fresh. Stored this way, the pie will remain fresh and delightful in the refrigerator for up to 3 days. It’s best enjoyed within the first 1-2 days for optimal texture of the crust and topping.
If you wish to enjoy this tropical treat at a later date, you can easily freeze it. For freezing, ensure the pie is completely chilled and firm. Wrap it very well in multiple layers of plastic wrap, followed by a layer of aluminum foil to prevent freezer burn. Label with the date. This pie can be stored in the freezer for up to 3 months. When ready to serve, thaw the pie in the refrigerator overnight. You may want to add fresh whipped cream and toasted coconut if the original topping has lost some of its freshness.
Frequently Asked Questions (FAQ)
Yes, absolutely! While fresh lime juice offers the brightest flavor, high-quality bottled key lime juice is a perfectly acceptable substitute. Look for brands like Nellie & Joe’s, which is a popular and reliable choice known for its authentic key lime flavor. Using bottled juice can also save you time and effort if fresh limes are not readily available or you’re short on time.
The key is to look for a pie that is mostly set around the edges but still has a slight “wiggle” in the very center when you gently shake the pan. The filling will continue to firm up as it cools completely to room temperature and then chills in the refrigerator. Over-baking can lead to a rubbery texture, so err on the side of under-baking slightly if you’re unsure.
Yes, this pie is an excellent make-ahead dessert! You can bake the pie (without the whipped topping and toasted coconut) up to 2-3 days in advance. Ensure it’s tightly covered and refrigerated. Add the coconut whipped cream and toasted coconut flakes just before serving for the freshest appearance and best texture.
You can use either sweetened or unsweetened flaked coconut for toasting. I generally prefer unsweetened to balance the overall sweetness of the pie, allowing the pure coconut flavor to shine. If you use sweetened flakes, keep a very close eye on them while toasting as the sugar content makes them brown much faster.
More Summer Desserts You’ll Love
If you adore delightful desserts, especially those perfect for warm weather, then you’ve landed in the right spot! Here are a few more recipes to add to your collection of summer favorites:
- Wild Blueberry Crisp With Peaches
- Easy Summer Plum Cake
- Lemon Lavender Shortbread Cookies
- Easy Lemon Pizzelle
Did you make this tropical dream pie? I would absolutely love to hear about your experience! Please leave a ⭐⭐⭐⭐⭐ rating with a comment right below the recipe card to share your thoughts. If you snap a gorgeous photo of your creation, don’t forget to tag me on Instagram @brunchandbatter. Happy baking!
📖Recipe

Coconut Key Lime Pie
Pin Recipe
Equipment
-
1 9 inch pie or tart pan
-
1 hand or stand mixer for the whipped cream, optional
Ingredients
- 1¾ cup plain graham cracker crumbs about 13 full graham cracker sheets
- 6 tablespoon unsalted butter, melted if using salted butter, omit the salt in the next step
- ¼ teaspoon Kosher or fine sea salt
- 4 large egg yolks
- 1 14 oz can of sweetened condensed milk
- ½ cup freshly squeezed lime juice (key limes or regular) About 3-4 limes, additional if using for decorating/serving
- 1 cup heavy cream (whipping cream) chilled
- 3 tablespoon confectioner’s (powdered) sugar
- ½ teaspoon coconut extract
- ⅓ cup sweetened or unsweetened coconut flakes
- lime zest for decorating, optional
Instructions
For the crust
-
Preheat the oven to 350℉ (175°C).
-
In a large bowl, combine the graham cracker crumbs, melted butter, and salt. Stir to combine thoroughly. The mixture should come together when pressed, indicating it’s ready.1¾ cup plain graham cracker crumbs, 6 tablespoon unsalted butter, melted, ¼ teaspoon Kosher or fine sea salt
-
In a 9-inch pie pan, press the mixture firmly and evenly across the bottom and up the sides. You can use your hands or the bottom of a measuring cup to pack the crust tightly into the pan.
-
Bake the crust for 8-10 minutes until lightly golden and the crust is set. Allow to cool slightly on a wire rack before proceeding to the next step.
For the filling
-
In a medium bowl, vigorously whisk the egg yolks until slightly thickened and pale. If preferred, use a hand mixer for efficiency. Gently whisk in the sweetened condensed milk until completely combined, then whisk in the lime juice until the mixture is uniform and smooth.4 large egg yolks, 1 14 oz can of sweetened condensed milk, ½ cup freshly squeezed lime juice (key limes or regular)
-
Pour the creamy lime filling into the cooled, pre-baked crust and spread it evenly with a spatula.
-
Place the pie pan on a baking sheet (to prevent any spillage and for easier handling) and bake for 20 minutes. The filling should be mostly set but still have a slight wiggle in the center. Cool the pie completely to room temperature on a wire rack, then transfer it to the refrigerator. Chill until the filling is completely set—this will take at least 5 hours, but for best results, refrigerate for up to 24 hours.
-
While the pie is baking and chilling, you can prepare and toast the coconut flakes.
For the toasted coconut
-
Set a small, dry pan over medium heat. Add the coconut flakes to the pan and cook, stirring frequently with a spatula, until the flakes are mostly golden brown and fragrant (this usually takes about 3-5 minutes). If using sweetened coconut flakes, keep a very close eye on them as they tend to brown quicker due to the sugar content. Immediately remove the toasted coconut from the pan and spread it on a plate to cool completely. Set aside until ready to assemble.⅓ cup sweetened or unsweetened coconut flakes
For the whipped topping
-
In a large, chilled mixing bowl, add the cold heavy cream. Using a hand mixer (or a stand mixer with a whisk attachment), beat the cream on high speed until soft peaks begin to form. Once soft peaks are visible, gradually add the confectioner’s sugar and coconut extract. Continue to beat on high speed until stiff peaks are formed, ensuring the topping holds its shape. Be careful not to overbeat, as this can make the cream grainy.1 cup heavy cream (whipping cream), 3 tablespoon confectioner’s (powdered) sugar, ½ teaspoon coconut extract
Assembling the pie
-
Remove the thoroughly chilled pie from the refrigerator. Spoon or pipe the prepared coconut whipped topping over the top, spreading it evenly or creating decorative swirls with a spoon. Finally, garnish generously with the cooled toasted coconut flakes and, if desired, a sprinkle of fresh lime zest or thin lime wedges for presentation. Slice, serve, and enjoy your delicious tropical pie!lime zest for decorating, optional
Notes
- If crushing graham crackers by hand, place them in a sealed Ziploc bag and gently smash them with a rolling pin (or another heavy object) to get them to a fine crumb consistency.
- To get a smooth filling, strain your lime juice after juicing to remove any pulp.
- Store in the fridge covered with plastic wrap or aluminum foil. It will keep in the fridge for up to 3 days. To Freeze: Wrap well in layers of plastic wrap and freeze for up to 3 months.
Nutrition*
*Nutrition information is provided as a courtesy and is an estimate only. Nutrition information can vary depending on many factors, such as products used, measurements and substitutions, therefore it is recommended that you obtain nutritional calculations based on your own finished recipe.
