Sparkling Lemonade Mimosa with Lemon Brûlée Garnish: Your Ultimate Guide to an Elegant Brunch Cocktail
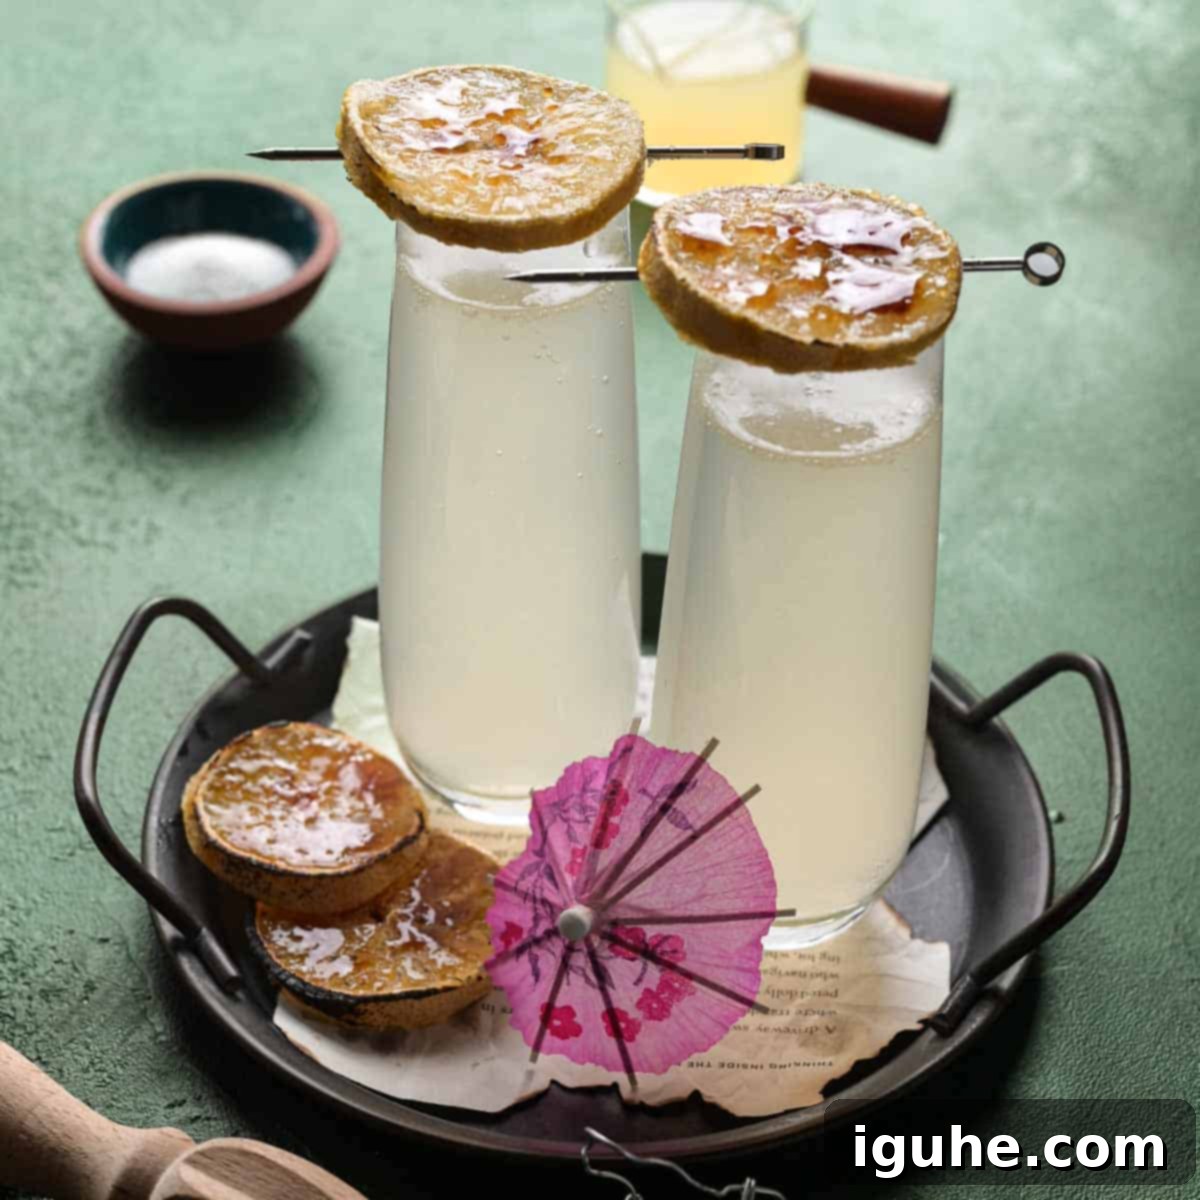
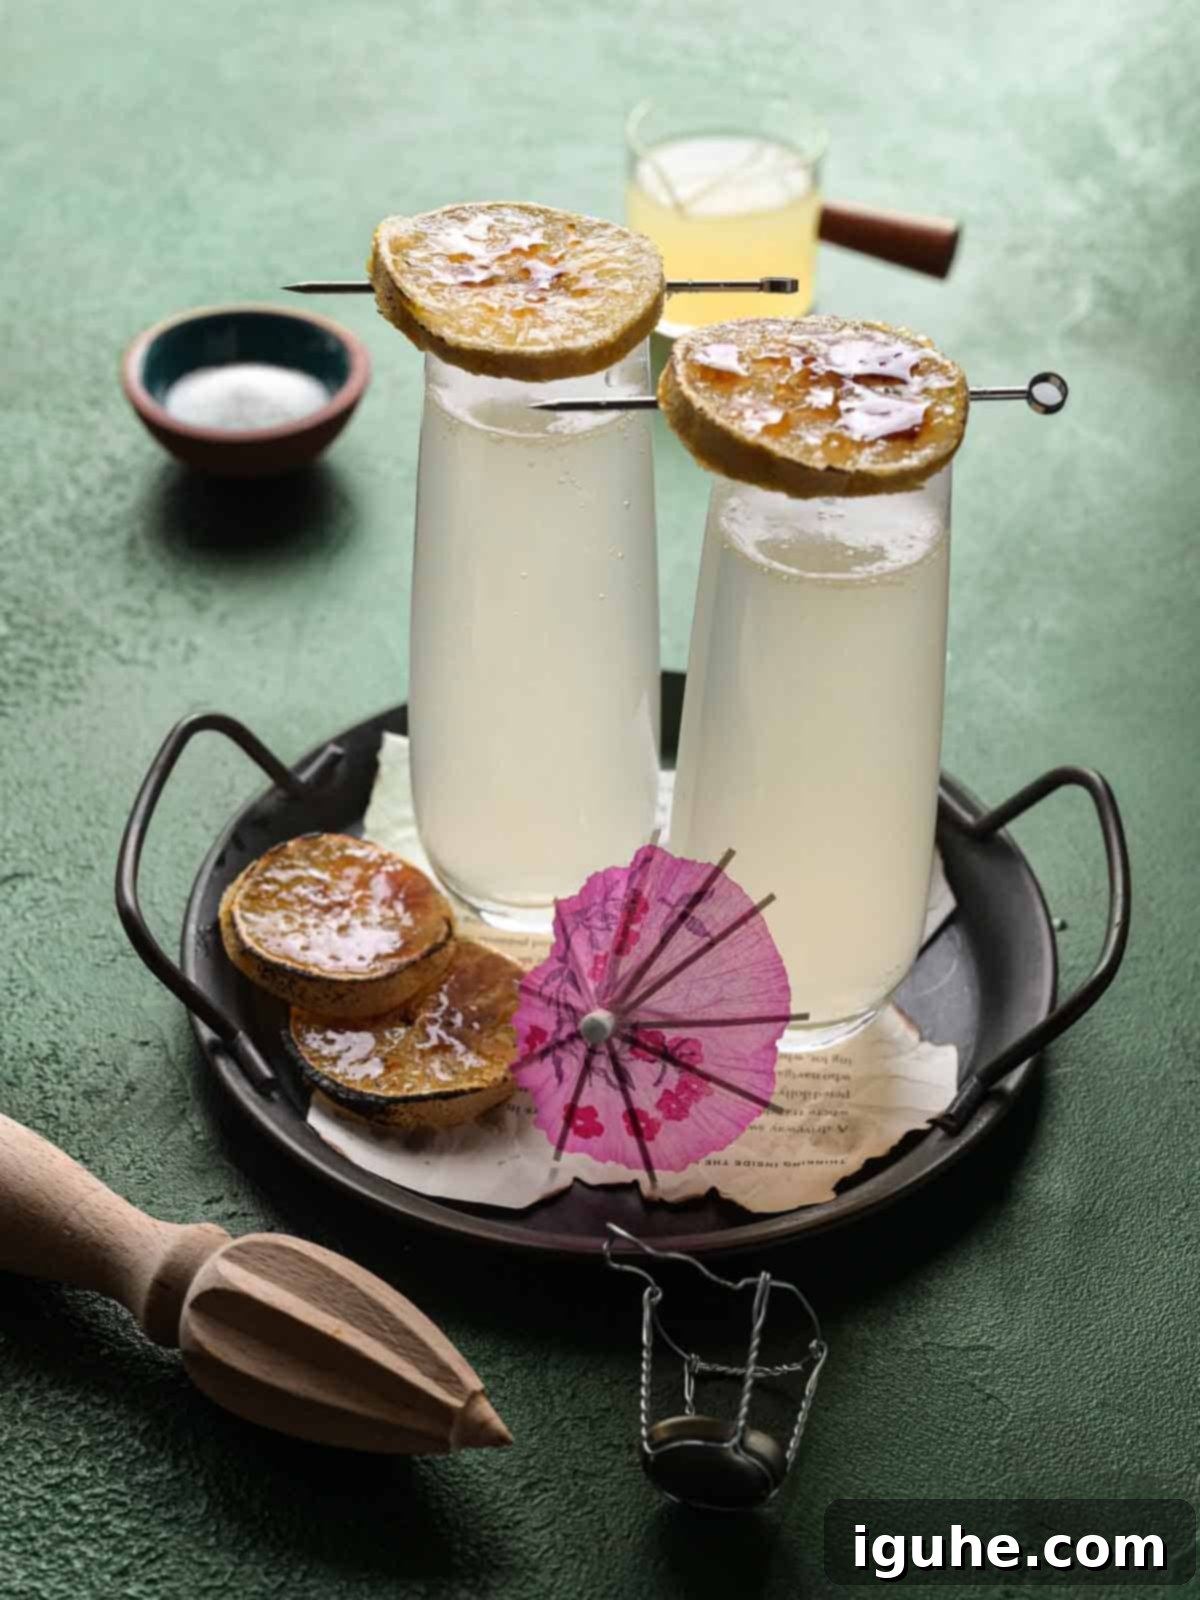
Step up your brunch game with a truly captivating drink that promises to dazzle your guests: the **Lemonade Mimosa with Lemon Brûlée Garnish**. This isn’t just any mimosa; it’s a sophisticated twist on a beloved classic, blending the bright, zesty notes of lemonade with your favorite effervescent bubbly. The result is a vibrant, refreshingly crisp cocktail that’s perfectly suited for any celebratory occasion, from a festive holiday brunch to a casual weekend gathering with friends. What truly sets this mimosa apart is its stunning garnish: a caramelized lemon slice, torched to perfection, offering a delightful sweet and smoky finish that elevates every sip and creates an unforgettable experience.
Why Choose a Lemonade Mimosa? A Zesty and Refreshing Brunch Twist
Mimosas are, without a doubt, the undisputed champion of brunch beverages. Their elegant simplicity and light effervescence make them a staple for any daytime celebration. However, even the most beloved classics can benefit from a little reinvention. The traditional orange juice mimosa, while consistently delicious, can sometimes feel a bit predictable. That’s where the **Lemonade Mimosa** steps in, offering a dazzlingly fresh alternative that invigorates the palate and elevates the entire experience.
By simply swapping out the orange juice for crisp, tangy lemonade, you unlock a whole new dimension of flavor. The delightful tartness of the lemon perfectly complements the dry, celebratory notes of champagne or sparkling wine, creating a harmonious balance that is both invigorating and incredibly palatable. This simple change transforms your mimosa into something truly special – a brighter, more effervescent, and unexpectedly sophisticated drink that’s sure to impress. It’s a fantastic way to surprise your taste buds and offer something a little different from the usual, ensuring your brunch stands out in everyone’s memory for its vibrant and zesty appeal.
The Irresistible Charm of the Lemon Brûlée Garnish: Beyond the Basics
While the lemonade itself makes a delightful mimosa, we believe in elevating every detail to create a truly memorable drink. Our secret weapon for making this cocktail genuinely unforgettable is the elegant **lemon brûlée garnish**. Since we often opt for the convenience of high-quality store-bought lemonade, we wanted to add a touch of homemade luxury and striking visual appeal to make our mimosas genuinely shine. Many mimosa recipes suggest a simple sugar-rimmed glass, but we envisioned something more refined, something that speaks of delicate sophistication rather than a sticky margarita.
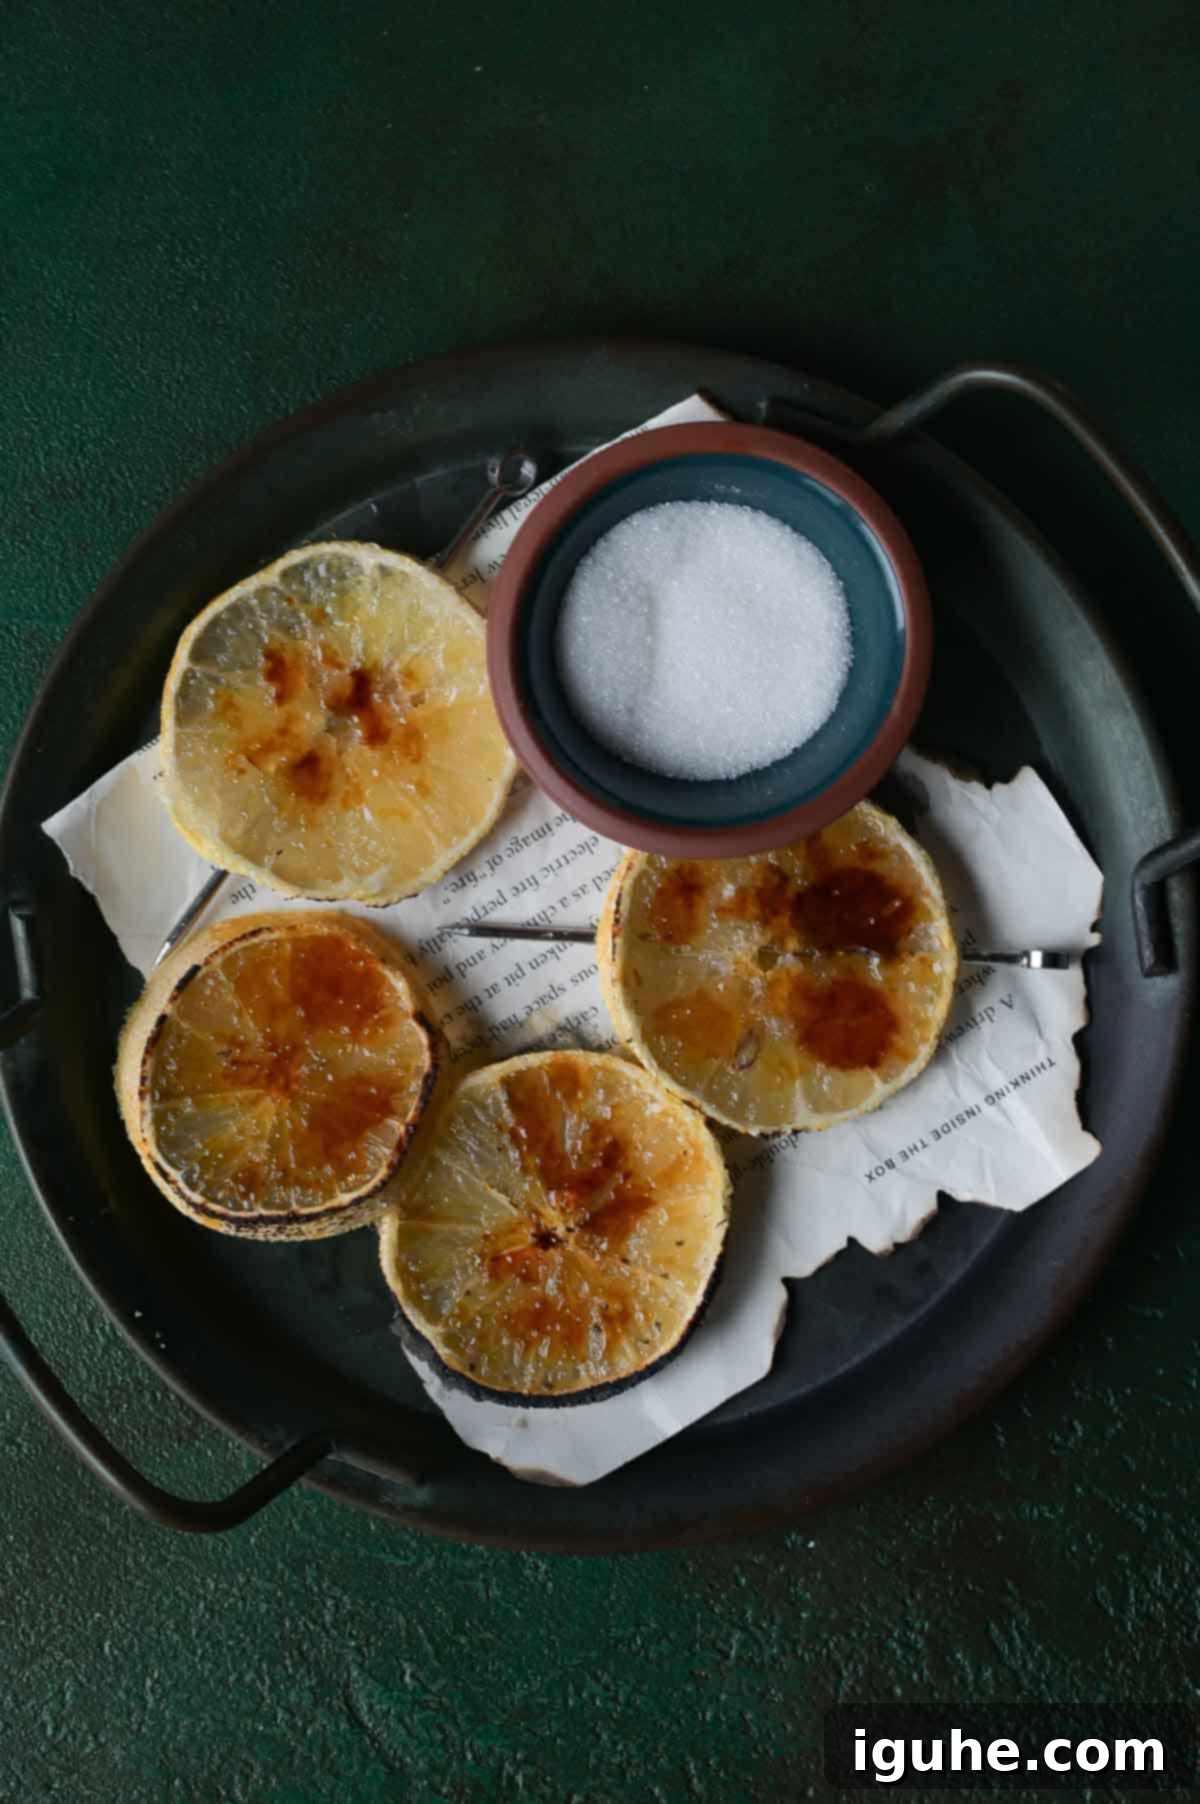
Imagine a perfectly sliced lemon, delicately sprinkled with white granulated sugar, and then kissed with a flame until it caramelizes into a beautiful, glossy, golden-brown crust. This isn’t just a garnish; it’s an integral part of the experience. The brûléed lemon offers a wonderful contrast of textures and flavors – the initial sweetness of the caramelized sugar, followed by the tart burst of the lemon’s juice, and a subtle smoky aroma that enhances the entire drink. It adds a gourmet touch that transforms a simple cocktail into a work of art, making each sip an indulgent moment. This stunning and unique lemon brûlée garnish is a statement piece that will undoubtedly be the talk of your brunch, rivaling even other creative concoctions like our popular Sugared Cranberry Christmas Mimosa or the aromatic Chai Moscow Mule with Burnt Cinnamon.
Crafting the Perfect Mimosa: Tips for Impeccable Taste
Creating the perfect mimosa is an art, but one that’s easily mastered with a few simple guidelines. While you might encounter recipes that rigidly recommend a 1:1 ratio of juice to champagne, we believe the true perfection of a mimosa lies in personal preference and a keen understanding of your ingredients. There are no strict rules, only delightful possibilities! The ideal balance will ultimately depend on your individual taste, the inherent sweetness of your chosen lemonade, and the specific type of sparkling wine you’re using.
For a generally well-balanced and less sweet drink that allows the nuanced flavors of the bubbly to truly shine, many enthusiasts, including myself, prefer a ratio of **1 part juice to 2 parts champagne or sparkling wine**. This ensures the drink is refreshing and zesty without being overly sugary. However, feel free to experiment to find your personal sweet spot! If you prefer a sweeter, more juice-forward mimosa, simply adjust by adding more lemonade. Conversely, if you love a stronger, more effervescent drink, increase the proportion of champagne. The beauty of the mimosa is its versatility, allowing you to tailor it exactly to your liking and the occasion.
The single most crucial tip for crafting an exceptional mimosa is to ensure both your sparkling wine and your lemonade are **perfectly chilled**. Warm ingredients can quickly diminish the delightful effervescence of the bubbly, resulting in a flat and less refreshing drink. Plan ahead by placing all your ingredients in the refrigerator several hours before you intend to serve. For an extra touch, you can even chill your champagne flutes for a few minutes in the freezer. This simple step guarantees a crisp, cold, and utterly invigorating mimosa experience from the first pour to the last drop, ensuring your guests enjoy every moment.
Essential Ingredients for Your Zesty Lemonade Mimosa
One of the many joys of this exquisite lemonade mimosa is its straightforward nature. You only need a handful of readily available ingredients to create this show-stopping cocktail. Each component plays a vital role in achieving that perfect balance of zest, sweetness, and effervescence, making it accessible for any home entertainer.
- Lemonade: For ultimate convenience and consistent results, we typically opt for a high-quality store-bought lemonade. Look for brands that offer a good balance of sweet and tart, avoiding those that are excessively sugary. However, if you have a cherished homemade lemonade recipe, this is the perfect opportunity to showcase its fresh, vibrant flavor. The quality of your lemonade will directly impact the overall profile of your mimosa.
- Champagne or Sparkling Wine: The bubbly component is key to any mimosa. While true Champagne from France is always a luxurious choice for special occasions, more affordable yet equally delicious options like Italian Prosecco or Spanish Cava work wonderfully. Prosecco, with its typically fruitier and often slightly sweeter notes, is a personal favorite as it beautifully complements the tartness of the lemonade. Ensure your chosen bottle is thoroughly chilled before mixing.
- Lemon: Fresh, ripe lemons are absolutely essential, specifically for crafting those gorgeous brûlée garnishes. You’ll need a few slices to transform your drink from great to extraordinary. Choose firm, bright yellow lemons that yield easily to a gentle squeeze, indicating they are juicy.
- Sugar: Simple white granulated sugar is all you need for the crucial caramelization process. Its fine granules melt and caramelize evenly under heat, creating that irresistible crisp and slightly smoky topping on your lemon slices that adds both flavor and visual flair.
Refer to the detailed recipe card below for precise quantities and step-by-step instructions to ensure your Lemonade Mimosa is nothing short of perfect for your next gathering.
Recommended Equipment for Your Cocktail Creation
To prepare and serve these delightful lemonade mimosas, you’ll need a few standard kitchen items, plus one special tool if you’re aiming for that impressive brûlée garnish. The right equipment can make all the difference in both the ease of preparation and the elegance of your presentation.
- Champagne Flutes or Similar Glasses: Classic champagne flutes, typically holding around 8-10 ounces, are ideal for serving mimosas. Their tall, narrow shape not only helps to preserve the delicate bubbles but also beautifully showcases the vibrant color of the drink. If flutes aren’t readily available, elegant wine glasses or any stemmed glass will serve as a suitable alternative, ensuring a sophisticated presentation.
- Kitchen (Culinary) Torch: This is the star equipment for creating the stunning brûlée lemon garnish. A culinary torch provides a precise, even flame that caramelizes sugar beautifully and quickly, creating that irresistible crisp crust. It’s a versatile tool to have for many dessert and cocktail applications, adding a gourmet touch effortlessly.
- Alternative (Oven Broiler): If you don’t own a kitchen torch, don’t despair! You can still achieve a caramelized lemon garnish using your oven’s broiler. While a torch offers superior control and a more consistent finish, the broiler can work in a pinch. You’ll need a sturdy baking sheet for this method, and careful monitoring is key to prevent burning.
- Heatproof Dish or Baking Pan: Essential for holding your lemon slices safely while you caramelize them, whether with a torch or under the broiler. Choose a dish that can withstand direct heat.
- Paper Towels: A simple yet crucial item for blotting excess moisture from the lemon slices. This step is vital for the sugar to caramelize properly without dissolving.
- Cocktail Picks (Optional): For serving the brûlée lemon slices elegantly perched on the rim of the glass. Metal skewers are recommended if you plan to thread the lemon *before* brûléeing.
How to Brûlée Lemon Slices: A Step-by-Step Guide for a Perfect Garnish
Adding a caramelized lemon garnish to your mimosa might sound like a professional chef’s trick, but it’s surprisingly simple to execute at home. This step is where your cocktail truly transforms into an elegant, show-stopping drink that will impress every guest. While a kitchen torch is the easiest and most effective method for achieving that perfect crisp finish, an oven broiler can also be used as a viable alternative.
Step 1: Slice and Blot for Optimal Results
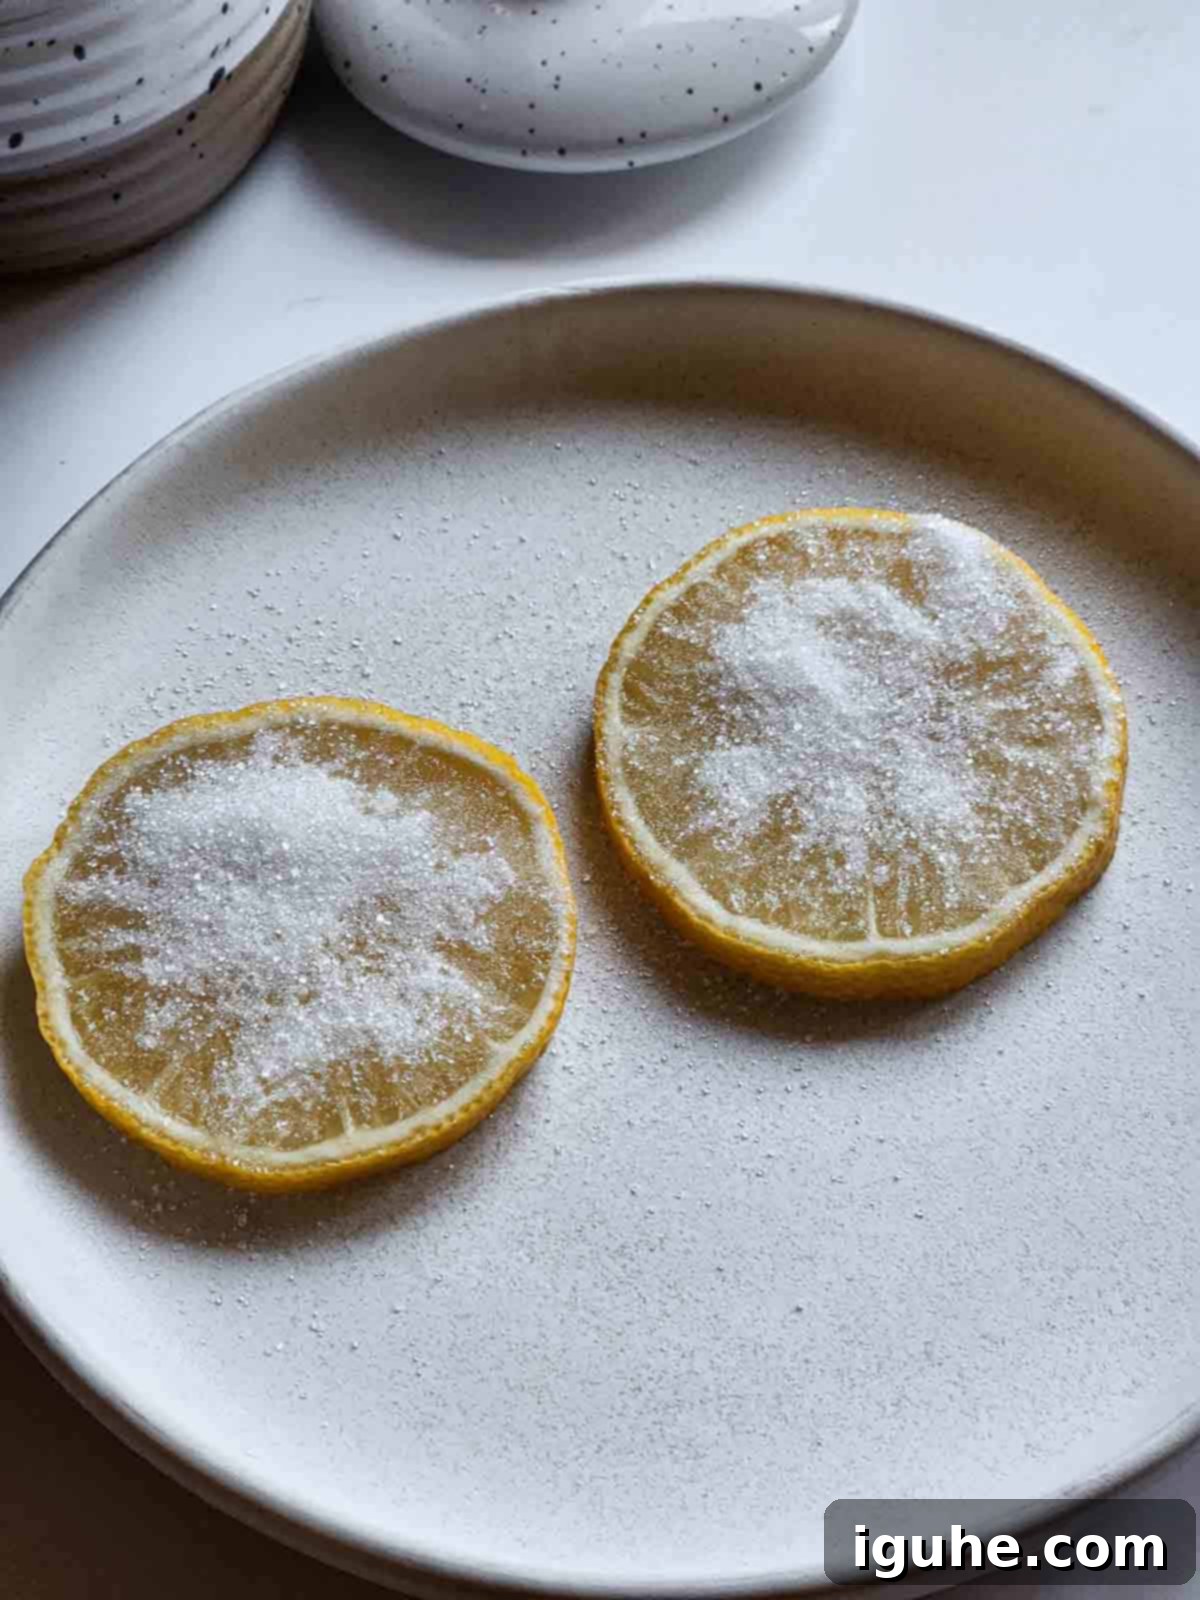
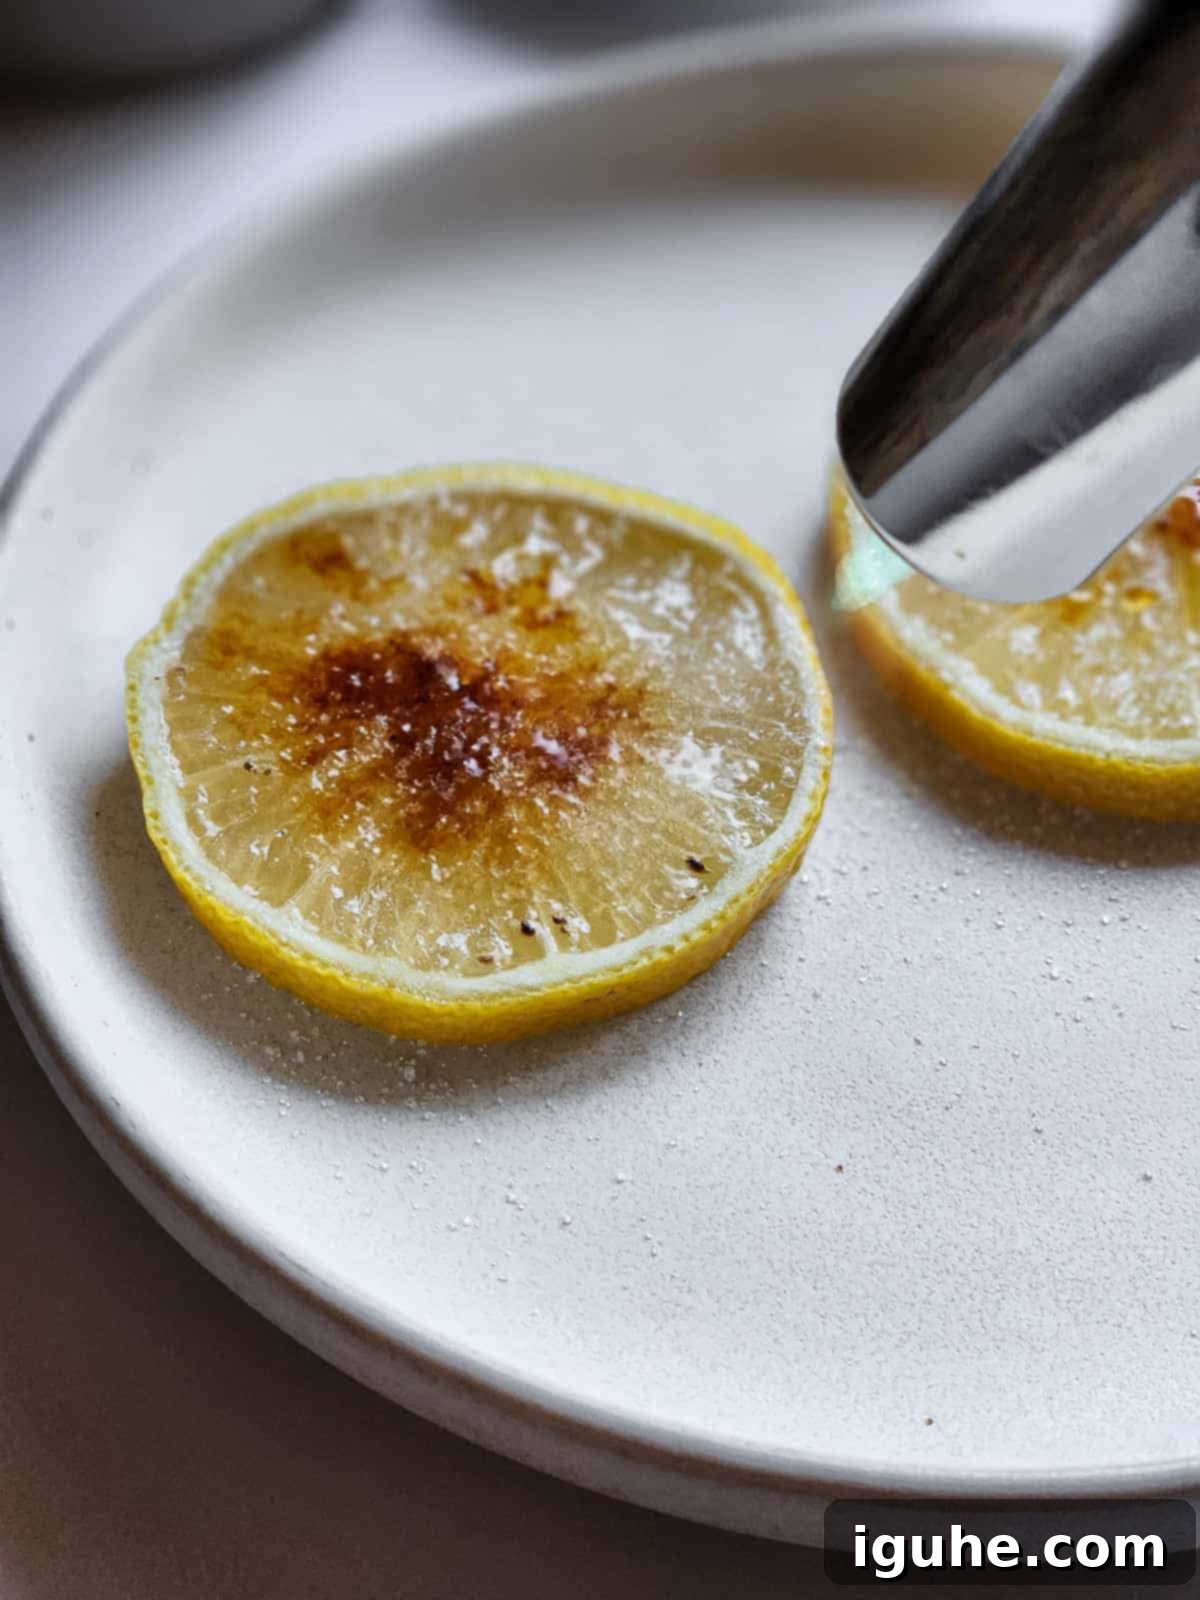
Begin by selecting fresh, firm lemons and slicing them into uniform rounds, ideally about ⅛ inch thick. Consistency in thickness is key to ensuring that the sugar caramelizes evenly across all slices. Once sliced, arrange them neatly on a heatproof dish, such as a ceramic plate or a metal baking pan (if you plan to use your oven’s broiler). The next critical step is to gently and thoroughly blot both sides of each lemon slice with paper towels. This removes any excess moisture from the lemon’s surface, which is absolutely vital for the sugar to caramelize properly without dissolving or becoming a sticky, uneven mess.
Step 2: Caramelize with a Torch or Broiler
Generously sprinkle white granulated sugar over the top of each prepared lemon slice, aiming for an even, thin layer. For the best and most professional-looking results, use a kitchen torch. Hold the torch a few inches above the sugared lemon slices and move the flame back and forth in a slow, sweeping motion. Watch closely as the sugar melts, bubbles, and transforms into a beautiful golden-brown, hard caramel crust. This process usually takes only a few seconds per slice, so pay close attention to prevent burning. If you’re using an oven broiler, preheat it to high. Place the sugared lemons on a baking pan and broil for approximately 3-5 minutes, keeping a very close eye on them. Broilers can heat intensely, so remove them as soon as they achieve that perfect golden hue.
Once your lemon brûlée slices are ready, they are best served immediately to retain their crisp texture. You can place them directly on top of the mimosa glass, allowing them to float elegantly, or use a small cocktail pick to perch them artfully on the rim. The crisp, sweet crunch of the caramelized sugar combined with the tart burst of fresh lemon provides an exquisite contrast to the bubbly drink, making each sip a delightful sensory experience.
📝 Expert Tips for a Flawless Lemon Brûlée Mimosa
- Blotting is Non-Negotiable: This is perhaps the most crucial step for perfect brûlée. Excess moisture on the lemon slices will cause the sugar to dissolve rather than caramelize, resulting in a sticky, uneven layer. Always blot both sides of your lemon slices thoroughly with paper towels before applying sugar.
- Timing is Everything for Crispness: For the crispiest, most delicious caramel layer, brûlée your lemons immediately after sprinkling them with sugar. Don’t let the sugar sit too long on the moist lemon surface, as it will start to absorb moisture and become less effective for caramelization.
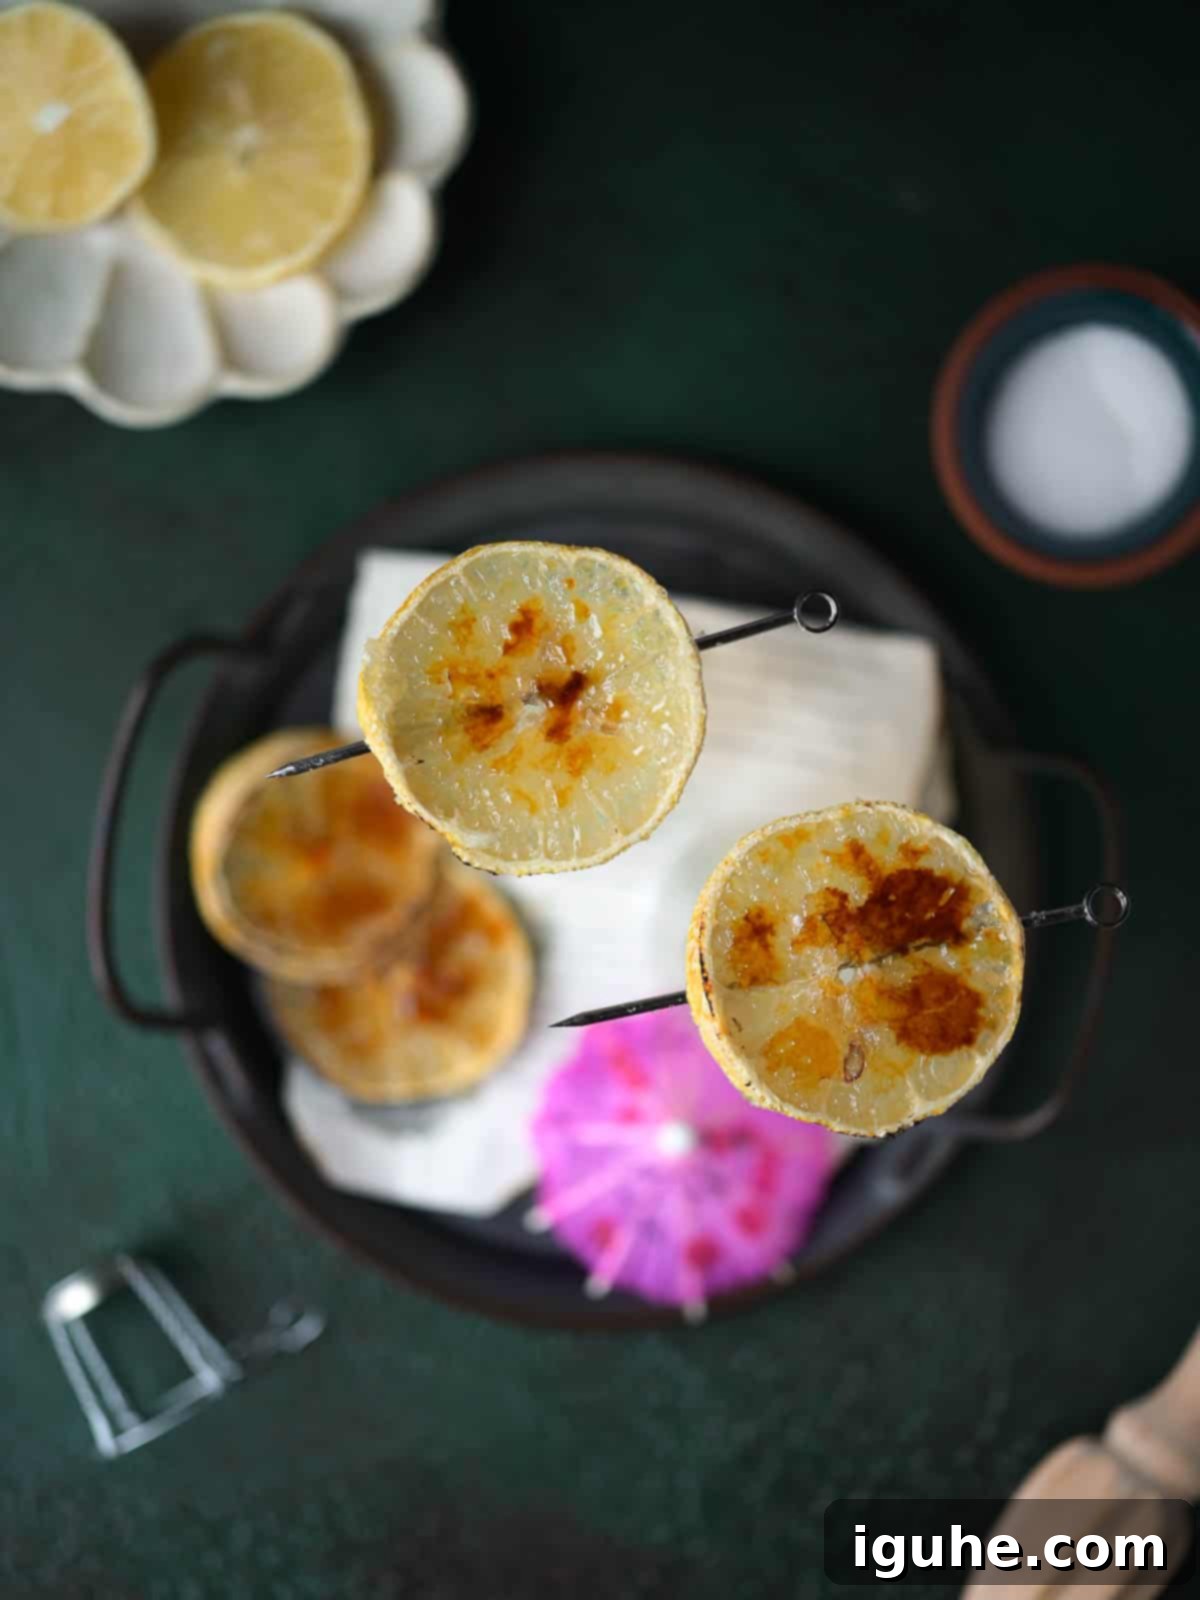
- Cocktail Skewer Technique: If you plan to serve your brûlée lemons on metal cocktail skewers, it’s best to thread the lemon onto the skewer *before* caramelizing. This prevents the delicate sugar crust from cracking when you handle the slices. If using a kitchen torch, always avoid wooden picks, as they can easily catch fire.
- Pre-Slice for Perfection: Always cut your lemons into their final desired size and shape before you torch them. Trying to cut them after caramelization will almost certainly cause the brittle sugar topping to shatter and create a messy presentation.
- Torch Safety First: Always follow the manufacturer’s instructions and safety guidelines for your kitchen torch. Work in a well-ventilated area, keep flammable materials away from the flame, and ensure children and pets are at a safe distance.
- Chill Everything Thoroughly: Beyond the lemonade and sparkling wine, even your champagne flutes can be chilled in the freezer for a few minutes before serving. This extra step helps keep your mimosa colder for longer, significantly enhancing its refreshing qualities and preserving its effervescence.
- Taste Test Your Lemonade: Since lemonade sweetness can vary widely by brand (or if you make it homemade), taste your chosen lemonade beforehand. If it’s particularly sweet, you might opt for a drier sparkling wine (like a Brut) or adjust your mimosa ratio to include more bubbly and less juice to achieve a balanced flavor.
- Garnish Just Before Serving: While it’s tempting to prepare everything in advance, the lemon brûlée garnish is at its peak immediately after preparation. Its crispness diminishes quickly, so make this the very last step before presenting your mimosas.
Creative Substitutions for Your Sparkling Lemonade Mimosa
The beauty of a mimosa lies in its remarkable adaptability! While our lemonade mimosa with its elegant lemon brûlée garnish is a standout, there are plenty of ways to tailor this recipe to your specific preferences, dietary needs, or simply to ingredients you might have on hand. Don’t be afraid to experiment and make this recipe truly your own, ensuring it’s perfect for every guest.
- Sparkling Wine Alternatives: If traditional Champagne is out of your budget or simply not your preferred bubbly, you have many excellent and more affordable options that will still produce a fantastic mimosa.
- Prosecco: An Italian sparkling wine that is often fruitier and slightly sweeter than Champagne, making it a wonderful and popular complement to the tartness of lemonade.
- Cava: A Spanish sparkling wine, Cava is typically drier and more savory, offering a different, often more complex, flavor profile that can be quite refreshing with the tart lemonade.
- Vino Verde: A Portuguese wine that is light, crisp, and often slightly effervescent, though not as bubbly as traditional sparkling wine. It offers a unique, zesty twist, especially fitting for a lemon-forward drink.
- Other Sparkling Wines: Many regions produce fantastic sparkling wines. When selecting, look for options labeled “Brut” or “Extra Dry” for a drier mimosa, or “Demi-Sec” if you prefer a sweeter drink. Always ensure it’s well-chilled.
- Skip the Alcohol (Mimosa Mocktail): For those who prefer a non-alcoholic option, or for including younger guests and designated drivers in the festivities, transforming this into a delicious mocktail is effortlessly simple and still looks incredibly elegant.
- Lemon-Flavored Seltzer or Sparkling Lemon Soda: These are excellent choices to replace the sparkling wine. They provide the necessary effervescence and reinforce the lemon flavor without adding alcohol. High-quality brands like Fever-Tree Sparkling Sicilian Lemonade are particularly good for this purpose, offering both fizz and intense lemon flavor.
- Sparkling White Grape Juice: A classic non-alcoholic bubbly option, it adds a touch of natural sweetness and sophistication, mimicking the appearance of a traditional mimosa.
- Ginger Ale or Lemon-Lime Soda: For a sweeter, more readily available option, these can also provide the fizz, though the flavor profile will be different.
- Beyond the Bubbles: If you’re looking for a simple, elegant non-carbonated drink, you can still enjoy the core flavors and stunning garnish.
- Fancy Lemonade: Simply serve your favorite lemonade in a champagne flute with the gorgeous lemon brûlée garnish. It’s still a beautiful presentation, perfect for kids or anyone avoiding carbonation, allowing everyone to feel included and special at your event.
Exciting Variations to Explore for Your Lemonade Mimosa
Once you’ve mastered the classic lemonade mimosa with its captivating brûlée garnish, feel free to get creative with these delightful variations. Each tweak offers a unique sensory experience while keeping the refreshing and celebratory spirit of the original alive, allowing you to customize your drink for different moods or seasons.
- Pretty in Pink Lemonade Mimosa: For a visually stunning drink with a subtly different flavor profile, use **pink lemonade** instead of regular. The blush hue adds an extra layer of elegance and fun, making it perfect for bridal showers, baby showers, or any garden party where aesthetics are key. Pink lemonade often has a slightly sweeter, sometimes berry-tinged, flavor that pairs wonderfully.
- Tropical Mimosa Twist: Transport your guests to a sun-drenched paradise by swapping out the lemonade for **pineapple juice**. The sweet, tangy, and exotic notes of pineapple pair beautifully with sparkling wine, creating a wonderfully refreshing and vibrant tropical cocktail. You could even enhance this by garnishing with a small pineapple wedge or a maraschino cherry alongside the brûléed lemon.
- Classic Citrus Mimosa with a Twist: If you’re feeling nostalgic or want to offer a familiar option, simply use **orange juice** to create the beloved classic mimosa. The unique lemon brûlée garnish still adds a sophisticated and unexpected touch, elevating even the most traditional version of this popular brunch drink.
- Berry-Infused Lemonade Mimosa: Muddle a few fresh berries (such as strawberries, raspberries, or blueberries) at the bottom of your flute before adding lemonade and bubbly. The berries will release their juices, adding a burst of natural color and a delightful fruity essence that complements the lemon perfectly.
- Herbal Infusion: For an aromatic and sophisticated twist, add a small sprig of fresh mint or a very thin slice of ginger to your lemonade mimosa. These subtle herbal notes can provide a refreshing counterpoint to the lemon and sparkling wine, adding an extra layer of complexity to the flavor profile.
Storage and Make-Ahead Considerations for Your Mimosa Brunch
For the best possible experience and to fully enjoy the unique qualities of this lemonade mimosa, especially with its signature lemon brûlée slices, it’s highly recommended that they be prepared and served fresh. The magic of the brûlée garnish lies in its delicate crispness and subtle smoky aroma, both of which begin to diminish quickly after preparation. In our experience, the caramelized lemon slices only retain their perfect texture for approximately 30 minutes after caramelization. Therefore, it’s crucial to brûlée your lemon slices just before you’re ready to assemble and serve the drinks.
Similarly, mimosas themselves are best enjoyed immediately after mixing. The delightful carbonation from the sparkling wine is fleeting, and the longer the mimosa sits, the flatter and less invigorating it will become. While you can certainly perform some crucial make-ahead steps – like chilling your lemonade and sparkling wine thoroughly in advance (a critical step for a refreshing drink!) – avoid pre-mixing the cocktails in a large batch. Instead, keep the ingredients separate and combine them in individual flutes right before serving to ensure maximum fizziness, optimal flavor, and a truly delightful effervescent experience for all your guests. This approach guarantees each mimosa is as fresh and bubbly as possible.
Frequently Asked Questions About Lemonade Mimosas
The “best” bubbly is ultimately what you enjoy most and what best fits your budget. While traditional Champagne from the Champagne region of France is a luxurious and celebratory choice, it can be quite expensive. Excellent and often more affordable alternatives include Italian Prosecco, Spanish Cava, or even a good quality domestic sparkling wine. For a lemonade mimosa, a “Brut” or “Extra Dry” sparkling wine is often preferred, as its less sweet profile beautifully balances the sweetness and tartness of the lemonade. The most important factor, regardless of your choice, is that it’s thoroughly well-chilled!
While you can’t effectively pre-mix large batches of mimosas without quickly losing their delightful fizz, you can certainly prepare all the components in advance to make serving easier. Chill your lemonade and sparkling wine thoroughly hours before your event. Slice your lemons and have your sugar ready for the brûlée garnish. When it’s time to serve, set up a mimosa bar where guests can mix their own drinks to their preferred ratio, or simply have one person quickly assemble them as needed right before handing them out. Remember, the lemon brûlée garnish should still be made right before serving for optimal crispness and presentation.
For convenience and consistent results, a good quality store-bought lemonade works perfectly. Look for brands that aren’t overly sweet, as you want a pleasant tartness to balance the sparkling wine. If your lemonade is too sweet, the mimosa can become cloying. If you’re feeling ambitious and have the time, homemade lemonade offers an unparalleled fresh flavor and allows you to control the sweetness perfectly. You can also experiment with pink lemonade for a different color and a slightly sweeter, sometimes berry-tinged, flavor profile that adds an extra touch of festivity.
No culinary torch? No problem! You can still achieve a beautiful caramelized lemon garnish using your oven’s broiler as an alternative. Arrange your sugared lemon slices on a non-stick baking sheet and place them under a preheated broiler set to high. It’s crucial to keep a very close eye on them, as sugar can burn incredibly quickly under a broiler. Broil for approximately 3-5 minutes, or until the sugar turns a beautiful golden brown and forms a hard, crackly crust. While a torch offers more precise control, the broiler can certainly achieve a similar delightful caramelization.
Mimosas are best served very cold. The ideal temperature for sparkling wine is typically between 45-50°F (7-10°C). By ensuring both your lemonade and sparkling wine are thoroughly chilled, you’ll maximize the refreshing qualities of the drink and help preserve its effervescence. Chilling your flutes beforehand also contributes to maintaining this ideal temperature for longer.
Delicious Brunch Pairings for Your Zesty Mimosa
Mimosas are incredibly versatile and pair beautifully with a wide array of brunch dishes, making them a perfect companion for almost any morning or afternoon spread. The bright, acidic notes of the lemonade mimosa cut through rich flavors and complement lighter fare, creating a harmonious and refreshing culinary experience. Here are some fantastic options to consider:
- Pesto Baked EggsThe savory richness of pesto baked eggs is beautifully balanced by the bright, zesty mimosa, creating a refreshing contrast that cleanses the palate with each sip.
- Fresh Strawberry Bread with ButtermilkThe fruitiness and subtle sweetness of strawberry bread find a perfect partner in the citrusy mimosa, enhancing both sweet and tart notes for a delightful combination.
- Homemade Raspberry Almond SconesThe delicate, buttery flavor of scones, especially with the bright burst of raspberries and the nutty hint of almonds, is wonderfully elevated by the mimosa’s bright, clean finish.
- Smashed Eggs On ToastWhether adorned with creamy avocado, fresh herbs, or a hint of chili oil, smashed eggs on toast receive a refreshing lift from the tangy mimosa, making each savory bite even more satisfying and balanced.
Did you make this recipe? We would absolutely love to hear about your experience! Please take a moment to leave a ⭐⭐⭐⭐⭐ rating with a comment directly below the recipe card. And if you capture a beautiful photo of your delightful creation, don’t hesitate to tag us on Instagram @brunchandbatter. Your feedback and shares inspire us to keep creating delicious recipes!
📖Recipe
Lemonade Mimosa with Lemon Brûlée Garnish
Equipment
-
6-8 champagne flutes
-
culinary torch
Ingredients
Brûlée Lemon Slices
- 1-2 lemons sliced ⅛ inch thick
- 4 tablespoon white granulated sugar
Lemonade Mimosa
- 1 750ml bottle Champagne or Prosecco, chilled
- 4 cups lemonade, chilled store-bought or homemade
Instructions
Brûlée Lemon Slices
-
Cut the lemons into ⅛ inch slices. If using a cocktail skewer, skew the lemons before caramelizing them. Lay them out on a heatproof dish. Using a paper towel, blot both sides of the lemons to remove any excess moisture. Sprinkle the lemons with about 2 teaspoon of sugar. Using a kitchen torch, sweep the flame over the top of the lemons until the sugar turns golden brown and hardens.1-2 lemons sliced, 4 tablespoon white granulated sugar
-
*If using the broiler, preheat the broiler to high. Place the sugared lemons on a heat-proof pan, and broil for about 5 minutes until golden.
Lemonade Mimosas
-
Pour the Champagne or prosecco into the Champagne flutes (⅓-½ way depending on taste). Top with the lemonade and a brûlée lemon slice. Serve immediately.1 750ml bottle Champagne or Prosecco, chilled, 4 cups lemonade, chilled
Notes
-
- You want to remove any excess moisture from the lemons before caramelizing them, or else the sugar will begin to dissolve. Be sure to blot them on a paper towel.
- For best results, brûlée your lemons immediately after placing the sugar on them.
- Follow the directions and safety instructions on your kitchen torch.
- If you have metal cocktail skewers, thread the skewer through the lemon first, then brûlée them. Skip this step if you are using a wooden cocktail pick (you don’t want the flame to touch wood).
- Cut your lemons into your preferred size before torching them, or the sugar will crack off after handling them.
Nutrition*
*Nutrition information is provided as a courtesy and is an estimate only. Nutrition information can vary depending on many factors, such as products used, measurements and substitutions, therefore it is recommended that you obtain nutritional calculations based on your own finished recipe.
